Bouwprioriteiten & Sanctuary-roadmap
Sanctuary-roadmap naar level 30, de bouwprioriteitsvolgorde, wat elk gebouw doet en hoe je bouwsnelheidsbuffs op de juiste opeenvolgende manier stapelt.
☰ Op deze pagina 31 ▾
🗓 Bijgewerkt: 2026-10-12
Bouwen in Last Asylum: Plague is een lange rit — de Sanctuary-push van level 1 naar level 30 kost maanden, en de verkeerde volgorde kost je daar weken van. Deze pagina toont de community-bouwvolgorde: welke gebouwen ertoe doen en in welke volgorde, een level-voor-level Sanctuary-roadmap en de exacte wiskunde achter het stapelen van bouwsnelheid.
De enige vraag die elke wachtrij bepaalt: maakt dit je sterker of sneller? Zo nee, dan kan het wachten.
De bouwprioriteitsvolgorde
Wanneer er meerdere gebouwen tegelijk beschikbaar zijn, staat de volgorde vanuit de community vast:
- Sanctuary — altijd. Dit vormt de poort voor elk ander level in de stad, de levelslimiet van helden en de troepentiers. Telkens wanneer er een Sanctuary-upgrade beschikbaar is, gaat deze als eerste in de wachtrij.
- Research Lab (Onderzoekslab) — beheert je tech-tree en dient als de verplichte vereiste voor Sanctuary-levels 11 tot en met 30 (zonder een geliverd lab kun je geen enkele mid/endgame Sanctuary-upgrade starten).
- Oefenterrein (Trainingsvelden) — ontgrendelt troepentiers (T1–T10). Gebruik de 1 Max + 3 Laag-splitsing: maximaliseer slechts 1 hoofdveld om aan je Sanctuary-tierlimiet te voldoen, en houd de andere 3 op Level 10 om massaal goedkope T4 te produceren voor promotie (bespaart 6–7 uur per cyclus en miljoenen grondstoffen!).
- Kazerne (Kazerne) — soldatencapaciteit. Een groter staand leger betekent meer macht en meer slagkracht per mars.
- Infirmary (Hospitaal) — geneest je gewonden na nederlagen. Een klein hospitaal zorgt ervoor dat elk verloren gevecht troepen bloedt die je niet kunt herstellen.
- Smelterij (Smeltwerkplaats) — produceert en verfijnt Gear Stones (uitrustingsstenen) voor uitrustingsupgrades. Push dit naar Level 25 zodra je Sanctuary dit toelaat om een mid-game flessenhals bij draagwapens te voorkomen.
- Walls (Muren) — worden strikt geliverd voor mijlpaalvereisten (alleen vereist voor Sanctuary-levels 5, 6, 9, 10, 12 en 24; nooit vereist voor de overige 24 levels). Muren bieden GEEN gevechtsstatistieken en beschermen troepen niet tegen schade! Ze bieden enkel duurzaamheid voor de stadsverdediging om vuur en gedwongen teleporteren tijdens belegeringen te weerstaan.
- Resource Buildings & Depots (Grondstofgebouwen & Depots) — worden strikt geüpgraded wanneer nodig voor Sanctuary-vereisten (Houthakker, graansilo en kruidenopslag).
De regel achter deze lijst: als een gebouw je niet sterker of sneller maakt, heeft het geen haast. Productiegebouwen, depots en decoraties worden nog steeds gebouwd — maar pas wanneer de zeven bovenstaande niets te doen hebben of een vereiste hiertoe dwingt.
Wat elk gebouw doet
Een snelle naslagwerken voor de gebouwen die je daadwerkelijk zult aantikken. Vertalingen verschillen tussen gameclients; dus wanneer twee namen op elkaar lijken, controleer dan de in-game tooltip voor het exacte effect op jouw versie.
| Gebouw | Wat het doet | Community-opmerkingen |
|---|---|---|
| Sanctuary | Vormt de poort voor alle andere gebouwniveaus, stelt de heldenlevelslimiet in, kent EXP toe per upgrade en ontgrendelt gebouwen en functies naarmate het stijgt. | Upgrade op cooldown. Dit is je werkelijke spelerslevel. |
| Walls (Muren) | Biedt duurzaamheid voor de stadsverdediging en vermindert de verdedigingsvervalrate tijdens belegeringen. Beschermt GEEN troepen in de strijd en verleent geen gevechtsstats! | Level strikt als vereiste op levels 5, 6, 9, 10, 12 en 24. Verspil er anders geen bouwvakkers aan. |
| Bouwershut (Bouwershut) | Vergroot het venster voor gratis voltooiing op bouwtimers (gratis versnellingstijd). Overlevenden die erin zijn gestationeerd, geven extra bonussen — wissel betere overlevenden in naarmate je ze recruteert. | Houd op Sanctuary-level tot Sanctuary 15 voor het maximale gratis-voltooiingsvenster. |
| Research Lab (Onderzoekslab) | Beheert je tech-tree: economie-, militaire- en ontwikkelingsonderzoek. Samengevoegd Research Lab 1 & 2: beide wachtrijen genieten van optimale snelheidsbuffs. | Prioriteit #2 — continue vereiste voor Sanctuary 11–30. Rush Super Reward 1 & 2 in de Alliantieduel-tree om kisttiers 4–9 te ontgrendelen! |
| Oefenterrein (Trainingsvelden) | Ontgrendelt nieuwe troepentiers (T2 bij Lv.3, T3 bij Lv.6, T4 bij Lv.10, T5 bij Lv.14, T6 bij Lv.17, T7 bij Lv.20, T8 bij Lv.24, T9 bij Lv.27, T10 bij Lv.30) en vergroot de trainingscapaciteit. | Maximeer 1 veld voor de hoogste tier; houd 3 andere op Lv.10 voor T4-parallelle farming en promotie (bespaart 6–7 uur per cyclus). |
| Kazerne (Kazerne) | Vergroot de totale capaciteit van het staande leger in je stad. | Upgrade om een enorm leger te huisvesten voor KvK en Kingdom Wars. |
| Infirmary (Hospitaal) | Geneest gewonde soldaten na nederlagen. | Een te klein hospitaal = permanente troepenverliezen na elk verloren gevecht. |
| Serum\nwerkplaats (Antitoxine-werkplaats) | Produceert antidota / antitoxine — de belangrijkste heldengrondstof die in alle voortgangssystemen voor helden wordt gebruikt. | Bouw op Lv.10 en blijf 24/7 produceren. |
| Gear / Smelting / Weaving Workshops (Uitrustings-/Smelt-/Weefwerkplaatsen) | Ambacht en upgrade heldenuitrusting van verzamelde materialen. | Push Smelterij naar Lv.25 voor stabiele Gear Stone-productie; Uitrustings\nwerkplaats ontgrendelt bij Sanctuary 20. |
| Tempel / Krijgers\nstandbeeld (Tempel / Krijgersstandbeeld) | Geïntegreerd cultusgebouw (waarbij voormalige Krijgers-, Verkenner- en Warlock-standbeelden zijn samengevoegd). Biedt procentuele stat-bonussen aan je gekozen factie. | Upgrade om de squad-kracht te vergroten en te voldoen aan Sanctuary-vereisten. |
| Erehal (Erehal) | Toont de ereniveaus van helden en ontgrendelt de Erewinkel (de kernbron van UR-uitrustingsblauwdrukken). | Essentieel voor de uitrustingsvoortgang in de late game. Koop uitsluitend UR-uitrustingsblauwdrukken. |
| Curiozaal (Curio-hal) | Huisvest verzamelde Curios die passieve bonussen bieden aan gebouwen, economie en squad-gevechtskracht. | Upgrade Curio-sterrenlevels voor permanente bonussen voor het hele account. |
| Taveerne (Taveerne) | Heldenrekrutering — het banner- en oproepsysteem bevindt zich hier. | Bewaar diamanten voor gedateerde UR-evenementen in plaats deze hier te verspillen. |
| Falcon Tower (Valkentoren) | Genereert dagelijkse missies die diamanten, versnellingen, heldenscherven en antitoxine belonen. Lv.8 ontgrendelt claimen met één tik. | Gebruik de “Stacking Max − 1”-strategie om voltooiende missies op te sparen voor dagen met dubbele punten. |
| Alliantiehal (Alliantiehal) | Verhoogt het aantal alliantiehulp-assistenties dat je kunt ontvangen. Heeft GEEN invloed op garnizoen of rallies! | Hoger level = meer assistentie van bondgenoten (tot 30 assistenties op Lv.25, wat ~30% gratis van elke timer afsnoept). Cruciaal voor het besparen van versnellingen en een verplichte vereiste voor Sanctuary Lv. 7, 8, 9, 13, 20 en 29. |
Kazerne vs. Trainingsvelden — de naamgevingsvalkuil
Het ene gebouw opent nieuwe troepentiers (Trainingsvelden), en het andere vergroot hoeveel soldaten je kunt herbergen (Kazerne). Open het gebouw en lees de tooltip: als het vermelde effect het ontgrendelen van tiers en de limiet van de trainingswachtrij is, dan is dat Trainingsvelden; als het de totale soldatencapaciteit is, dan is dat Kazerne.
Sanctuary-roadmap per level (1 tot 30)
Een veelvoorkomend misverstand is dat muren voor elk enkel level vereist zijn. Dat zijn ze niet! Muren zijn slechts 6 keer vereist in het hele spel (levels 5, 6, 9, 10, 12 en 24).
De echte vereistenstructuur:
- Research Lab is de primaire flessenhals: voor elk level van 12 tot 30 moet het Research Lab op
Lv. (Doel − 1)staan. - Secundaire militaire poort roteert: Trainingsvelden (7, 8, 11, 15, 18, 21, 25, 27, 30), Tempel / Krijgersstandbeeld (14, 16, 19, 22, 26), Alliantiehal (7, 8, 9, 13, 20, 29), Kazerne (17, 28) en Hospitaal (10, 23).
- Tertiaire grondstofpoort roteert: Houthakker/Graansilo/Kruidenopslag, Antitoxine-werkplaats, Boerderij, Houthagerij en Kruidentuin.
Hieronder staan de volledige, officiële level-voor-level gegevens die rechtstreeks uit de binair van de gameclient zijn gehaald:
Vroege game (levels 1 – 10)
| Lv. | Vereisten | Basistijd | Grondstoffen (Graan / Hout / Kruiden) | Ontgrendelingen |
|---|---|---|---|---|
| 2 | Geen | 2 sec | 32 / 32 / 0 | Basisvoortgang, Heldenlimiet Lv.10 |
| 3 | Geen (Hoofdstuk 17-quest) | 3 sec | 983 / 983 / 0 | Tier 2-troepen (bij Trainingsvelden Lv.3) |
| 4 | Houtopslag 1 + Graanschuur 1 + Kruidenopslag 1 | 5 min | 2,6K / 2,6K / 0 | Grondstoffendepots, Bouwershut |
| 5 | Wall Lv.3 | 10 min | 19,7K / 19,7K / 0 | Heldenlimiet Lv.20 |
| 6 | Wall Lv.5 | 34 min | 92,7K / 92,7K / 0 | Tier 3-troepen (bij Trainingsvelden Lv.6), Uitkijkpost, Radar |
| 7 | Oefenterrein 4 + Alliantiehal 3 | 1,5 u | 235,8K / 235,8K / 0 | Alliantiehal (Alliantiehulp-knop), Research Lab |
| 8 | Oefenterrein 6 + Alliantiehal 5 | 3 u | 395,6K / 395,6K / 0 | Valkentoren (dagelijkse missies) |
| 9 | Wall 8 + Alliantiehal 7 | 4,3 u | 605,8K / 605,8K / 208,7K | Heldenlimiet Lv.30 |
| 10 | Wall 9 + Infirmary 7 | 5,6 u | 748,7K / 748,7K / 232,9K | Tier 4-troepen (bij Trainingsvelden Lv.10), Serum\nwerkplaats, Taveerne |
Mid-game (levels 11 – 19)
| Lv. | Vereisten | Basistijd | Grondstoffen (Graan / Hout / Kruiden) | Ontgrendelingen |
|---|---|---|---|---|
| 11 | Oefenterrein 10 + Research Lab 7 | 7,2 u | 1,9M / 1,9M / 601,8K | Marsgleuf 2 (Team 2 via labonderzoek) |
| 12 | Research Lab 11 + Wall 10 + Serum\nwerkplaats 7 | 9,4 u | 3,1M / 3,1M / 959K | Diepere onderzoeksmogelijkheden |
| 13 | Research Lab 12 + Alliantiehal 11 + Boerderij 7 | 12,2 u | 3,5M / 3,5M / 1,1M | Heldenlimiet Lv.40 |
| 14 | Research Lab 13 + Krijgers\nstandbeeld (Tempel) 12 + Lumber Mill 7 | 15,9 u | 4,9M / 4,9M / 1,6M | Tier 5-troepen (bij Trainingsvelden Lv.14), Tempel |
| 15 | Research Lab 14 + Oefenterrein 14 + Kruidentuin 7 | 22,3 u | 6,5M / 6,5M / 2,3M | Smeltwerkplaats, Marsgleuf 3, Heldenlimiet Lv.50 |
| 16 | Research Lab 15 + Krijgers\nstandbeeld (Tempel) 14 + Graanschuur 7 | 1,3 d (31,2 u) | 11,9M / 11,9M / 4,0M | Kruidenproductie en -verzameling schalen op |
| 17 | Research Lab 16 + Kazerne 15 + Houtopslag 7 | 1,8 d (43,6 u) | 16,7M / 16,7M / 5,1M | Tier 6-troepen (bij Trainingsvelden Lv.17), Weefwerkplaats, Heldenlimiet Lv.60 |
| 18 | Research Lab 17 + Oefenterrein 17 + Kruidenopslag 7 | 2,5 d (61,1 u) | 28,2M / 28,2M / 9,3M | Heldenuitrusting Lv.18 |
| 19 | Research Lab 18 + Krijgers\nstandbeeld (Tempel) 17 + Serum\nwerkplaats 10 | 3,6 d (85,5 u) | 32,7M / 32,7M / 11,3M | Geavanceerde militaire tech-knooppunten |
Late game (levels 20 – 25)
| Lv. | Vereisten | Basistijd | Grondstoffen (Graan / Hout / Kruiden) | Ontgrendelingen |
|---|---|---|---|---|
| 20 | Research Lab 19 + Alliantiehal 18 + Boerderij 10 | 5,0 d (119,7 u) | 60,0M / 60,0M / 18,4M | GROTE MIJLPAAL! Tier 7-troepen (TG 20), Uitrustings\nwerkplaats, Marsgleuf 4 |
| 21 | Research Lab 20 + Oefenterrein 20 + Lumber Mill 10 | 6,7 d (160,3 u) | 85,5M / 85,5M / 27,6M | Heldenlimiet Lv.70, Paarse uitrusting smeden |
| 22 | Research Lab 21 + Krijgers\nstandbeeld (Tempel) 21 + Kruidentuin 10 | 8,7 d (208,4 u) | 111,2M / 111,2M / 36,7M | Factiestat-uitbreidingen |
| 23 | Research Lab 22 + Infirmary 22 + Graanschuur 10 | 11,3 d (271,0 u) | 145,2M / 145,2M / 42,8M | Gouden uitrusting smeden |
| 24 | Research Lab 23 + Wall 23 + Houtopslag 10 | 15,8 d (379,4 u) | 171,2M / 171,2M / 56,2M | Tier 8-troepen (bij Trainingsvelden Lv.24), Toename rallycapaciteit |
| 25 | Research Lab 24 + Oefenterrein 24 + Kruidenopslag 10 | 22,1 d (531,1 u) | 277,9M / 277,9M / 97,5M | Heldenlimiet Lv.80, Meester militaire tech-trees |
End-game (levels 26 – 30)
| Lv. | Vereisten | Basistijd | Grondstoffen (Graan / Hout / Kruiden) | Ontgrendelingen |
|---|---|---|---|---|
| 26 | Research Lab 25 + Krijgers\nstandbeeld (Tempel) 25 + Serum\nwerkplaats 13 | 31,0 d (743,5 u) | 386,8M / 386,8M / 123,5M | Ultieme werkplaats-uitrustingsbeheersing |
| 27 | Research Lab 26 + Oefenterrein 26 + Boerderij 13 | 43,4 d (1041,0 u) | 548,0M / 548,0M / 168,6M | Tier 9-troepen (bij Trainingsvelden Lv.27) |
| 28 | Research Lab 27 + Kazerne 27 + Lumber Mill 13 | 60,7 d (1457,3 u) | 731,1M / 731,1M / 236,5M | Maximale veilige opslag & hospitaalcapaciteiten |
| 29 | Research Lab 28 + Alliantiehal 28 + Kruidentuin 13 | 78,9 d (1894,5 u) | 1,05 B / 1,05 B / 316,4M | Voorbereiding voor T10 |
| 30 | Research Lab 29 + Oefenterrein 29 + Serum\nwerkplaats 15 | 102,6 d (2462,9 u) | 1,36 B / 1,36 B / 441,3M | ABSOLUTE LIMIET! Tier 10-troepen (TG 30 + Tech), Speciale tech-tak |
De Sanctuary-push is geen lange sleur — het zijn vier sprints tussen mijlpalen die elk een echte krachtsprong ontgrendelen.
- Sanctuary 20 — Tier 7-troepen en een hoogwaardige Uitrustings\nwerkplaats arriveren tegelijkertijd. Dit is de grootste enkele krachtspiek van de mid-game en de eerste push waarvoor het loont om opgeslagen versnellingen op te branden.
- Sanctuary 24, dan 27 — de volgende tier-pushes. Elk verhoogt opnieuw de troepentiers en werkplaatslimieten.
- Sanctuary 30 — de limiet. Al het overige in de stad kan nu worden voltooid.
Wees je bewust van wat de late mijlpalen kosten: voorbij de mid-20 kosten enkele upgrades meer dan 100 miljoen grondstoffen. Begin met het behandelen van het opslaan van grondstoffen als onderdeel van het bouwplan — zie de sectie over grondstofschaling hieronder.
Bouwsnelheid stapelen — de juiste wiskunde
Bouwsnelheidsbuffs stapelen vanaf vijf bronnen, en samen comprimeren ze een upgrade van 38 dagen tot 20 dagen (uit de gids van chuppergaming). De buffs zijn:
| Bron | Bonus |
|---|---|
| Persoonlijk ontwikkelingsonderzoek | +5%, dan +10% op knooppuntlevel 5 |
| Alliantie-onderzoek — Snel bouwen | +20% |
| VIP-level 11 | +45% |
| Koninklijke Stad — Titel van Minister van Bouw | +50% |
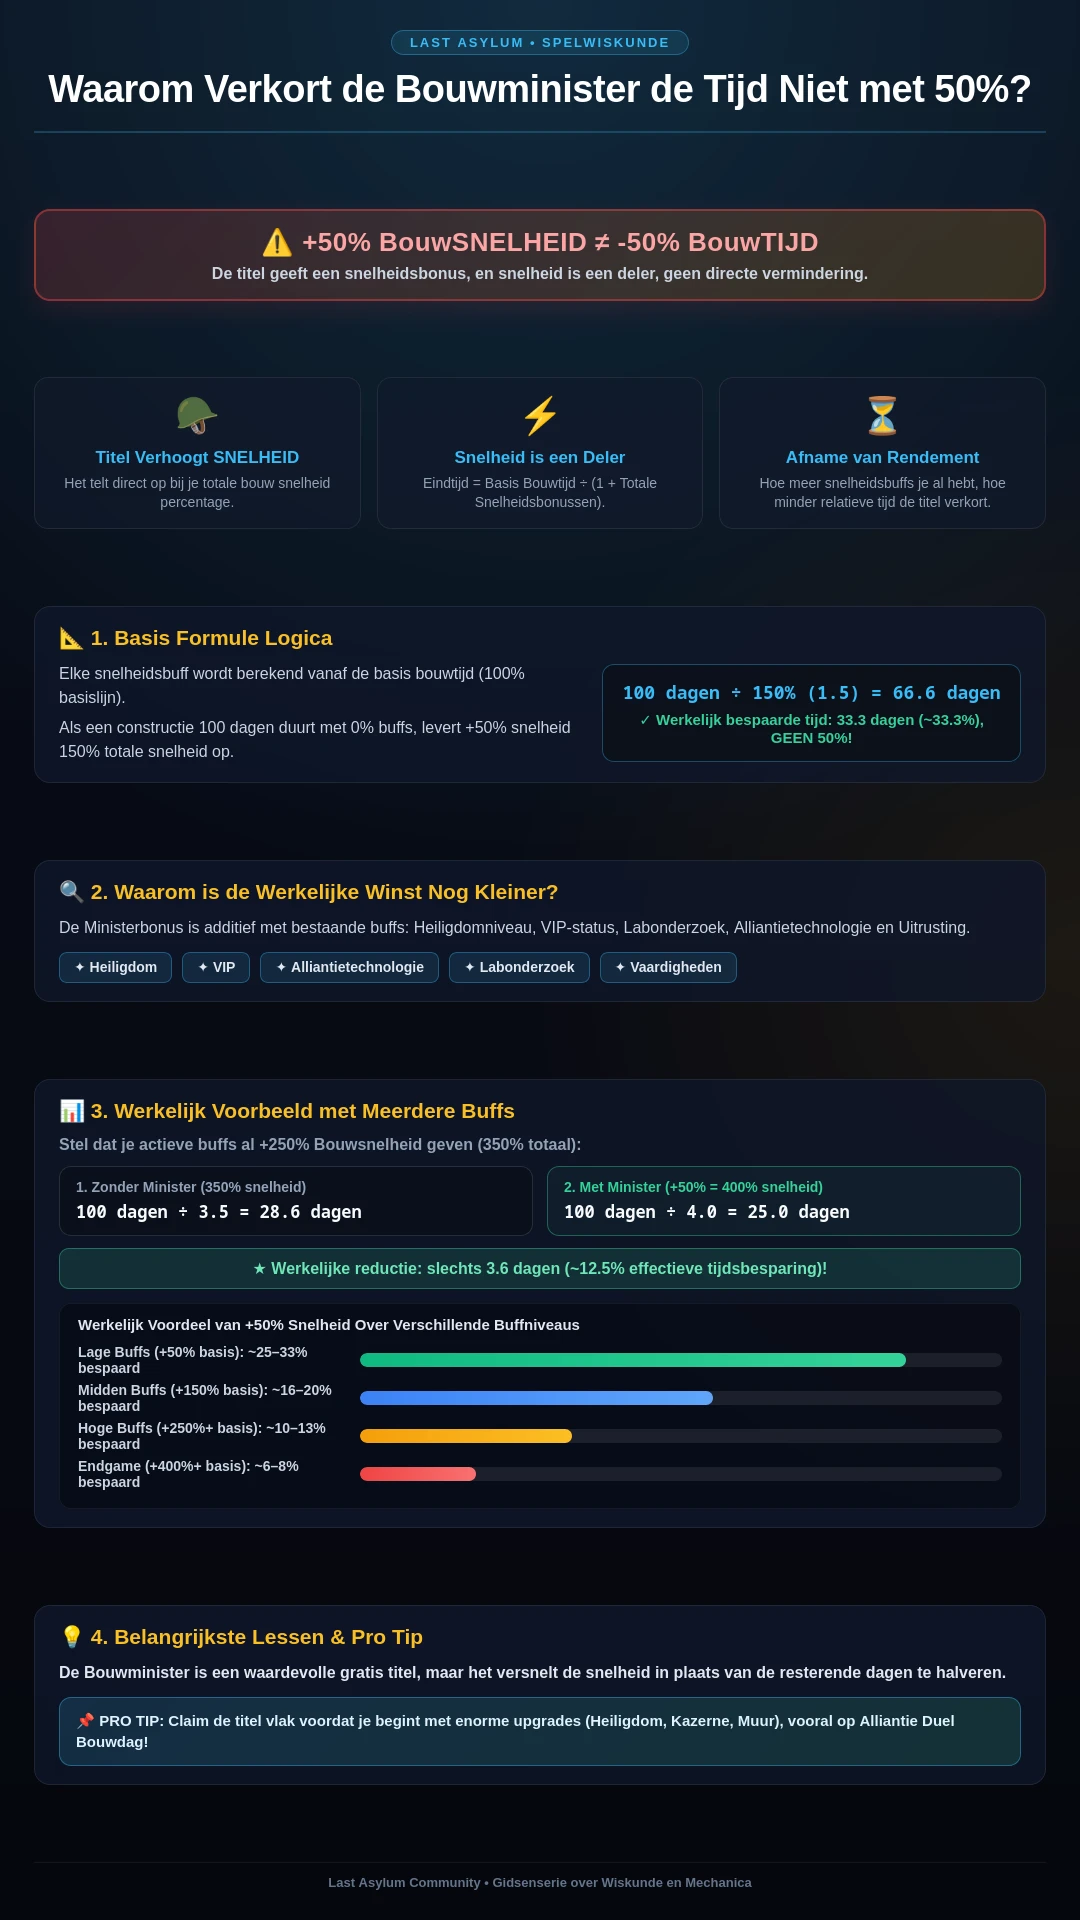
Nu het gedeelte dat bijna iedereen verkeerd begrijpt: deze buffs tellen op als snelheidsmultipliers, toegepast op de basistijd — je kunt 10% + 5% + 20% + 45% + 50% niet zomaar optellen en de timer met 130% van iets verkorten, omdat het spel deelt door de totale snelheid:
$$T = \frac{T_{base}}{100% + \sum \text{speed buffs}}$$
Hier is de echte berekening voor een upgrade met een basistijd van 37 dagen:
- Basistijd: 37 dagen.
- Met +10% en +5% actief: T = 37 / 1,15 ≈ 32,2 dagen.
- Toevoeging van de Minister-titel (+50%): totale snelheid 165% → T = 37 / 1,65 ≈ 22,4 dagen — de titel bespaart ~10 dagen, niet “de helft van de timer”.
- En met alles gestapeld (+10% +5% +20% +45% +50% = +130%): T = 37 / 2,30 ≈ 16,1 dagen.
Elke extra buff is daardoor iets minder uren waard dan de vorige (afnemende meeropbrengsten). De praktische gevolgen:
- De volgorde van buffs maakt niet uit voor het eindresultaat — maar je moet de buffs actief hebben wanneer de timer lang is, omdat hun waarde schaalt met de resterende tijd.
- Pas alles toe voordat je de grote Sanctuary 20+-pushes start, niet halverwege.
- Het veiligstellen van de titel van Minister van Bouw en VIP 11 vóór de late push is op zichzelf al dagen aan timers waard.
[!TIP] De “Hamer vasthouden”-scoretruc: In Alliantieduel en Opperste Genezer worden bouwpunten toegekend op het moment dat je op het voltooide hamerpictogram tikt, en niet wanneer je het project start. Start lange upgrades dagen van tevoren en tik pas op de hamer wanneer de Bouw-/Bouwdag (dinsdag) aanbreekt.
[!IMPORTANT] Titel-snapshotregel voor Minister van Bouw: De Minister-titel (+50% bouwsnelheid) is strikt van toepassing op bouwprojecten die zijn gestart TERWIJL je de titel bezit.
- Vraag de titel aan en ontvang deze van de koning/officier.
- Tik op Upgrade om je gebouw in de wachtrij te plaatsen (de timer wordt vastgezet met de buff toegepast).
- Je kunt de titel onmiddellijk doorgeven aan de volgende speler — de in de wachtrij geplaatste bouw behoudt permanent zijn verlaagde timer tot voltooiing!
Grondstofschaling — plan je voorraden
Wat een gebouw kost op Sanctuary 8 vertelt je niets over wat het kost op Sanctuary 25. De curve verloopt in drie fasen:
| Fase | Typische kosten per upgrade | Wat het betekent |
|---|---|---|
| Vroeg (Sanctuary 1-10) | Duizenden tot lage miljoenen | Productie dekt het. Geef vrij uit, houd wachtrijen vol. |
| Midden (Sanctuary 11-24) | Tientallen miljoenen | Plunderingen en evenementen dragen de last — dagelijks plunderen stopt optioneel te zijn. |
| Laat (Sanctuary 25-30) | Meer dan 100 miljoen | Sla dagenlang voorraden op voor het starten. Een upgrade die je niet kunt voeden, legt je hele wachtrij stil. |
En houd de mix in balans: zorg dat je altijd graan, hout en kruiden op voorraad hebt. Late upgrades vreten alle drie tegelijk op, en halverwege een push zonder komen te zitten verspilt precies de timer die je hebt gestapeld om te besparen.
Ultieme Research Lab-roadmap: alle 13 tech-trees
Research Lab-technologieën bieden cumulatieve permanente vermenigvuldigers voor gevechten, economie en alliantiescores. Gebaseerd op de geverifieerde Ultimate Research Roadmap, volgt hier de exacte tier-prioriteit:
| Prioriteitstier | Onderzoekstak | Kernimpact | Aanbevolen strategie |
|---|---|---|---|
| Tier S (Verplicht) | Alliance Duel (Alliantieduel) | Super Reward 1 & 2 | Enkel hoogste prioriteit in het spel! Super Reward ontgrendelt dagelijkse kisten van tier 4 t/m 9 in het Alliantieduel, goed voor miljoenen aan diamanten, versnellingen en heldentokens. Maximaliseer dit als eerste! |
| Tier S (Verplicht) | Development (Ontwikkeling) | Bouw- & bouwsnelheid (+10-25%) | Moet worden onderzocht voordat je lange Sanctuary 20+-bouwtimers start om honderden dagen aan versnellingen te besparen. |
| Tier A (Hoog) | Economy (Gathering) (Economie - Verzamel) | Wereldkaart verzamelsnelheid (+50-100%) | Kaartverzamelopbrengsten leveren 20x meer grondstoffen op dan passieve stadsproductieknooppunten. Prioriteer verzameltakken boven productie. |
| Tier A (Hoog) | Primary Faction (Warrior/Ranger/Warlock) (Primaire factie) | ATK, DEF & HP voor gekozen klasse | Richt 100% van het militaire onderzoek op de kernfactie van je Team 1. Verdeel stats nooit gelijkmatig over alle drie de klassen. |
| Tier A (Hoog) | March Size (Marsgrootte) | +20.000 tot +50.000 troepencapaciteit | Directe vermenigvuldiger voor rallyschade en garnizoensverdediging. Grotere legers winnen gevechten. |
| Tier B (Midden/Laat) | Elite Troops (Elitetroepen) | Ontgrendelt Tier 10-troepen (T10) | Vereist Sanctuary 30 en volledige voltooiing van vereisten. Endgame-mijlpaal. |
| Tier B (Midden/Laat) | Caravan Transport (Karavaantransport) | Karavaancapaciteit en escorstats | Verbetert de verdediging van de gouden karavaan en plunderopbrengsten zonder troepenverliezen. |
| Tier C (Situationeel) | Tactics (Offensive/Defensive) (Tactiek) | Slachtoffervermindering in KvK Bastion-rallies | Ideaal voordat het Koninkrijksstrijd-seizoen begint. |
| Tier S (Endgame) | Specialty Tech (Specialiteitstech) | Krachtige actieve & passieve specialiteitsbuffs | Ontgrendelt wanneer Research Lab Lv.30 bereikt en Elite Troop Tech 80% bereikt. Het hoogtepunt van de tech-tree. |
Troepentier-mijlpalen
- T7-troepen: Sanctuary 20 + Trainingsvelden 20.
- T8-troepen: Sanctuary 24–25 + Trainingsvelden 24.
- T9-troepen: Sanctuary 27 + Trainingsvelden 27.
- T10-troepen: Sanctuary 30 + Trainingsvelden 30 + 100% Elite Troops-onderzoekstak.
Micro-strategie per tree (Korpez-analyse)
Zodra de macro-prioriteit hierboven draait, zijn dit de binnentree-snelkoppelingen die weken aan onderzoeksversnellingen besparen:
- Development-tree — rush het knooppunt dat het extra trainingskamp ontgrendelt. Breng Quick Bandage slechts naar level 2 (genoeg om door te gaan); maximaliseer dit nooit vroeg. Binnen ~7 dagen voltooid met actieve alliantiehulp.
- Economy-tree — open eerst de extra boerderijpercelen, push daarna onmiddellijk de Herb Output-knooppunten (kruidenopbrengst); laat al het overige met rust tot veel later.
- Hero-trees — level alle drie de klassenladders gelijkmatig naar Lv 3 (de kosten van zeven dagen per knooppunt zijn een bug die de ontwikkelaars zogenaamd aan het fixen zijn), push dan je hoofdklasse naar Lv 5. De generieke heldenknooppunten hieronder (Aanval/Gezondheid/Def/Schade) zijn goud waard.
- Soldier-tree — elk standaard stat-knooppunt is de moeite waard, behalve het laatste Load-knooppunt: een upgrade van 9 dagen voor +1% laadvermogen is een valkuil; sla dit over.
- Volledige Development-tree (post-dev) — push direct naar Soldier Fatality Rate (−1% → −5% met max) — het allerbeste knooppunt voor KvK. Sla genezingssnelheid over; trainingscapaciteit kan langzaam worden gedaan; trainingssnelheid is het waard om onderweg mee te pakken.
- Prosperous Economy — ontgrendel Kruidentuin, laat de tree dan voor wat het is: al het andere daar is slechter dan dezelfde onderzoeksduur besteed aan militair.
- Squad-tabblad (post-Soldier) — vul March Capacity en Squad Attack aan voor je primaire klasse; parkeer de overige op Lv 3. De wereldbaas-verdedigingsknooppunten kunnen op 3 worden gelaten — deze maximaliseren levert niets op.
📚 Naslag: Bouwlimieten: waarom kruiden opraken
Bron: wiki-last-asylum.com, client v1.0.87.
Bouwlimieten bepalen hoeveel gebouwen van één soort een stad kan bevatten, en de echte limiet ligt hoger dan het bouwpaneel suggereert. Het lab beschikt over knooppunten die één extra gebouw van elk soort toevoegen, en daarmee ziet de toekenning er als volgt uit.
| Gebouw | Totaal toegestaan |
|---|---|
| Boerderij (Boerderij) | 5 |
| Houthakkers\nkamp (Houthakker) | 5 |
| Herb garden (Kruidentuin) | 5 |
| Training ground (Trainingsveld) | 4 |
| Infirmary (Hospitaal) | 4 |
| Kazerne (Kazerne) | 4 |
Een vijfde productiegebouw voegt een kwart toe aan de opbrengst van zijn grondstof en kost minder dan nog een level op de gebouwen die al staan. Erachter komen is het moeilijkste gedeelte, aangezien het knooppunt zich in de onderzoekstak bevindt in plaats van op het bouwpaneel.
Waarom kruiden opraken in de mid-game
De toekenningen gaan niet tegelijkertijd open, en het kruidenschema loopt achter. De vierde boerderij en de vierde houthakker openen bij Sanctuary-level twaalf, de vierde kruidentuin pas bij negentien. Zeven levels op rij komen graan en hout elk uit vier gebouwen, terwijl kruiden uit drie komen.
Vandaar het gevoel dat kruiden altijd als eerste opraken. Dat gevoel klopt, en het komt door het ontgrendelingsschema in plaats van hoe de speler uitgeeft.
Hoeveel kopieën een stad kan hebben, inclusief labknooppunten, wordt getoond door de bouwrakencalculator: elke tegel is gelabeld met het Sanctuary-level dat deze ontgrendelt.
📚 Naslag: Onderzoek: de prijs van macht, takken en limieten
Gegevens geverifieerd aan de hand van de gameclient (v1.0.87, bron: wiki-last-asylum.com).
Onderzoek verloopt traag en kost veel, dus de volgorde van de takken is belangrijker dan de opsomming ervan. Macht komt tegen sterk uiteenlopende prijzen in de labcategorieën, twee takken herhalen wat twee andere al bieden, en één categorie vraagt helemaal geen grondstoffen. Development en Economy verkopen macht het goedkoopst, Hero verkoopt het het duurst.
Prijs van macht per categorie
Alles wat een categorie kost delen door alle macht die het oplevert, geeft het volgende beeld.
| Categorie | Grondstoffen per punt |
|---|---|
| Development (Ontwikkeling) | 794 |
| Economy (Economie) | 2.640 |
| Soldier (Soldaat) | 12.152 |
| Hero (Held) | 18.065 |
Het gat is twintigvoudig. De vroege Development- en Economy-takken betalen zich het snelst terug en komen als eerste aan de beurt, terwijl de Hero-takken tot later wachten.
Twee squad-takken dupliceren twee andere
Team 1 en Team 4 geven dezelfde bonussen en dezelfde limieten als Team 2 en Team 3, maar kosten veel minder: ongeveer 310 miljoen grondstoffen en 38 dagen wachtrij tegen miljarden grondstoffen en duizenden dagen voor het tweede paar.
De eerste twee zijn het waard om te maximaliseren, en de andere twee kunnen wachten zolang al het andere de moeite waard is om te kopen.
De tak die geen grondstoffen kost
De categorie gekoppeld aan het Alliantieduel heeft geen graan, hout of kruiden nodig. Er wordt betaald met Study Scrolls, die worden toegekend voor competitie: alliantieliga-rangen, het duel, arenaseizoensbeloningen en groeidoelen. Achter het knooppunt bevindt zich de elitetroepentak, en daarmee de tiende tier, dus deze categorie kan niet worden overgeslagen.
Economielimieten
Het lab duwt de economie op tot een vaste grens en niet verder. De opbrengst van elke grondstof stijgt tot +60%, verzamelsnelheid tot +25%, bouwsnelheid tot +25%, onderzoeksnelheid tot +50% en de beschermde grondstoffenlimiet tot +50%.
Bouwsnelheid komt van vier Fast Construction-takken, elk 5% voor de eerste drie en 10% voor de vierde. Onderzoeksnelheid werkt op dezelfde manier, drie op 10% en een vierde op 20%.
Construction Master staat ernaast en is makkelijk aan te zien voor een van hen. Het vers؍nelt de bouw niet, het maakt het goedkoper en haalt tot 5% van de grondstofkosten af over vijf levels. De namen lijken op elkaar terwijl de effecten dat niet doen: de ene tak bespaart tijd, de andere bespaart grondstoffen.
Het onthouden waard
Macht- en bonuswaarden in de tabellen zijn cumulatief, dus een rij toont het totaal op dat level in plaats van de toename ten opzichte van de vorige. Levels mogen niet worden opgeteld.
Hoe de snelheid-, kosten- en kopielimietknooppunten de bouwwachtrij voor een specifieke stad veranderen, wordt getoond door de bouwrakencalculator.
🏗️ Bouwgidsen
- 2e werkbank
- Alliantiehal
- Alliantiestal
- Serum\nwerkplaats
- Arena
- Kazerne
- Geheime Operaties
- Bouwershut
- Curiozaal
- Inscriptiewerkplaats
- Verkenners\nkamp
- Falcon Tower
- Boerderij
- Uitrustings\nwerkplaats
- Graanschuur
- Erehal
- Kruidentuin
- Kruidenopslag
- Infirmary
- Heer Standbeeld
- Houtopslag
- Houthakkers\nkamp
- Monument — gebouwstats; voor de tijdlijn van serverleeftijd-evenementen zie Calendar: Monument
- Nomaden\nhandelaar
- Privéstal
- Jagers\nstandbeeld
- Ravennest
- Raven\nwerkplaats
- Research Lab
- Woning
- Sanctuary
- Verkennings\nteam
- Smelterij
- Herstelkwartier
- Team 1
- Team 2
- Team 3
- Team 4
- Taveerne
- Tempel
- Oefenterrein
- Walls
- Tovenaars\nstandbeeld
- Krijgers\nstandbeeld
- Wachttoren
- Weverij
🧱 Beginnersbouwtactieken
Gelijkmatige verbeteringen verspreid over de vesting vertragen het account: grondstoffen raken precies op wanneer het Heiligdom, het Lab, de Trainingsvelden of de Antitoxis-werkplaatsen ze nodig hebben. Dit gedeelte is de gids voor beginners — waar elk gebouw voor dient en in welke volgorde je eraan moet sleutelen.
Eerst het Heiligdom, helden worden daardoor begrensd
Het Heiligdom bepaalt de limiet voor alles: heldenniveaus (ongeveer +5 per Heiligdomniveau — bijv. Heiligdom 28 staat helden toe tot niveau 140) en alle andere gebouwen. Als de hoofdgroep van vijf de limiet bereikt, helpt extra antitoxis niet — alleen het volgende Heiligdomniveau heft dit op. Elk Heiligdomniveau vereist ook verschillende voorvereiste gebouwen (Lab, Trainingsvelden, Kazernes, standbeelden), dus open de vereisten vroeg en bereid de hele keten voor. Wacht niet tot alle helden hun limiet bereiken — start het volgende Heiligdomniveau van tevoren.
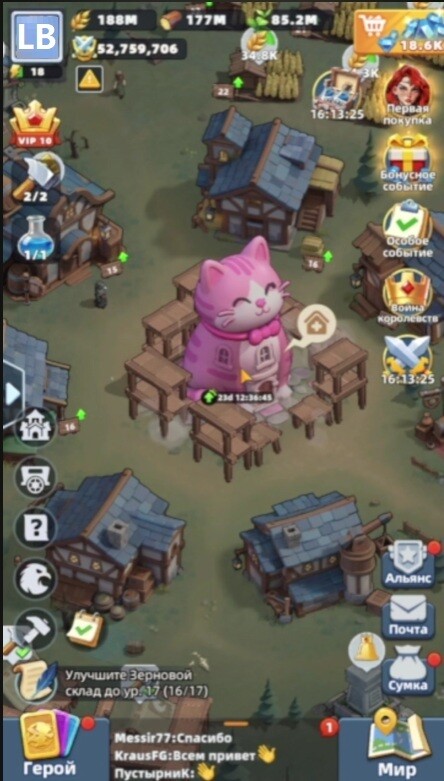
Twee bouwers, twee rollen
Het tijdelijke tweede-bouwer-slot (500 diamanten) moet een andere taak vervullen dan de eerste: het lange slot pakt het Heiligdom, het Lab of een ander meerdaags verplicht gebouw, terwijl de vrije bouwer korte upgrades afhandelt — boerderijen, zagerijen, tuinen, antitoxis-werkplaatsen en de tussenliggende voorvereisten voor het volgende Heiligdomniveau. Twee bouwers op lange projecten betekent geen slot voor plotselinge vereisten; twee op kleine klussen betekent dat het hoofdgebouw eeuwig achterloopt.
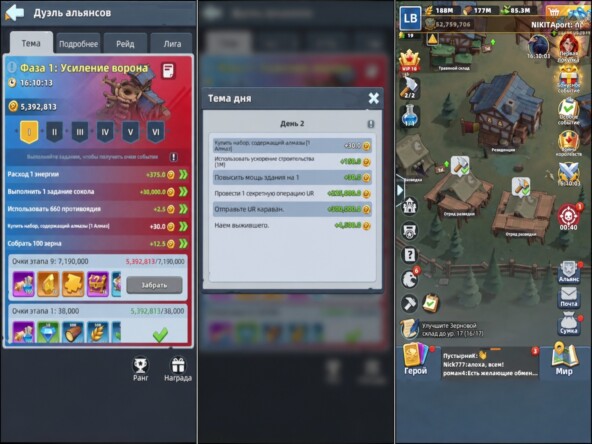
Plan grote voltooiingen voor de bouwdag van het Alliantieduel: een voltooid gebouw hoeft niet meteen te worden geclaimd — laat de hamer erboven hangen en tik nadat de evenementenfase is omgeslagen, zodat je punten scoort voor reeds uitgevoerd werk. Het gebouw blijft het slot bezetten, dus houd de hamer alleen vast boven grote projecten. Accepteer eerst alle alliantiehulp, geef dan versnellingen uit en claim pas dan.
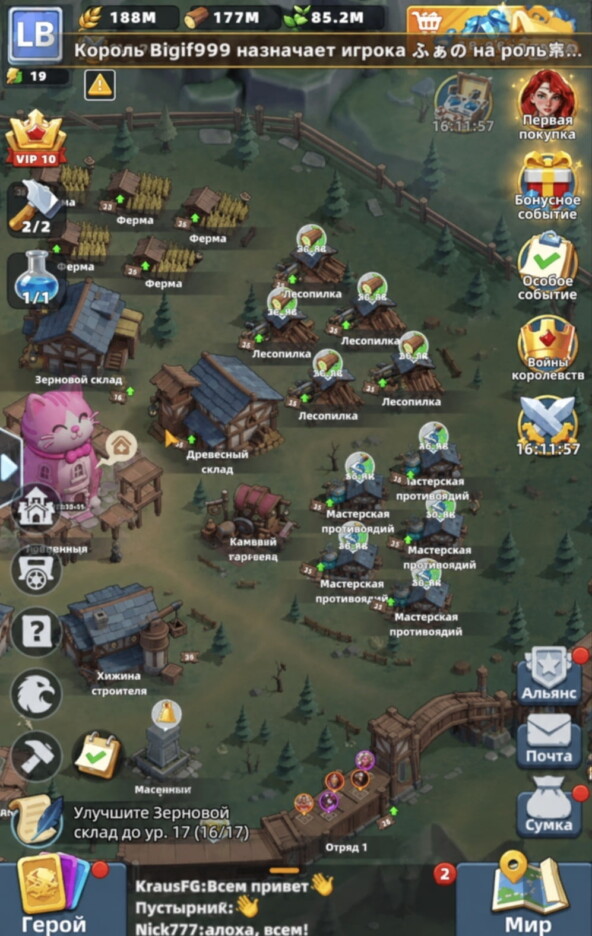
Grondstoffengebouwen kunnen achterlopen
Boerderijen, zagerijen en kruidentuinen leveren graan, hout en kruiden op — maar ze hoeven geen gelijke tred te houden met het Heiligdom. Een gat van vijf tot zes niveaus blijft comfortabel. Terwijl de tweede bouwer op het Heiligdom zit, verhoogt de eerste geleidelijk de grondstoffengebouwen, en de antitoxis-werkplaatsen nog wel het meest: antitoxis wordt constant verbruikt voor het levelen van helden.
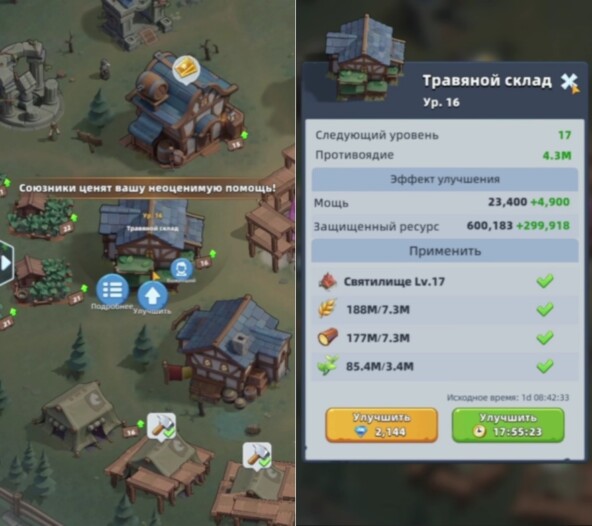
Opslagplaatsen (hout, graan, kruiden) verhogen alleen de beschermde hoeveelheid die aanvallers niet kunnen plunderen. Ze ontgrendelen geen niveaus, technologieën of troepen, dus houd ze merkbaar achter tenzij een Heiligdomvereiste ze noemt. De veiligste strategie: houd materiaalpakketten ongeopend in de inventaris en open ze vlak voor de bouw — dan verliezen zelfs zwakke opslagplaatsen vrijwel niets.
Taverne, Tempel en Onderzoekslab
De Taverne rekruteert helden en overlevenden, en het levelen ervan verkort de afkoeltijd voor gratis rekruteren — maar slechts met ongeveer een uur na verschillende niveaus. Upgrade deze op basis van Heiligdomvereisten of bouwdag; het is vele malen belangrijker om daadwerkelijk op de gereedstaande gratis rekruteringen te tikken. De eerste 50 trekkingen gaan richting gegarandeerde Arthur-fragmenten.

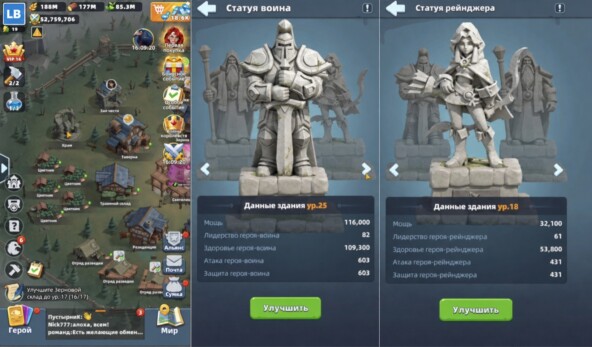
De Krijger-, Ranger- en Warlock-standbeelden van de Tempel geven directe factie-ATK/HP/DEF. Begin met de factie van je Selectie 1, maar overdrijf de scheefgroei niet: de andere standbeelden komen voor in Heiligdomvereisten, en selecties 2–3 hebben ze nodig voor expedities.
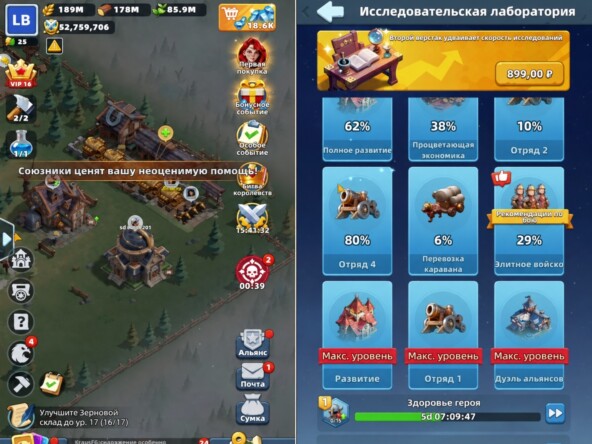
Na het Heiligdom is het Onderzoekslab het belangrijkste gebouw — economie-, helden-, troepen- en ontwikkelingstechnologieën bevinden zich allemaal daar. Voer op woensdag onderzoek uit in de Alliantieduel-boom, zodat dezelfde versnellingen evenementenpunten scoren, en verspil niet al je universele versnellingen aan gebouwen: een deel van de voorraad moet onderzoek dekken, met name dure legerechnologieën.
Leger: Trainingsvelden, Kazernes, Ziekenboeg
Hogere Trainingsvelden ontgrendelen sterkere troepenrangen (T1–T10). Level niet alle velden even gelijkmatig: houd er één maximaal en gebruik de rest om massaal goedkope troepen te trainen, om ze vervolgens op het hoofdveld te promoveren — vergelijkbare grondstoffenkosten, aanzienlijk minder tijd. Het hoofdveld moet het Heiligdom volgen, aangezien zowel nieuwe tiers als Heiligdomvereisten hiervan afhangen.
Kazernes herbergen het getrainde leger, en de capaciteit bindt snel: dievenjachtaanvallen en gevechten op vrijdag/zaterdag verbranden duizenden soldaten. Als de Kazernes vol zijn, staan de velden stil en vertrekken marches onvolledig — level ze gelijk op met het hoofdveld. De capaciteit en genezingssnelheid van de Ziekenboeg bepalen hoeveel klappen het account kan opvangen: als één gevecht deze vult, is het tijd voor een upgrade. Te kleine ziekenboegen veranderen gewonden in permanente verliezen.
Bouwershut, Alliantiehal en Muren
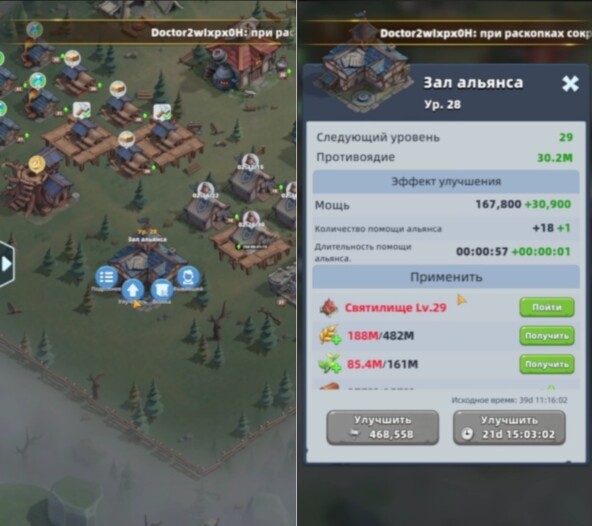
De Bouwershut verkort elk toekomstig project, dus de investering verdubbelt zich over het gehele account. De Alliantiehal schaalt alliantiehulp (meer tikken, meer minuten per tik) — vraag altijd om hulp zodra een lange timer start en besteed versnellingen pas nadat bondgenoten klaar zijn, anders wordt de vrije tijd verspild.
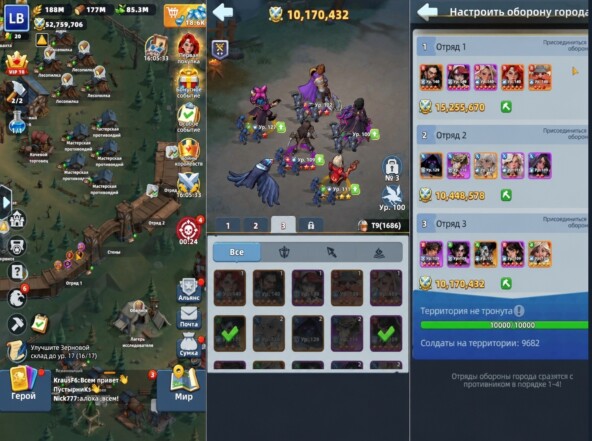
Drie verdedigingsselecties staan op de Muren, naast versterkingen en de blusknop. Om deze te herschikken, moeten alle marches thuis zijn. Let op de verdedigingsvakjes: indien ingeschakeld, sluiten helden en soldaten zich aan bij de verdediging — tegen een sterkere aanvaller betekent dit zware verliezen, dus veel spelers vinken dit uit tijdens interserveroorlogen om het leger te sparen, maar de vakjes moeten weer aan voor de Undead Siege, anders worden de golven niet gestopt. Muurniveaus verhogen ook de marchesnelheid voor Blight-aanvallen, verzamelen en terugkeer.
Onderzoekskamp, Wachttoren, Valkurentoren
Gevechten in het Onderzoekskamp (battle pass) kosten geen soldaten — het perfecte lab om formaties te testen en helden te vergelijken — plus een uurlijks passief inkomen (graan, hout, kruiden, antitoxis) en kisten na elke paar stadia. De Wachttoren voert factie-expedities uit (één factie per modus, vernieuwt ongeveer elke 3 dagen): kies niet de maximale sterren “voor de groei” — een vastgelopen halverwege-run scoort slechter dan een volledig voltooide run één ster lager.
De Valkurentoren geeft dagelijkse speurtochten uit (nieuwe ongeveer elke 6 uur; ~11 beschikbaar op een ontwikkelde toren, maar slechts 9 passen op het bord, de rest komt in de wachtrij — overloop-speurtochten verdwijnen). Speurtochten kosten energie en betalen onder andere grondstoffen, antitoxis en Raven-items. Level de toren alleen als speurtochten daadwerkelijk dagelijks worden voltooid.

Uitrustingsdistrict en wat je kunt uitstellen
De Smeltwerkplaats maakt uitrustingsstenen (een enkel zwaard van hoog niveau kan wel 20.000+ ststenen per upgrade verlangen — ontwikkel dit vroeg), de Weefwerkplaats maakt stof die later wordt gesynthetiseerd tot staal voor gouden uitrusting, en de Uitrustingswerkplaats vervaardigt de stukken. Een volledige gouden set voor selectie 1 kost veel tijd, dus de productie mag nooit stilvallen — een goed draagzwaard en tankpantser verslaan meerdere willekeurige niveaus elders.
Stel uit wanneer grondstoffen schaars zijn: Verkennersselectie (snellere verkenning, geen ontwikkelingssnelheid), opslagplaatsen boven vereisten, Taverne boven vereisten. De Raven-werkplaats kan op de bouwdag worden geliveld voor duelpunten. Arena, Ravennest, Black Ops-centrum en Curio-hal levelen helemaal niet — gebruik ze regelmatig, ze kosten geen bouwgrondstoffen.
Beginnersvolgorde in één lijn: Heiligdom op het lange slot → Lab → hoofd-Trainingsveld, Kazernes, Ziekenboeg, standbeeld van hoofdfactie → Bouwershut en Alliantiehal gestaag → grondstoffengebouwen ~5–6 onder Heiligdom → uitrustingsdistrict → extra velden en secundaire gebouwen → opslagplaatsen, Taverne, verkenners op basis van vereiste of overschot.
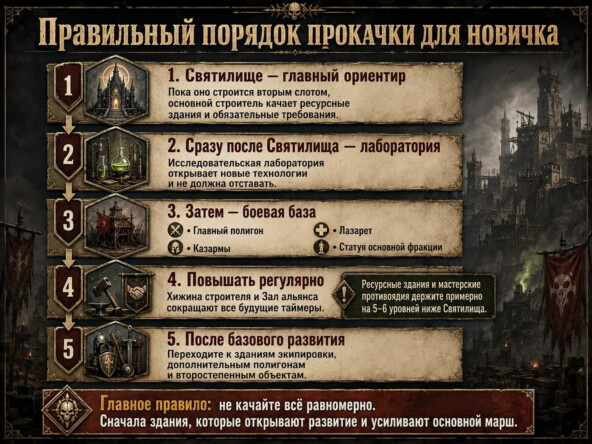
Bron: Здания Last Asylum: Plague - гайд для новичков door Гейм-Знаток op DTF.
🎥 Videogidsen
Geselecteerde videogidsen en strategische analyses van community-makers
📝 Teksttranscript 17:42 (1062 сек) ▼
📝 Teksttranscript 13:24 (804 сек) ▼
Zoek op YouTube naar dit onderwerp: «Buildings & Base»
Zoekopdracht: Last Asylum Plague building speed construction guide
🏰 Sanctuary Upgrade Planner
Exacte totaal aan grondstoffen, netto bouwtijd met snelheidsbuff en vereiste bouwketens
Graan
0
Hout
0
Kruiden
0
Basistijd
0
Met jouw buff
0
Bespaarde tijd
0
Vereiste gebouwen:
💡 De gouden "Houd de hamer vast"-regel:
Might-punten voor gebouwen in Alliance Duel & Supreme Healer worden pas toegekend wanneer je op het voltooingsicoon (de hamer) klikt. Start upgrades dagen van tevoren, maar tik NIET op de hamer tot de aangewezen bouwdag (dinsdag)!
Bouwversnellingen & Diamanten tot 20% korting
Sanctuary naar level 25–30 pushen? Waardeer diamanten en bouwpakketten op met directe levering via UID op LDShop.
📖 Lees verder
Hielp deze gids je?