أولويات البناء وخريطة طريق الملجأ
خريطة طريق الملجأ حتى المستوى 30، وترتيب أولويات البناء، ووظيفة كل مبنى، وكيفية تكديس تعزيزات سرعة البناء بالطريقة المتتالية الصحيحة.
☰ في هذه الصفحة 31 ▾
🗓 محدّث: 2026-10-12
البناء في لعبة Last Asylum: Plague هو لعبة طويلة الأمد — فالتقدم بالملجأ من المستوى 1 إلى المستوى 30 يستغرق شهراً، والترتيب الخاطئ سيكلفك أسابيع من ذلك. هذه الصفحة تعرض ترتيب البناء الخاص بالمجتمع: المباني التي تهم وبالترتيب الصحيح، خريطة طريق الملجأ مستوى بمستوى، والرياضيات الدقيقة لتكديس سرعة البناء.
السؤال الواحد الذي يحدد فتحة قائمة الانتظار التالية: هل يجعلني هذا أقوى أم أسرع؟ إذا كانت الإجابة لا، فيمكنه الانتظار.
ترتيب أولويات البناء
عندما توجد عدة مباني متاحة في نفس الوقت، يكون ترتيب المجتمع ثابتاً:
- الملجأ (Sanctuary) — دائماً أولاً. فهو يقيد كل مستوى آخر في المدينة، والحد الأقصى لمستوى الأبطال، وفئات القوات. متى ما تفرّق ترقية الملجأ، فإنها تدخل قائمة الانتظار أولاً.
- مختبر الأبحاث (Research Lab) — يشغل شجرة التكنولوجيا الخاصة بك ويعمل بمثابة المتطلب الأساسي الإلزامي لمستويات الملجأ من 11 إلى 30 (بدون مختبر مطور، لا يمكنك بدء أي ترقية ملجأ متوسطة/متأخرة).
- أراضي التدريب (Training Grounds) — تفتح فئات القوات (من T1 إلى T10). استخدم تقسيم 1 كحد أقصى + 3 منخفضة: اجعل أرض تدريب رئيسية واحدة في الحد الأقصى لتتوافق مع حد مستوى الملجأ الخاص بك، واحتفظ بالـ 3 الأخرى في المستوى 10 لإنتاج كميات ضخمة من قوات T4 الرخيصة لغرض الترقية (يوفر 6-7 ساعات لكل دورة وملايين الموارد!).
- الثكنات (Barracks) — سعة الجنود. جيش نظامي أكبر يعني قوة أكبر وضربة أقوى لكل مسيرة.
- المستشفى (Infirmary) — يعالج جنودك الجرحى بعد الهزائم. مستشفى صغير يعني أن كل معركة خاسرة ستنزف جنوداً لا يمكنك استعادتهم.
- ورشة الصهر (Smelting Workshop) — تنتج وتصقل أحجار العتاد (Gear Stones) لتطوير المعدات. ادفعها إلى المستوى 25 بمجرد أن يسمح لك الملجأ لتجنب حدوث عنق زجاجي في منتصف اللعبة على أسلحة الحمل.
- الجدران (Walls) — يتم تطويرها بصرامة لمعالم البوابات (** مطلوبة فقط لمستويات الملجأ 5، 6، 9، 10، 12، و24**؛ وليست مطلوبة أبداً للـ 24 مستوى الأخرى). الجدران لا توفر إحصائيات قتالية ولا تحمي القوات من الضرر! بل توفر فقط متانة للدفاع عن المدن لمقاومة الحريق والانتقال الإجباري أثناء الحصارات.
- مباني الموارد والمستودعات — يتم ترقيتها بصرامة حسب الحاجة لمتطلبات الملجأ الأساسية (الأخشاب، الصومعة، ومستودعات الأعشاب).
القاعدة وراء القائمة: إذا كان المبنى لا يجعلك أقوى أو أسرع، فهو ليس عاجلاً. مباني الإنتاج، والمستودعات، والديكورات يتم بناؤها أيضاً — ولكن فقط عندما لا يكون لدى السبعة أعلاه أي عمل أو يجبرك شرط أساسي على ذلك.
ما يفعله كل مبنى
مرجع سريع للمباني التي ستنقر عليها بالفعل. تختلف الترجمات بين عملاء اللعبة، لذا عندما يبدو اِسمان متشابهين، تحقق من تلميح الأداة داخل اللعبة للحصول على التأثير الدقيق على نسختك.
| المبنى | ماذا يفعل | ملاحظات المجتمع |
|---|---|---|
| الملجأ (Sanctuary) | يفرض قيوداً على جميع مستويات المباني الأخرى، ويحدد الحد الأقصى لمستوى الأبطال، ويمنح نقاط خبرة لكل ترقية، ويفتح المباني والميزات كلما ارتفع مستواه. | قم بالترقية عند انتهاء فترة التبريد. إنه مستواك الحقيقي كلاعب. |
| الجدران (Walls) | توفر متانة للدفاع عن المدينة وتقلل معدل اضمحلال الدفاع أثناء الحصار. لا تحمي القوات في المعركة ولا تمنح أي إحصائيات قتالية! | قم بالترقية حصرياً كمتطلب أساسي في المستويات 5، 6، 9، 10، 12، و24. لا تهدر البناة عليها بخلاف ذلك. |
| كوخ البناء (Builder’s Hut) | يوسع نافذة الإنجاز المجاني على مؤقتات البناء (وقت التسريع المجاني). الناجون المتمركزون بالداخل يمنحون مكافآت إضافية — استبدل ناجين أفضل كلما جندتهم. | احتفظ به في مستوى الملجأ حتى الملجأ 15 للحصول على الحد الأقصى لنافذة الإنجاز المجاني. |
| مختبر الأبحاث (Research Lab) | يدير شجرة التكنولوجيا الخاصة بك: الأبحاث الاقتصادية، والعسكرية، والتطويرية. تم دمج مختبر الأبحاث 1 و 2: تتمتع كلتا القائمتين بتعزيزات سرعة مثالية. | الأولوية رقم 2 — متطلب أساسي مستمر للملجأ 11-30. سارع بفتح المكافأة الكبرى 1 و 2 في شجرة مبارزة التحالف لفتح مستويات الصناديق 4-9! |
| أراضي التدريب (Training Grounds) | تفتح فئات قوات جديدة (T2 في المستوي 3، T3 في المستوي 6، T4 في المستوي 10، T5 في المستوي 14، T6 في المستوي 17، T7 في المستوي 20، T8 في المستوي 24، T9 في المستوي 27، T10 في المستوي 30) وتزيد من سعة التدريب. | ارفع أرض تدريب واحدة للحد الأقصى للطبقة العليا؛ واحتفظ بالثلاثة الأخرى عند المستوى 10 للزراعة والترقية الموازية لقوات T4 (يوفر 6-7 ساعات لكل دورة). |
| الثكنات (Barracks) | تزيد من إجمالي سعة الجيش النظامي في مدينتك. | قم بالترقية لاستيعاب جيش ضخم لحروب KvK وحروب الممالك. |
| المستشفى (Infirmary) | يعالج الجنود الجرحى بعد الهزائم. | مستشفى بحجم غير كافٍ = خسائر دائمة في القوات بعد كل معركة خاسرة. |
| ورشة الترياق (Antitoxin Workshop) | تنتج الترياق/مضادات السموم — المورد الرئيسي للأبطال المستخدم عبر أنظمة تقدم الأبطال. | ابنها عند المستوى 10 واستمر في الإنتاج على مدار الساعة طوال أيام الأسبوع. |
| ورش العتاد / الصهر / النسيج | تصنع وتطور عتاد الأبطال من المواد المزروعة. | ادفع ورشة الصهر إلى المستوى 25 للحصول على إنتاج مستقر لأحجار العتاد؛ تفتح ورشة العتاد عند الملجأ 20. |
| المعبد (تمثال المحارب) | مبنى طائفي موحد (يمدمج تماثيل المحارب، والحرّاس، والسحرة السابقة). يوفر مكافآت إحصائية مئوية لفصيلك المختختار. | قم بالترقية لتعزيز قوة الفرقة وتلبية متطلبات الملجأ. |
| قاعة الشرف (Hall of Honor) | تعرّض مستويات شرف الأبطال وتفتح متجر الشرف (المصدر الأساسي لمخططات عتاد الـ UR). | ضرورية لتقدم عتاد اللعبة المتأخر. اشترِ مخططات عتاد الـ UR ح حصرياً. |
| قاعة التحف (Curio Hall) | تضم التحف المجمعة التي توفر مكافآت سلبية للمباني، والاقتصاد، وقوة القتال للفرق. | قم بترقية مستويات نجوم التحف للحصول على تعزيزات دائمة على مستوى الحساب بأكمله. |
| الحانة (Tavern) | تجنيد الأبطال — نظام اللافتات والسحب موجود هنا. | احفظ الماس لأحداث الـ UR المحددة بدلاً من إهداره هنا. |
| برج الصقر (Falcon Tower) | يولّد مهام يومية تمنح الماس، ومسرعات، وشظايا الأبطال، والترياق. المستوى 8 يفتح الاستلام بنقرة واحدة. | استخدم استراتيجية “الحد الأقصى للتكديس − 1” لتخزين المهام المكتملة لأيام النقاط المزدوجة. |
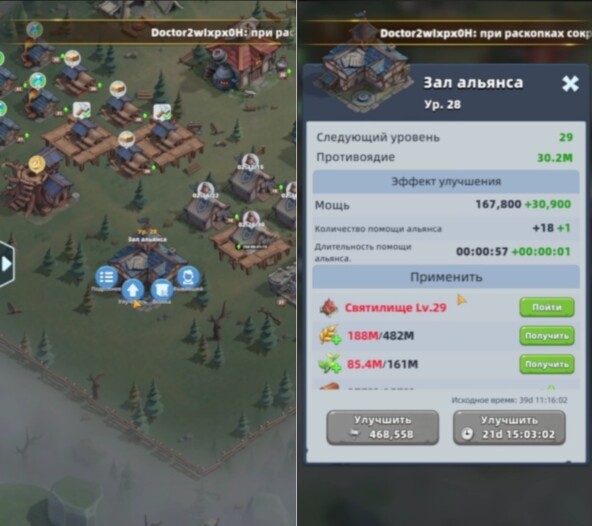
| قاعة التحالف (Alliance Hall) | تزيد من عدد مساعدات التحالف التي يمكنك تلقيها. لا تؤثر على الحاميات أو الحشد! | مستوى أعلى = المزيد من المساعدات من الحلفاء (تصل إلى 30 مساعدة في المستوى 25، مما يخصم ~30% من أي مؤقت مجاناً). أمر بالغ الأهمية لتوفير المسرعات ومتطلب إلزامي لمستويات الملجأ 7، 8، 9، 13، 20، و29. |
الثكنات مقابل أراضي التدريب — فخ التسمية
مبنى واحد يفتح فئات قوات جديدة (أراضي التدريب)، والآخر يزيد عدد الجنود الذين يمكنك استيعابهم (الثكنات). افتح المبنى واقرأ التلميح: إذا كان التأثير المدرج هو فتح الفئات وحد قائمة انتظار التدريب، فهذه هي أراضي التدريب؛ وإذا كان إجمالي سعة الجنود، فهذه هي الثكنات.
خريطة طريق الملجأ حسب المستوى (من 1 إلى 30)
من المفاهيم الخاطئة الشائعة أن الجدران مطلوبة لكل مستوى منفرد. هي ليست كذلك! الجدران مطلوبة 6 مرات فقط في جميع أنحاء اللعبة (المستويات 5، 6، 9، 10، 12، و24).
هيكل القيود الحقيقي:
- مختبر الأبحاث هو عنق الزجاجة الأساسي: لكل مستوى من 12 إلى 30، يجب أن يكون مختبر الأبحاث عند مستوى
(المستوى المستهدف − 1). - القيد العسكري الثانوي يتناوب: أراضي التدريب (7، 8، 11، 15، 18، 21، 25، 27، 30)، المعبد / تمثال المحارب (14، 16، 19، 22، 26)، قاعة التحالف (7، 8، 9، 13، 20، 29)، الثكنات (17، 28)، والمستشفى (10، 23).
- قيد الموارد الثلاثي يتناوب: مستودعات الخشب/الحبوب/الأعشاب، ورشة الترياق، المزرعة، مطحنة الخشب، وپستان الأعشاب.
فيما يلي البيانات الكاملة والرسمية مستوى بمستوى المستخرجة مباشرة من الملف الثنائي لعملاء اللعبة:
اللعبة المبكرة (المستويات 1 – 10)
| المستوى | المتطلبات الأساسية | الوقت الأساسي | الموارد (الحبوب / الأخشاب / الأعشاب) | عمليات الفتح |
|---|---|---|---|---|
| 2 | لا يوجد | 2 ثانية | 32 / 32 / 0 | التقدم الأساسي، حد الأبطال المستوى 10 |
| 3 | لا يوجد (مهمة الفصل 17) | 3 ثوانٍ | 983 / 983 / 0 | قوات المستوى 2 (في أراضي التدريب المستوى 3) |
| 4 | مستودع الأخشاب 1 + الصومعة 1 + مستودع الأعشاب 1 | 5 دقائق | 2.6K / 2.6K / 0 | مستودعات الموارد، كوخ البناء |
| 5 | الجدار المستوى 3 | 10 دقائق | 19.7K / 19.7K / 0 | حد الأبطال المستوى 20 |
| 6 | الجدار المستوى 5 | 34 دقيقة | 92.7K / 92.7K / 0 | قوات المستوى 3 (في أراضي التدريب المستوى 6)، برج المراقبة، الرادار |
| 7 | أراضي التدريب 4 + قاعة التحالف 3 | 1.5 ساعة | 235.8K / 235.8K / 0 | قاعة التحالف (زر مساعدة التحالف)، مختبر الأبحاث |
| 8 | أراضي التدريب 6 + قاعة التحالف 5 | 3 ساعات | 395.6K / 395.6K / 0 | برج الصقر (المهام اليومية) |
| 9 | الجدار 8 + قاعة التحالف 7 | 4.3 ساعة | 605.8K / 605.8K / 208.7K | حد الأبطال المستوى 30 |
| 10 | الجدار 9 + المستشفى 7 | 5.6 ساعة | 748.7K / 748.7K / 232.9K | قوات المستوى 4 (في أراضي التدريب المستوى 10)، ورشة الترياق، الحانة |
منتصف اللعبة (المستويات 11 – 19)
| المستوى | المتطلبات الأساسية | الوقت الأساسي | الموارد (الحبوب / الأخشاب / الأعشاب) | عمليات الفتح |
|---|---|---|---|---|
| 11 | أراضي التدريب 10 + مختبر الأبحاث 7 | 7.2 ساعة | 1.9M / 1.9M / 601.8K | فتحة المسيرة 2 (الفرقة 2 عبر أبحاث المختبر) |
| 12 | مختبر الأبحاث 11 + الجدار 10 + ورشة الترياق 7 | 9.4 ساعة | 3.1M / 3.1M / 959K | قدرات بحثية أعمق |
| 13 | مختبر الأبحاث 12 + قاعة التحالف 11 + المزرعة 7 | 12.2 ساعة | 3.5M / 3.5M / 1.1M | حد الأبطال المستوى 40 |
| 14 | مختبر الأبحاث 13 + تمثال المحارب (المعبد) 12 + مطحنة الخشب 7 | 15.9 ساعة | 4.9M / 4.9M / 1.6M | قوات المستوى 5 (في أراضي التدريب المستوى 14)، المعبد |
| 15 | مختبر الأبحاث 14 + أراضي التدريب 14 + بستان الأعشاب 7 | 22.3 ساعة | 6.5M / 6.5M / 2.3M | ورشة الصهر، فتحة المسيرة 3، حد الأبطال المستوى 50 |
| 16 | مختبر الأبحاث 15 + تمثال المحارب (المعبد) 14 + الصومعة 7 | 1.3 يوم (31.2 ساعة) | 11.9M / 11.9M / 4.0M | نطاق إنتاج الأعشاب وجمعها يتوسع |
| 17 | مختبر الأبحاث 16 + الثكنات 15 + مستودع الأخشاب 7 | 1.8 يوم (43.6 ساعة) | 16.7M / 16.7M / 5.1M | قوات المستوى 6 (في أراضي التدريب المستوى 17)، ورشة النسيج، حد الأبطال المستوى 60 |
| 18 | مختبر الأبحاث 17 + أراضي التدريب 17 + مستودع الأعشاب 7 | 2.5 يوم (61.1 ساعة) | 28.2M / 28.2M / 9.3M | عتاد الأبطال المستوى 18 |
| 19 | مختبر الأبحاث 18 + تمثال المحارب (المعبد) 17 + ورشة الترياق 10 | 3.6 يوم (85.5 ساعة) | 32.7M / 32.7M / 11.3M | عقد التكنولوجيا العسكرية المتقدمة |
متأخر اللعبة (المستويات 20 – 25)
| المستوى | المتطلبات الأساسية | الوقت الأساسي | الموارد (الحبوب / الأخشاب / الأعشاب) | عمليات الفتح |
|---|---|---|---|---|
| 20 | مختبر الأبحاث 19 + قاعة التحالف 18 + المزرعة 10 | 5.0 أيام (119.7 ساعة) | 60.0M / 60.0M / 18.4M | إنجاز رئيسي! قوات المستوى 7 (أراضي التدريب 20)، ورشة العتاد، فتحة المسيرة 4 |
| 21 | مختبر الأبحاث 20 + أراضي التدريب 20 + مطحنة الخشب 10 | 6.7 أيام (160.3 ساعة) | 85.5M / 85.5M / 27.6M | حد الأبطال المستوى 70، صناعة العتاد البنفسجي |
| 22 | مختبر الأبحاث 21 + تمثال المحارب (المعبد) 21 + بستان الأعشاب 10 | 8.7 أيام (208.4 ساعة) | 111.2M / 111.2M / 36.7M | توسعات إحصائيات الفصائل |
| 23 | مختبر الأبحاث 22 + المستشفى 22 + الصومعة 10 | 11.3 يوم (271.0 ساعة) | 145.2M / 145.2M / 42.8M | صناعة عتاد الذهب |
| 24 | مختبر الأبحاث 23 + الجدار 23 + مستودع الأخشاب 10 | 15.8 يوم (379.4 ساعة) | 171.2M / 171.2M / 56.2M | قوات المستوى 8 (في أراضي التدريب المستوى 24)، زيادة سعة الحشد |
| 25 | مختبر الأبحاث 24 + أراضي التدريب 24 + مستودع الأعشاب 10 | 22.1 يوم (531.1 ساعة) | 277.9M / 277.9M / 97.5M | حد الأبطال المستوى 80، إتقان أشجار التكنولوجيا العسكرية |
نهاية اللعبة (المستويات 26 – 30)
| المستوى | المتطلبات الأساسية | الوقت الأساسي | الموارد (الحبوب / الأخشاب / الأعشاب) | عمليات الفتح |
|---|---|---|---|---|
| 26 | مختبر الأبحاث 25 + تمثال المحارب (المعبد) 25 + ورشة الترياق 13 | 31.0 يوم (743.5 ساعة) | 386.8M / 386.8M / 123.5M | ذروة إتقان عتاد الورشة |
| 27 | مختبر الأبحاث 26 + أراضي التدريب 26 + المزرعة 13 | 43.4 يوم (1041.0 ساعة) | 548.0M / 548.0M / 168.6M | قوات المستوى 9 (في أراضي التدريب المستوى 27) |
| 28 | مختبر الأبحاث 27 + الثكنات 27 + مطحنة الخشب 13 | 60.7 يوم (1457.3 ساعة) | 731.1M / 731.1M / 236.5M | الحد الأقصى للتخزين الآمن وسعات المستشفيات |
| 29 | مختبر الأبحاث 28 + قاعة التحالف 28 + بستان الأعشاب 13 | 78.9 يوم (1894.5 ساعة) | 1.05 B / 1.05 B / 316.4M | التحضير لمرحلة ما قبل T10 |
| 30 | مختبر الأبحاث 29 + أراضي التدريب 29 + ورشة الترياق 15 | 102.6 يوم (2462.9 ساعة) | 1.36 B / 1.36 B / 441.3M | الحد الأقصى المطلق! قوات المستوى 10 (أراضي التدريب 30 + التكنولوجيا)، فرع التكنولوجيا المتخصصة |
دفع الملجأ ليس طحناً طويلاً واحداً بل هو أربعة سباقات بين المعالم التي يفتح كل منها قفزة حقيقية في القوة.
- الملجأ 20 — قوات المستوى 7 وورشة العتاد ذات المستوى العالي تصلان معاً. هذه هي أكبر طفرة قوة فردية في منتصف اللعبة وأول دفع يستحق حرق المسرعات المخزنة من أجلها.
- الملجأ 24، ثم 27 — دفعات الفئات التالية. كل واحدة ترفع فئات القوات وسقوف الورش مرة أخرى.
- الملجأ 30 — الحد الأقصى. يمكن الآن الانتهاء من كل ما تبقى في المدينة.
كن على دراية بما تكلفه المعالم المتأخرة: بعد منتصف العشرينيات، تتجاوز الترقية الفردية 100 مليون مورد. ابدأ في التعامل مع تخزين الموارد كجزء من خطة البناء — راجع قسم توسيع الموارد أدناه.
تكديس سرعة البناء — الرياضيات الصحيحة
تتراكم تعزيزات سرعة البناء من خمسة مصادر، ومعاً تضغط ترقية مدتها 38 يوماً إلى 20 يوماً (من دليل chuppergaming). التعزيزات هي:
| المصدر | المكافأة |
|---|---|
| أبحاث التنمية الشخصية | +5%، ثم +10% عند مستوى العقدة 5 |
| أبحاث التحالف — البناء السريع | +20% |
| مستوى الـ VIP 11 | +45% |
| المدينة الملكية — لقب وزير البناء | +50% |
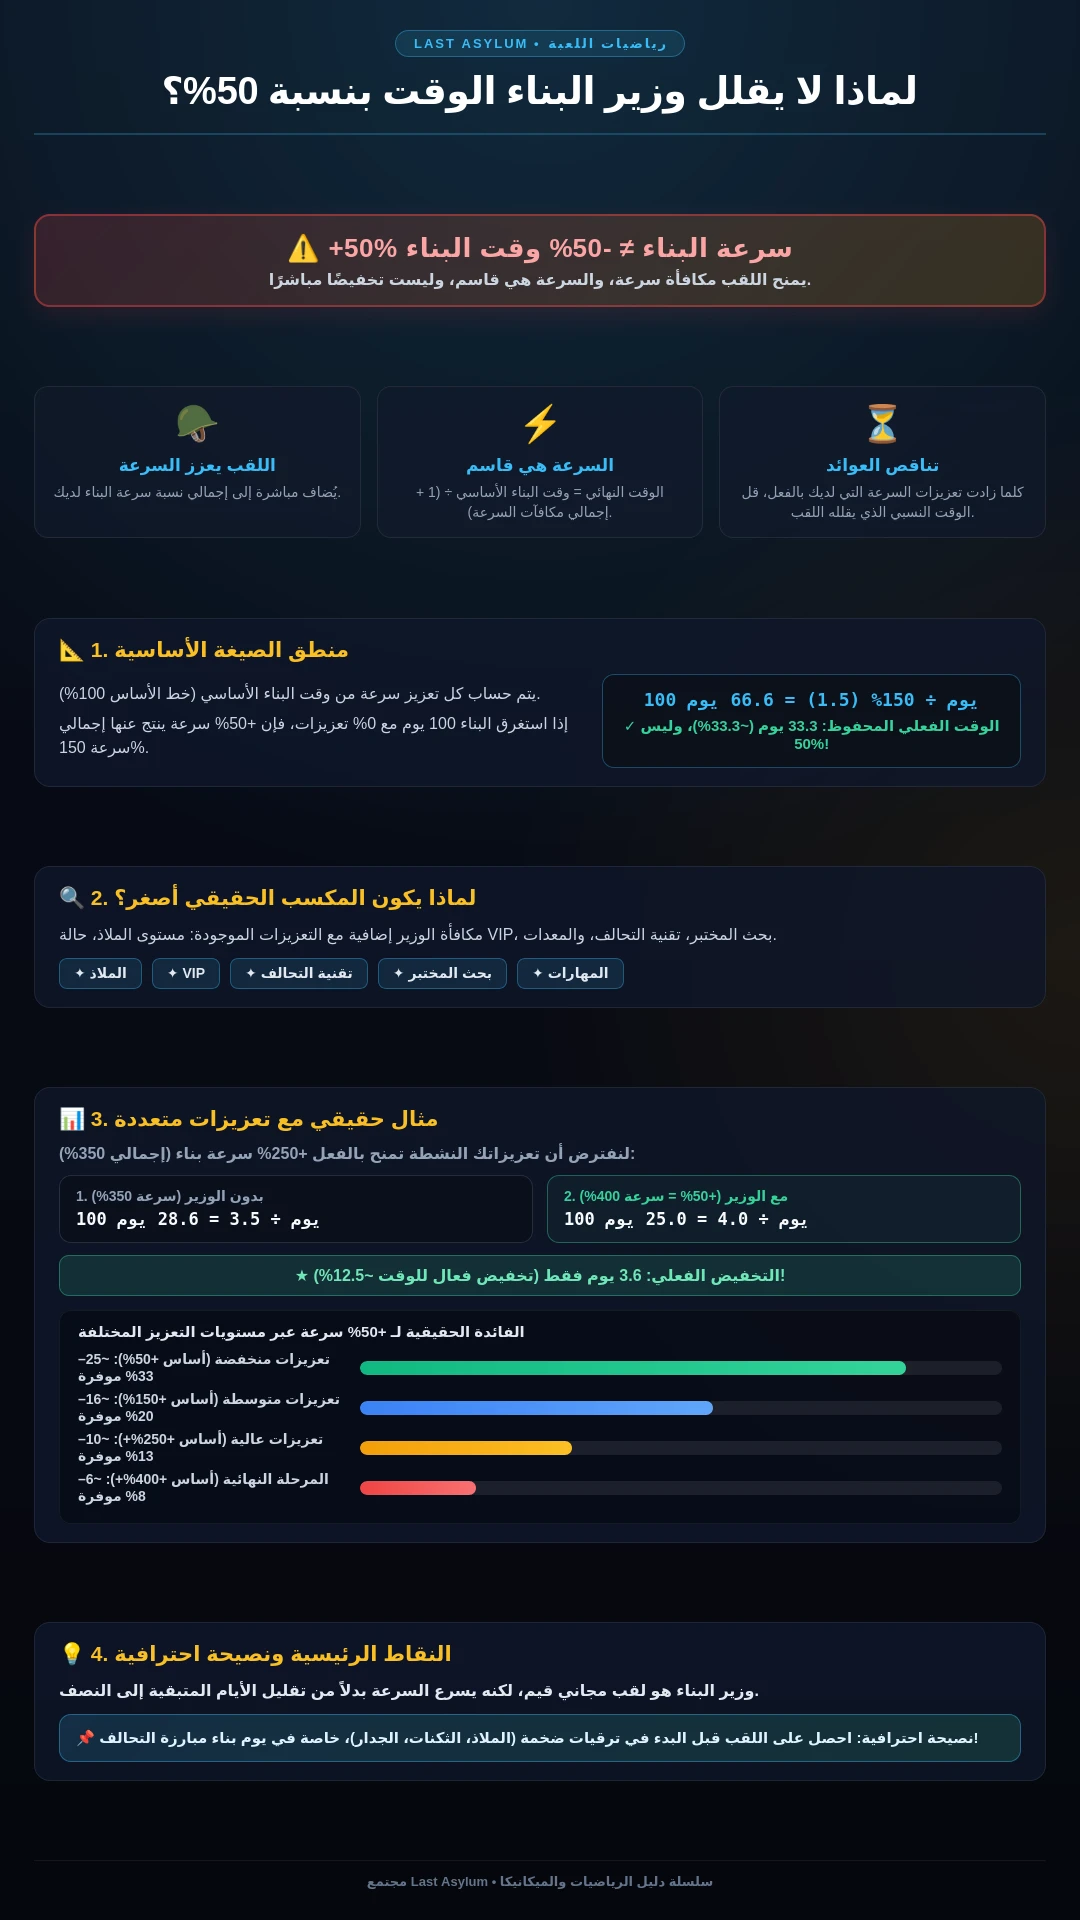
الآن الجزء الذي يخطئ فيه الجميع تقریباً: هذه التعزيزات تتجمع كمضاعفات للسرعة، مطبقة على الوقت الأساسي — لا يمكنك جمع 10% + 5% + 20% + 45% + 50% وتقليص المؤقت بنسبة 130% من أي شيء، لأن اللعبة تقسم على إجمالي السرعة:
$$T = \frac{T_{base}}{100% + \sum \text{speed buffs}}$$
إليك الحساب الحقيقي لترقية ذات وقت أساسي مدته 37 يوماً:
- الوقت الأساسي: 37 يوماً.
- مع تفعيل +10% و +5%: T = 37 / 1.15 ≈ 32.2 يوماً.
- إضافة لقب الوزير (+50%): إجمالي السرعة 165% ← T = 37 / 1.65 ≈ 22.4 يوماً — يوفر اللقب ~10 أيام، وليس “نصف المؤقت”.
- ومع تكديس كل شيء (+10% + 5% + 20% + 45% + 50% = +130%): T = 37 / 2.30 ≈ 16.1 يوماً.
لذلك، فإن كل تعزيز إضافي يساوي ساعات أقل قليلاً من سابقه (تناقص العوائد). النتائج العملية:
- ترتيب التعزيزات لا يهم للنتيجة النهائية — ولكن يجب أن تكون التعزيزات مفعلة عندما يكون المؤقت طويلاً، لأن قيمتها تتناسب طردياً مع الوقت المتبقي.
- قم بتطبيق كل شيء قبل بدء دفعات الملجأ الكبيرة 20+، وليس في منتصف الطريق.
- تأمين لقب وزير البناء ومستوى الـ VIP 11 قبل الدفعة المتأخرة يوفر أياماً من المؤقتات بمفرده.
[!TIP] خدعة تسجيل “إمساك المطرقة”: في مبارزة التحالف والمعالج الأعظم، تُمنح نقاط البناء في لحظة نقرك على أيقونة المطرقة المكتملة، وليس عند بدء المشروع. ابدأ الترقيات الطويلة قبل أيام، ولا تنقر على المطرقة حتى يصل يوم البناء (الثلاثاء).
[!IMPORTANT] قاعدة لقطة شاشة لقب وزير البناء: لقب الوزير (+50% سرعة بناء) ينطبق حصرياً على مشاريع البناء التي بدأت أثناء حمل اللقب.
- اطلب وتلقّ اللقب من الملك/المسؤول.
- انقر على ترقية لوضع مبناك في قائمة الانتظار (يتم قفل المؤقت مع تطبيق التعزيز).
- يمكنك فوراً تسليم اللقب إلى اللاعب التالي — تحتفظ البناء المدرجة في قائمة الانتظار بمؤقتها المخفض بشكل دائم حتى الاكتمال!
توسيع الموارد — خطط لمخزوناتك
تكلفة المبنى في الملجأ 8 لا تخبرك بشيء عن تكلفته في الملجأ 25. المنحنى يعمل على ثلاث مراحل:
| المرحلة | التكلفة النموذجية لكل ترقية | ماذا تعني |
|---|---|---|
| المبكرة (الملجأ 1-10) | آلاف إلى ملايين منخفضة | الإنتاج يغطيها. أنفق بحرية، واجعل قوائم الانتظار ممتلئة. |
| المتوسطة (الملجأ 11-24) | عشرات الملايين | النهب والأحداث تتحمل العبء — النهب اليومي يتوقف عن كونها اختيارياً. |
| المتأخرة (الملجأ 25-30) | أكثر من 100 مليون | خزّن لأيام قبل البدء. الترقية التي لا يمكنك تغذيتها توطل قائمة الانتظار بأكملها. |
وحافظ على توازن المزيج: حافظ دائماً على مخزون من الحبوب والأخشاب والأعشاب. الترقيات المتأخرة تلتهم الثلاثة معاً، ونفاد أي منها في منتصف الدفعة يهدر تماماً المؤقت الذي خزّنت التعزيزات لتوفيره.
خريطة الطريق القصوى لمختبر الأبحاث: كل شجرة تكنولوجيا الـ 13
توفر تكنولوجيات مختبر الأبحاث مضاعفات دائمة مركبة عبر القتال، والاقتصاد، وتسجيل النقاط للتحالف. استناداً إلى خريطة طريق البحث القصوى التي تم التحقق منها، إليك أولوية الطبقة الدقيقة:
| طبقة الأولوية | فرع البحث | التأثير الأساسي | الاستراتيجية الموصى بها |
|---|---|---|---|
| الطبقة S (إلزامي) | مبارزة التحالف | المكافأة الكبرى 1 و 2 | الأولوية المطلقة الأعلى في اللعبة! تفتح المكافأة الكبرى صناديق مبارزة التحالف اليومية من المستوى 4 إلى 9، مما يمنح ملايين الماس، والمسرعات، ورموز الأبطال. قم بتعظيم هذه أولاً! |
| الطبقة S (إلزامي) | التطوير | سرعة البناء والبحث (+10-25%) | يجب بحثها قبل بدء مؤقتات بناء الملجأ 20+ الطويلة لتوفير مئات الأيام من المسرعات. |
| الطبقة A (عالية) | الاقتصاد (الجمع) | سرعة جمع خريطة العالم (+50-100%) | جمع الخريطة ينتج موارد أكثر بـ 20 مرة من عقد إنتاج المدن السلبية. أعط الأولوية لفروع الجمع على الإنتاج. |
| الطبقة A (عالية) | الفصيل الأساسي (المحارب/الرارجر/الساحر) | الهجوم، الدفاع والصحة للفئة المختارة | ركز 100% من الأبحاث العسكرية على الفصيل الأساسي لفرقتك 1. لا تقم أبداً بتوزيع الإحصائيات بالتساوي عبر الفئات الثلاث. |
| الطبقة A (عالية) | حجم المسيرة | +20,000 إلى +50,000 سعة قوات | مضاعف مباشر لضرر الحشد ودفاع الحاميات. الجيوش الأكبر تفوز بالاشتباكات. |
| الطبقة B (متوسطة/متأخرة) | القوات النخبة | تفتح قوات المستوى 10 (T10) | تتطلب الملجأ 30 وإكمال المتطلبات الأساسية بالكامل. إنجاز نهاية اللعبة. |
| الطبقة B (متوسطة/متأخرة) | النقل بالقوافل | سعة القوافل وإحصائيات المرافقة | يعزز دفاع القوافل الذهبية وعوائد النهب بدون خسائر في القوات. |
| الطبقة C (ظرفية) | التكتيكات (الهجومية/الدفاعية) | تقليل الإصابات في حشود معاقل KvK | مثالية قبل أن تبدأ موسم حرب الممالك. |
| الطبقة S (نهاية اللعبة) | التكنولوجيا المتخصصة | تعزيزات تخصصية نشطة وسلبية قوية | تفتح عندما يصل مختبر الأبحاث إلى المستوى 30 وتصل تكنولوجيا قوات النخبة إلى 80%. ذروة شجرة التكنولوجيا. |
معالم فئات القوات
- قوات المستوى 7: الملجأ 20 + أراضي التدريب 20.
- قوات المستوى 8: الملجأ 24-25 + أراضي التدريب 24.
- قوات المستوى 9: الملجأ 27 + أراضي التدريب 27.
- قوات المستوى 10: الملجأ 30 + أراضي التدريب 30 + فرع أبحاث قوات النخبة بنسبة 100%.
استراتيجية مصغرة لكل شجرة (تحليل Korpez)
بمجرد تشغيل الأولوية الكبرى أعلاه، هذه هي الاختصارات داخل الشجرة التي توفر أسابيع من مسرعات البحث:
- شجرة التطوير — سارع نحو العقدة التي تفتح معسكر التدريب الإضافي. ارفع الضمادة السريعة إلى المستوى 2 فقط (بما يكفي للمتابعة)؛ لا تقم أبدا برفعتها للحد الأقصى مبكراً. تكتمل في ~7 أيام مع مساعدة تحالف نشطة.
- شجرة الاقتصاد — افتح مزارع المزرعة الإضافية أولاً، ثم ادفع فوراً نحو عقد إنتاج الأعشاب؛ اترك كل شيء آخر وشأنه حتى وقت لاحق بكثير.
- أشجار الأبطال — ارفع جميع سلالم الفئات الثلاث إلى المستوى 3 بالتساوي (تكلفة العقدة التي تبلغ سبعة أيام لكل عقدة هي خطأ قيل إن المطورين يقومون بإصلاحه)، ثم ادفع فئتك الرئيسية إلى المستوى 5. عقد الأبطال العامة أدناه (الهجوم/الصحة/الدفاع/الضرر) هي الذهب.
- شجرة الجنود — كل عقدة إحصائيات قياسية تستحق العناء، باستثناء عقدة الحمولة النهائية: ترقية مدتها 9 أيام مقابل +1% حمولة هي فخ؛ تخطها.
- شجرة التطوير الكاملة (ما بعد التطوير) — ادفع مباشرة نحو معدل فتك الجنود (-1% ← -5% مع الحد الأقصى) — أفضل عقدة فردية لحروب KvK. تخطَّ سرعة الشفاء؛ يمكن تخفيف سرعة التدريب ببطء؛ سرعة التدريب تستحق الاكتساب في الطريق.
- الاقتصاد المزدهر — افتح بستان الأعشاب، ثم اترك الشجرة: كل شيء آخر هناك أسوأ من نفس أيام البحث المقضية في الجيش.
- علامة تبويب الفرقة (ما بعد الجنود) — قم بتوسيع سعة المسيرة وهجوم الفرقة لفئتك الأساسية؛ واترك البقية عند المستوى 3. يمكن ترك عقد دفاع زعيم العالم عند المستوى 3 — تعظيمها لا يؤتي ثماره.
📚 مرجع: حدود المباني: لماذا تنفد الأعشاب
المصدر: wiki-last-asylum.com، العميل v1.0.87.
تضع حدود المباني سقفاً لعدد المباني من نوع واحد التي يمكن أن تحتفظ بها المدينة، والحد الحقيقي يقع أعلى مما تقترحه لوحة المباني. يحمل المختبر عقدًا تضيف مبنى إضافيًا من كل نوع، ومعها يبدو المخصص على النحو التالي.
| المبنى | الإجمالي المسموح به |
|---|---|
| المزرعة | 5 |
| ساحة الأخشاب | 5 |
| بستان الأعشاب | 5 |
| أرض التدريب | 4 |
| المستشفى | 4 |
| الثكنات | 4 |
يضيف مبنى إنتاج خامس ربعاً إلى إنتاج مورده ويكلف أقل من مستوى آخر على المباني القائمة بالفعل. معرفة ذلك هو الجزء الصعب، حيث تختفي العقدة في شجرة البحث بدلاً من لوحة المباني.
لماذا تنفد الأعشاب في منتصف اللعبة
لا تفتح المخصصات معاً، ويتأخّر جدول الأعشاب. تفتح المزرعة الرابعة وساحة الأخشاب الرابعة عند مستوى الملجأ اثني عشر، بينما يفتح بستان الأعشاب الرابع فقط عند التاسعة عشرة. لسبعة مستويات على التوالي، تأتي الحبوب والخشب من أربعة مبانٍ لكل منهما بينما تأتي الأعشاب من ثلاثة.
ومن هنا جاء الشعور بأن الأعشاب تنفد دائماً أولاً. الشعور دقيق، وينشأ من جدول الفتح بدلاً من كيفية إنفاق اللاعب.
عدد النسخ التي يمكن أن تمتلكها المدينة، متضمنةً عقد المختبر، يظهر بواسطة حاسبة البناء: كل بلاطة معلمة بمستوى الملجأ الذي يفتحها.
📚 مرجع: البحث: ثمن القوة، الفروع والحدود
تم التحقق من البيانات مقابل عميل اللعبة (v1.0.87، المصدر: wiki-last-asylum.com).
يسير البحث ببطء ويكلف الكثير، لذا فإن ترتيب الفروع يهم أكثر من قائمة الأسماء. تأتي القوة بأسعار متفاوتة بشكل كبير عبر فئات المختبر، وفرعان يكرران ما تعود إحصائياهما لاثنين آخرين، وفئة واحدة لا تطلب أي موارد على الإطلاق. التطوير والاقتصاد يبيعان القوة بأرخص ثمن، والأبطال يبيعونها بأغلى ثمن.
ثمن القوة حسب الفئة
قسمة كل ما تكلفه الفئة على إجمالي القوة التي تمنحها تعطي الصورة التالية.
| الفئة | الموارد لكل نقطة |
|---|---|
| التطوير | 794 |
| الاقتصاد | 2,640 |
| الجنود | 12,152 |
| الأبطال | 18,065 |
الفجوة عشرينية. فروع التطوير والاقتصاد المبكرة تؤتي ثمارها أسرع وتأتي أولاً، بينما فروع الأبطال تنتظر لوقت لاحق.
فرعا فرقة يكرران اثنين آخرين
تعطي الفرقة 1 والفرقة 4 نفس المكافآت ونفس الحدود مثل الفرقة 2 والفرقة 3، ولكن بتكلفة أقل بكثير: حوالي 310 مليون مورد و38 يوماً من قائمة الانتظار مقابل مليارات الموارد وآلاف الأيام للزوج الثاني.
الاثنان الأوليان يستحقان الوصول للحد الأقصى، والآخران يمكن أن ينتظرا طالما أن أي شيء آخر يستحق الشراء.
الفئة التي لا تكلف موارد
الفئة المرتبطة بمبارزة التحالف لا تحتاج إلى حبوب أو خشب أو أعشاب. يتم دفع ثمنها بلفائف الدراسة، والتي تُمنح للمنافسة: تصنيفات دوري التحالف، والمبارزة، ومكافآت موسم الساحة، وأهداف النمو. خلف عقدتها يقع فرع قوات النخبة، ومعها الطبقة العاشرة، لذا لا يمكن تخطي الفئة.
حدود الاقتصاد
يدفع المختبر الاقتصاد حتى حد ثابت ولا يتجاوز ذلك. يرتفع إنتاج كل مورد إلى +60%، وسرعة الجمع إلى +25%، وسرعة البناء إلى +25%، وسرعة البحث إلى +50%، وحد الموارد المحمية إلى +50%.
تأتي سرعة البناء من أربعة فروع للبناء السريع، بواقع 5% لكل من الثلاثة الأولى و10% للرابعة. تعمل سرعة البحث بنفس الطريقة، ثلاثة بنسبة 10% ورابعة بنسبة 20%.
يجلس سيد البناء بجانبها ومن السهل الخطأ واعتباره واحداً منها. إنه لا يسرع البناء، بل يجعله أرخص، مأخوذاً حتى 5% من تكلفة الموارد على مدى خمسة مستويات. الأسماء تبدو متشابهة بينما التأثيرات لا: فرع واحد يوفر الوقت، والآخر يوفر الموارد.
يجدر تذكره
قيم القوة والمكافآت في الجداول تراكمية، لذا يُظهر الصف الإجمالي في ذلك المستوى بدلاً من الزيادة فوق السابق. يجب عدم جمع المستويات.
كيف تتغير قائمة بناء مدينة معينة بناءً على عقد السرعة، والتكلفة، وحدود النسخ يظهر بواسطة حاسبة البناء.
🏗️ أدلة المباني
- طاولة العمل الثانية
- قاعة التحالف
- إسطبل التحالف
- ورشة الترياق
- الساحة
- الثكنات
- العمليات السوداء
- كوخ البناء
- قاعة التحف
- ورشة النقوش
- معسكر المستكشف
- برج الصقر
- المزرعة
- ورشة العتاد
- الصومعة
- قاعة الشرف
- بستان الأعشاب
- مستودع الأعشاب
- المستشفى
- تمثال اللورد
- مستودع الأخشاب
- ساحة الأخشاب
- النصب التذكاري — إحصائيات المبنى؛ للجدول الزمني لأحداث عمر الخادم انظر التقويم: النصب التذكاري
- التاجر البدوي
- الإسطبل الخاص
- تمثال الحارس
- عش الغراب
- ورشة الغراب
- مختبر الأبحاث
- السكن
- الملجأ
- فرقة الاستطلاع
- ورشة الصهر
- استراحة الجنود
- الفرقة 1
- الفرقة 2
- الفرقة 3
- الفرقة 4
- الحانة
- المعبد
- أراضي التدريب
- الجدران
- تمثال الساحر
- تمثال المحارب
- برج المراقبة
- ورشة النسيج
🧱 تكتيكات البناء للمبتدئين
حتى الترقيات الموزعة بالتساوي عبر الحصن تتسبب في تعطل الحساب: تنفد الموارد بدقة عندما تكون الحاجة ماسة إليها في الملجأ (Sanctuary)، أو المختبر (Lab)، أو ساحات التدريب (Training Grounds)، أو ورش مضادات السموم (Antitoxin Workshops). هذا القسم هو دليل للمبتدئين — يوضح الغرض من كل مبنى والترتيب الصحيح للتعامل معه.
الملجأ أولاً، وتحديد الحد الأقصى للأبطال بفضله
يضع الملجأ السقف لكل شيء: مستويات الأبطال (تقريباً +5 لكل مستوى في الملجأ — على سبيل المثال، الملجأ 28 يسمح للأبطال بالوصول إلى المستوى 140) وجميع المباني الأخرى. إذا وصل الأبطال الخمسة الأساسيون إلى الحد الأقصى، فلن تفيد مضادات السموم الإضافية — وحدها مستويات الملجأ التالية هي ما يرفع هذا الحد. يتطلب كل مستوى من مستويات الملجأ أيضاً عدة مبانٍ مسبقة (المختبر، ساحات التدريب، الثكنات، التماثيل)، لذا افتح المتطلبات مبكراً وقم تجهيز السلسلة بأكملها. لا تنتظر حتى يصل جميع الأبطال إلى الحد الأقصى — ابدأ مستوى الملجأ التالي مسبقاً.
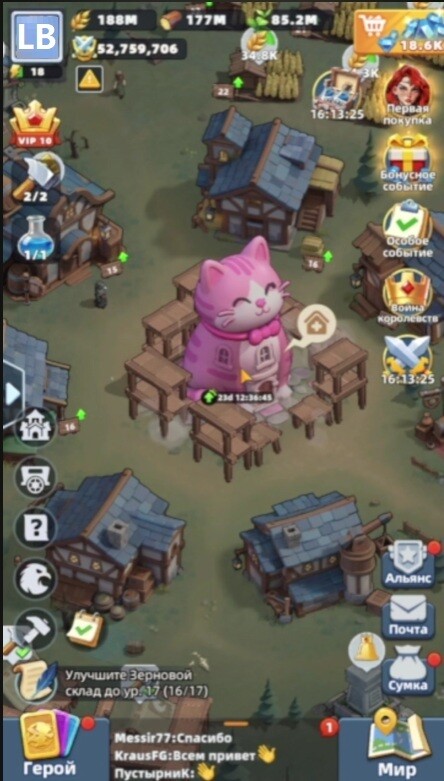
بناّءان، دوران مختلفان
يجب أن تقوم فتحة البناء المؤقتة الثانية (500 ماسة) بوظيفة مختلفة عن الأولى: الفتحة الطويلة تتولى الملجأ، أو المختبر، أو أي مبنى إلزامي آخر يستغرق عدة أيام، بينما ينهي البناء المجاني الترقيات القصيرة — المزارع، ومطاحن الأخشاب، والحدائق، وورش مضادات السموم، والمتطلبات الوسيطة للمستوى التالي من الملجأ. وجود بناّءين في مشاريع طويلة يعني عدم وجود فتحة للمتطلبات المفاجئة؛ ووجودهما معاً في مهام صغيرة يترك المبنى الرئيسي متأخراً إلى الأبد.
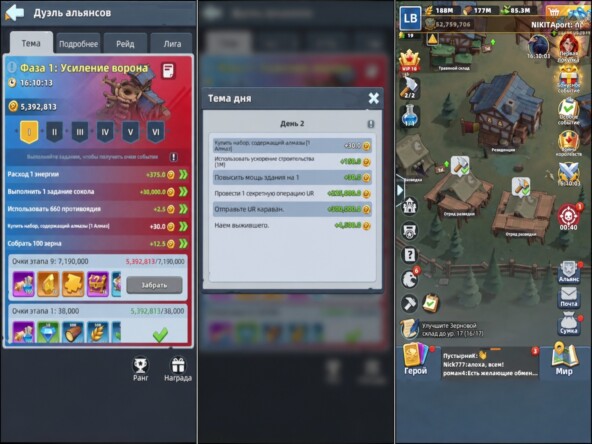
قم بتوقيت إكمال المشاريع الكبيرة بالتزامن مع يوم البناء في مبارزة التحالف (Alliance Duel): المبنى المكتمل ليس من الضروري المطالبة به فوراً — اترك المطرقة معلقة فوقه واقرص عليها بعد انتقال مرحلة الحدث، لتسجيل نقاط مقابل العمل المنجز مسبقاً. يستمر المبنى في شغل الفتحة، لذا احتفظ بالمطرقة فقط فوق المشاريع الكبيرة. احصل على كل مساعدة التحالف أولاً، ثم أنفق عناصر التسريع، ثم طالب بالمكافأة.
مباني الموارد يمكن أن تتأخر خلف الركب
المزارع ومطاحن الأخشاب وحدائق الأعشاب تمد الحصن بالحبوب والأخشاب والأعشاب — لكنها لا تحتاج إلى مطابقة الملجأ. الفارق بمقدار خمسة إلى ستة مستويات يظل مريحاً. بينما يجلس البناّء الثاني على الملجأ، يرفع البناّء الأول مباني الموارد تدريجياً، وورش مضادات السموم قبل أي شيء آخر: حيث تُستهلك مضادات السموم باستمرار للارتقاء بمستوى الأبطال.
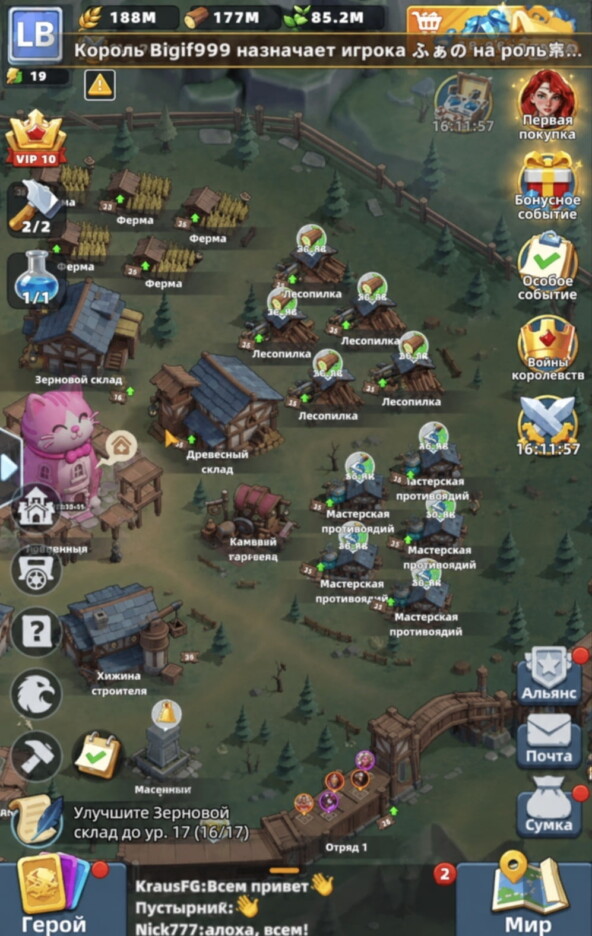
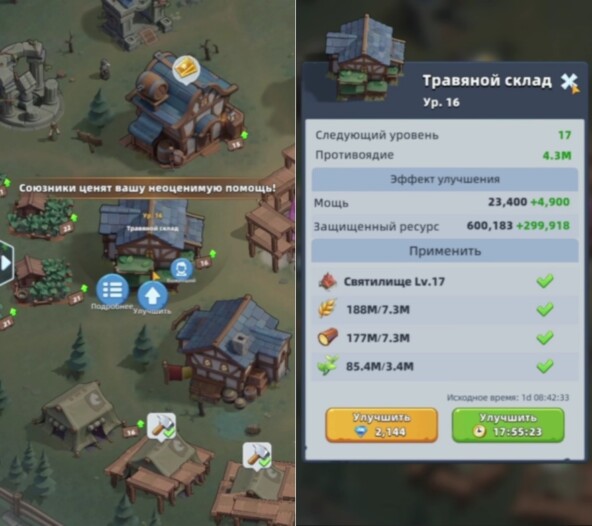
مستودعات (الأخشاب، الحبوب، الأعشاب) ترفع فقط الكمية المحمية التي لا يستطيع المهاجمون نهبها. فهي لا تفتح أي مستويات، أو تقنيات، أو قوات، لذا حافظ على إبقائها متأخرة بشكل ملحوظ ما لم يحددها متطلب الملجأ. الاستراتيجية الأكثر أماناً: احتفظ بحزم المواد غير مفتوحة في المخزون وافتحها قبل البناء مباشرة — فحينها لن يفقد حتى المستودع الضعيف أي شيء يُذكر.
الحانة، المعبد، ومختبر الأبحاث
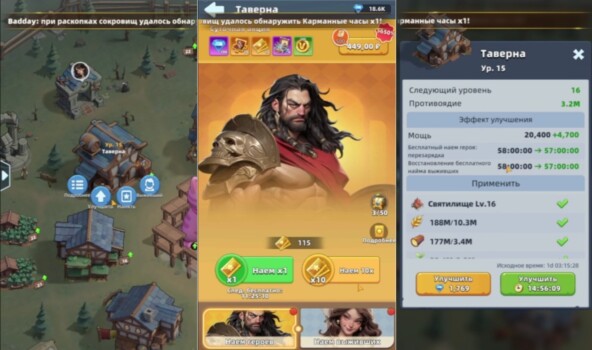
تقوم الحانة بتجنيد الأبطال والناجين، وترقيتها تقصر فترة الانتظار للتوظيف المجاني — ولكن بمحو ساعة واحدة فقط بعد عدة مستويات. قم بترقيتها بناءً على متطلبات الملجأ أو يوم البناء؛ والأهم بكثير هو الضغط فعلياً على عمليات التوظيف المجانية الجاهزة. أول 50 عملية سحب تتجه نحو ضمان الحصول على شظايا Arthur.
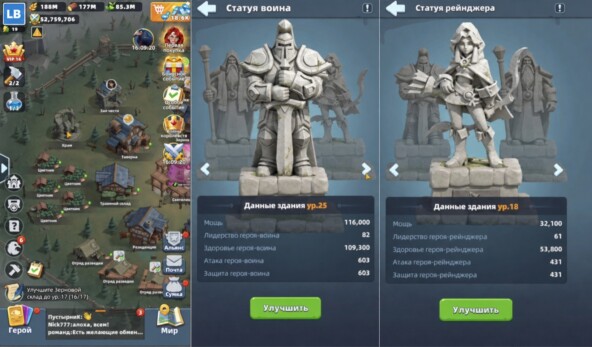
تمنح تماثيل المحارب (Warrior)، والحارس (Ranger)، والساحر (Warlock) في المعبد نقاط هجوم/صحة/دفاع (ATK/HP/DEF) مباشرة للفصيل. ابدأ بفصيل فرقة العمل 1 الخاصة بك، ولكن لا تفرط في الميل نحو جانب واحد: التماثيل الأخرى تدخل ضمن متطلبات الملجأ، وتحتاجها الفرقتان 2 و3 لتنفيذ الاستكشافات.
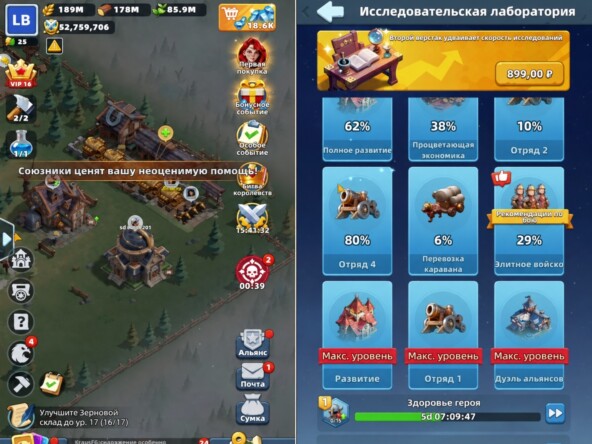
بعد الملجأ، يُعد مختبر الأبحاث (Research Lab) المبنى الأهم — حيث تتوفر تقنيات الاقتصاد، والأبطال، والقوات، والتطوير. قم بإجراء أبحاث شجرة مبارزة التحالف أيام الأربعاء حتى تسجل نفس عناصر التسريع نقاطاً في الحدث، ولا تحرق جميع عناصر التسريع العامة في المباني: يجب أن يغطي جزء من المخزون الأبحاث، وخاصة التقنيات العسكرية باهظة الثمن.
الجيش: ساحات التدريب، الثكنات، المستشفى
تفتح ساحات التدريب الأعلى رتب قوات أقوى (T1–T10). لا ترقِ جميع الساحات بالتساوي: حافظ على إحداها في الحد الأقصى واستخدم البقية لتدريب قوات رخيصة بكميات كبيرة، ثم ترقيتها في الساحات الرئيسية — تكلفة موارد مقاربة، ووقت أقل بكثير. يجب أن تواكب الساحة الرئيسية الملجأ نظراً لأن الفئات الجديدة ومتطلبات الملجأ تعتمد عليها معاً.
تحتوي الثكنات على الجيش المُدرب، وسعتها تمثل قيداً سريعاً: هجمات صيد اللصوص ومعارك الجمعة/السبت تحرق آلاف الجنود. إذا امتلأت الثكنات، تتعطل الساحات وتخرج المسيرات غير مكتملة — لذا قم بترقيتها جنباً إلى جنب مع الساحة الرئيسية. سعة المستشفى وسرعة الشفاء تحددان مدى الضربات التي يمكن أن يتحملها الحساب: إذا ملأته معركة واحدة، فقد حان وقت الترقية. المستشفات صغيرة الحجم تحول الجرحى إلى خسائر دائمة.
كوخ البناء، قاعة التحالف، والجدران
كوخ البناء (Builder’s Hut) يقصر وقت كل مشروع مستقبلي، لذا يتضاعف الاستثمار عبر الحساب بأكمله. قاعة التحالف (Alliance Hall) تطور مساعدة الحلفاء (نقرات أكثر، دقائق أكثر لكل نقرة) — اطلب المساعدة دائماً في اللحظة التي يبدأ فيها المؤقت الطويل ولا تنفق عناصر التسريع إلا بعد أن ينتهي الحلفاء، وإلا سيضيع الوقت المجاني هدرأ.
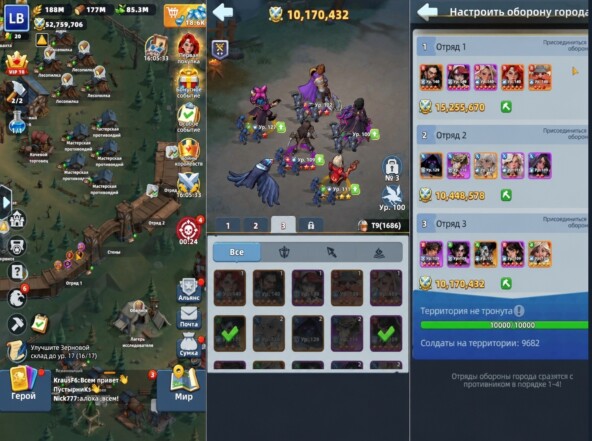
تقف ثلاث فرق دفاعية على الجدران، إلى جانب التحصينات وزر الإطفاء. لإعادة ترتيبها، يجب أن تكون جميع المسيرات في القاعدة. راقب مربعات الاختيار الخاصة بالدفاع: عندما تكون مفعلة، ينضم الأبطال والجنود إلى الدفاع — ضد مهاجم أقوى يعني ذلك خسائر فادحة، لذا يقوم العديد من اللاعبين بإلغاء التحديد أثناء حروب الخوادم المشتركة لإنقاذ الجيش، ولكن يجب إعادة تحديد المربعات قبل حصار الأموات (Undead Siege) وإلا فلن تُوقف الأمواج. مستويات الجدران ترفع أيضاً سرعة المسيرة لهجمات الآفات (Blight)، وجمع الموارد، والعودة.
معسكر الأبحاث، برج المراقبة، برج الصقر
معارك معسكر الأبحاث (تذكرة المعركة - battle pass) لا تكلف جنوداً — فهو المختبر المثالي لاختبار التشكيلات ومقارنة الأبطال — بالإضافة إلى دخل سلبي كل ساعة (حبوب، أخشاب، أعشاب، مضادات السموم) وصناديق كل عدة مراحل. يشغل برج المراقبة استكشافات الفصائل (فصيل واحد لكل نمط، يتم تحديثه كل 3 أيام تقريبا): لا تختار الحد الأقصى من النجوم “من أجل النمو” — الجري في منتصف الطريق العالق يسجل نقاطاً أسوأ من التطهير الكامل بنجم أقل.
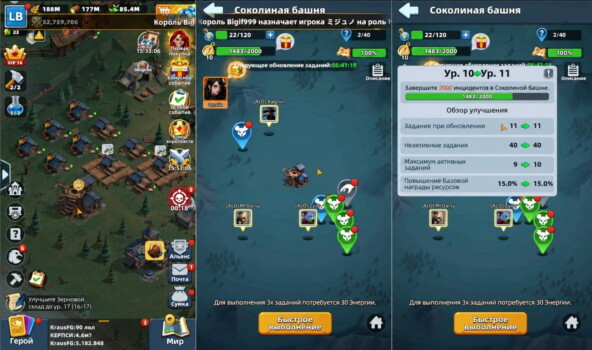
يصدر برج الصقر مهام يومية (مهام جديدة تقريباً كل 6 ساعات؛ ~11 متاحة على برج مطور ولكن 9 فقط تناسب اللوحة، والباقي تصطف في قائمة الانتظار — مهام الفيضان تختفي). تكلف المهام طاقة وتدفع موارد ومضادات سموم وعناصر غراب (Raven) من بين أمور أخرى. قم بترقية البرج فقط إذا كانت المهام تُمحى يومياً بالفعل.
حي العتاد وما يجب تأجيله
تصنع ورشة الصهر (Smelting Workshop) أحجار العتاد (Gear Stones) (السيف عالي المستوى الواحد قد يتطلب أكثر من 20,000 حجر لكل ترقية — طوّره مبكراً)، وتصنع ورشة النسيج (Weaving Workshop) القماش الذي يتم توليفه لاحقاً إلى فولاذ للعتاد الذهبي، بينما تصنع ورشة العتاد (Gear Workshop) القطع. مجموعة ذهبية كاملة لفرقة العمل 1 تستغرق وقتاً طويلاً، لذا يجب ألا تتعطل الإنتاجية أبداً — سيف حامل جيد ودروع دبابة يتفوقان على عدة مستويات عشوائية في مكان آخر.
قم بالتأجيل عندما تقيدك الموارد: فرقة الاستطلاع (Scout Squad) (استطلاع أسرع، لا توجد سرعة تطوير)، المستودعات فوق المتطلبات، الحانة فوق المتطلبات. يمكن ترقية ورشة الغراب (Raven Workshop) في يوم البناء لتسجيل نقاط المبارزة. الحلبة (Arena)، وعش الغراب (Raven Nest)، ومركز العمليات السوداء (Black Ops Center)، وقاعة التحف (Curio Hall) لا ترتقي على الإطلاق — استخدمها بانتظام، فهي لا تكلف موارد بناء.
ترتيب المبتدئين في سطر واحد: الملجأ على الفتحة الطويلة ← المختبر ← ساحة التدريب الرئيسية، الثكنات، المستشفى، تمثال الفصيل الرئيسي ← كوخ البناء وقاعة التحالف بشكل مطرد ← مباني الموارد أدنى بـ ~5-6 مستويات من الملجأ ← حي العتاد ← الساحات الإضافية والمباني الثانوية ← المستودعات، الحانة، الكشافة حسب المتطلبات أو الفائض.
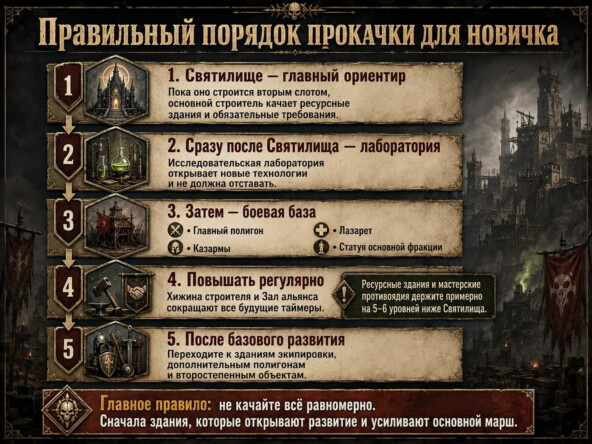
المصدر: Здания Last Asylum: Plague - гайд для новичков بواسطة Гейм-Знаток على DTF.
🎥 أدلة الفيديو
أدلة فيديو مختارة وتحليلات استراتيجية من صناع المحتوى في المجتمع
📝 نص الحوار 17:42 (1062 сек) ▼
📝 نص الحوار 13:24 (804 сек) ▼
ابحث في YouTube عن هذا الموضوع: «Buildings & Base»
استعلام البحث: Last Asylum Plague building speed construction guide
🏰 مخطط ترقية الملجأ
إجمالي الموارد الدقيق، وقت البناء الصافي مع تعزيز السرعة، وسلاسل المباني المطلوبة
الحبوب
0
الخشب
0
الأعشاب
0
الوقت الأساسي
0
مع التعزيز الخاص بك
0
الوقت الموفر
0
المباني المطلوبة:
💡 القاعدة الذهبية "أمسك المطرقة":
لا يتم منح نقاط القوة في البناء في فعاليتي Alliance Duel و Supreme Healer إلا عند النقر على أيقونة المطرقة لإكمال البناء. ابدأ الترقيات قبل أيام، ولكن لا تضغط على المطرقة إلا في يوم البناء المحدد (الثلاثاء)!
مسرعات البناء والماسات بخصم يصل إلى 20%
هل تعمل على ترقية Sanctuary إلى المستوى 25–30؟ اشحن الماسات وحزم البناء مع تسليم فوري عبر الـ UID على LDShop.
📖 اقرأ التالي
هل ساعدك هذا الدليل؟