ลำดับความสำคัญในการก่อสร้าง & แผนผังเส้นทางศูนย์บัญชาการ (Sanctuary)
แผนผังเส้นทางศูนย์บัญชาการ (Sanctuary) สู่เลเวล 30, ลำดับความสำคัญในการก่อสร้าง, หน้าที่ของสิ่งปลูกสร้างแต่ละแห่ง และวิธีซ้อนทับบัฟความเร็วในการก่อสร้างตามลำดับที่ถูกต้อง
☰ ในหน้านี้ 31 ▾
🗓 อัปเดตแล้ว: 2026-10-12
การก่อสร้างใน Last Asylum: Plague เป็นเกมระยะยาว — การอัปเกรดศูนย์บัญชาการ (Sanctuary) จากเลเวล 1 ถึงเลเวล 30 กินเวลาหลายเดือน และการเรียงลำดับผิดจะทำให้คุณเสียเวลาไปเป็นสัปดาห์ หน้าตานี้คือลำดับการก่อสร้างตามที่คอมมูนิตีแนะนำ: สิ่งปลูกสร้างใดที่สำคัญและต้องสร้างตามลำดับไหน, แผนผังศูนย์บัญชาการทีละเลเวล, และสูตรคณิตศาสตร์ที่แน่นอนของการซ้อนทับความเร็วในการก่อสร้าง
คำถามเดียวที่เป็นตัวตัดสินทุกช่องคิว: สิ่งนี้ทำให้คุณแข็งแกร่งขึ้นหรือเร็วขึ้นหรือไม่? ถ้าคำตอบคือไม่ ก็ปล่อยไว้ก่อน
ลำดับความสำคัญในการก่อสร้าง
เมื่อมีสิ่งปลูกสร้างหลายอย่างพร้อมให้อัปเกรดพร้อมกัน ลำดับของคอมมูนิตีจะถูกกำหนดไว้ดังนี้:
- ศูนย์บัญชาการ (Sanctuary) — ก่อนเสมอ มันเป็นตัวปลดล็อกทุกเลเวลในเมือง, จำกัดเลเวลสูงสุดของฮีโร่, และปลดล็อกระดับทหาร เมื่อไหร่ก็ตามที่มีการอัปเกรดศูนย์บัญชาการได้ ให้ใส่คิวนี้เป็นอันดับแรกสุด
- ห้องวิจัย (Research Lab) — ใช้รันสายเทคโนโลยีของคุณและทำหน้าที่เป็น เงื่อนไขบังคับสำหรับศูนย์บัญชาการเลเวล 11 ถึง 30 (หากไม่มีห้องวิจัยที่เลเวลสูงพอ คุณจะไม่สามารถเริ่มอัปเกรดศูนย์บัญชาการในช่วงกลาง/ท้ายเกมได้)
- สนามฝึกทหาร (ลานฝึก) — ปปลดล็อกระดับทหาร (T1–T10) ให้ใช้ สูตรแยก 1 สูงสุด + 3 ต่ำ: อัปเกรดสนามฝึกหลักแค่ 1 แห่งให้ตรงกับขีดจำกัดเลเวลของศูนย์บัญชาการ, และปล่อยอีก 3 แห่งไว้ที่เลเวล 10 เพื่อผลิต T4 ราคาถูกจำนวนมากไว้ใช้เลื่อนขั้น (ประหยัดเวลา 6–7 ชั่วโมงต่อรอบและทรัพยากรนับล้าน!)
- ค่ายทหาร (ค่ายทหาร) — ความจุทหาร กองทัพประจำการที่ใหญ่ขึ้นหมายถึงพลังที่มากขึ้นและความรุนแรงที่มากกว่าต่อการเดินทัพแต่ละครั้ง
- โรงพยาบาล (Infirmary) — รักษาทหารที่บาดเจ็บหลังความพ่ายแพ้ โรงพยาบาลขนาดเล็กหมายความว่าทุกครั้งที่แพ้ คุณจะต้องสูญเสียทหารไปอย่างถาวรและกู้คืนไม่ได้
- โรงงานหลอมโลหะ (โรงหลอม) — ผลิตและกลั่นหินอุปกรณ์ (Gear Stones) สำหรับอัปเกรดสวมใส่ เร่งอัปเกรดไปที่ เลเวล 25 ทันทีที่ศูนย์บัญชาการของคุณอนุญาต เพื่อหลีกเลี่ยงปัญหาคอขวดในmid-gameสำหรับอาวุธสวมใส่
- กำแพงเมือง (Walls) — อัปเกรดตามเงื่อนไขไมล์สโตนอย่างเคร่งครัด (จำเป็นสำหรับศูนย์บัญชาการเลเวล 5, 6, 9, 10, 12 และ 24 เท่านั้น; ไม่เคยจำเป็นสำหรับอีก 24 เลเวลที่เหลือ) กำแพงเมืองไม่ได้ให้ค่าสถานะการต่อสู้หรือปกป้องทหารจากความเสียหายใดๆ! มันให้เพียงความทนทานในการป้องกันเมืองเพื่อต้านทานไฟและการเคลื่อนย้ายบังคับระหว่างการถูกล้อมเท่านั้น
- สิ่งปลูกสร้างทรัพยากร & คลังสินค้า (Resource Buildings & Depots) — อัปเกรดตามความจำเป็นสำหรับเงื่อนไขของศูนย์บัญชาการเท่านั้น (คลังไม้, ยุ้งฉาง, และคลังสมุนไพร)
กฎเบื้องหลังรายการนี้: หากสิ่งปลูกสร้างใดไม่ได้ทำให้คุณแข็งแกร่งขึ้นหรือเร็วขึ้น ก็ยังไม่เร่งด่วน สิ่งปลูกสร้างผลิต, คลังสินค้า และของตกแต่งยังคงถูกสร้างขึ้น — แต่จะทำก็ต่อเมื่อสิ่งปลูกสร้าง 7 อย่างข้างต้นไม่มีอะไรให้ทำ หรือมีเงื่อนไขบังคับเท่านั้น
หน้าที่ของสิ่งปลูกสร้างแต่ละแห่ง
ข้อมูลอ้างอิงอย่างรวดเร็วสำหรับสิ่งปลูกสร้างที่คุณจะต้องกดใช้งานจริง การแปลอาจแตกต่างกันไปในแต่ละไคลเอนต์เกม ดังนั้นเมื่อชื่อสองชื่อฟังดูคล้ายกัน ให้ตรวจสอบทูล팁ในเกมสำหรับผลลัพธ์ที่แน่นอนในเวอร์ชันของคุณ
| สิ่งปลูกสร้าง | สิ่งที่ทำ | บันทึกจากคอมมูนิตี |
|---|---|---|
| ศูนย์บัญชาการ (Sanctuary) | ควบคุมเลเวลสิ่งปลูกสร้างอื่นๆ ทั้งหมด, กำหนดขีดจำกัดเลเวลฮีโร่, มอบค่า EXP ต่อการอัปเกรด, และปลดล็อกสิ่งปลูกสร้างและฟีเจอร์ต่างๆ ตามเลเวลที่เพิ่มขึ้น | อัปเกรดบนคูลดาวน์ มันคือเลเวลผู้เล่นจริงของคุณ |
| กำแพงเมือง (Walls) | ให้ความทนทานในการป้องกันเมืองและลดอัตราการเสื่อมสภาพของการป้องกันระหว่างการถูกล้อม ไม่ได้ปกป้องทหารในการต่อสู้และไม่ให้ค่าสถานะการต่อสู้ใดๆ! | อัปเกรดตามเงื่อนไขที่เลเวล 5, 6, 9, 10, 12 และ 24 เท่านั้น อย่าเสียคนงานสร้างกับมันนอกเหนือจากนี้ |
| กระท่อมผู้สร้าง (กระท่อมช่างก่อสร้าง) | ขยายหน้าต่างการทำเสร็จฟรีบนตัวนับเวลาการก่อสร้าง (เวลาเร่งความเร็วฟรี) ผู้รอดชีวิตที่ประจำการอยู่ภายในจะให้โบนัสพิเศษ — สลับผู้รอดชีวิตที่ดีกว่าเข้ามาเมื่อคุณรับสมัครพวกเขา | รักษาเลเวลไว้เท่ากับศูนย์บัญชาการจนถึงศูนย์บัญชาการ 15 เพื่อรับหน้าต่างการทำเสร็จฟรีสูงสุด |
| ห้องวิจัย (Research Lab) | รันสายเทคโนโลยีของคุณ: เศรษฐกิจ, การทหาร, และการวิจัยการพัฒนา ห้องวิจัย 1 และ 2 ที่รวมกัน: ทั้งสองคิวได้รับบัฟความเร็วที่เหมาะสม | ลำดับความสำคัญ #2 — เงื่อนไขต่อเนื่องสำหรับศูนย์บัญชาการ 11–30 เร่งรีบ Super Reward 1 & 2 ในสายดวลพันธมิตรเพื่อปลดล็อกหีบระดับ 4–9! |
| สนามฝึกทหาร (ลานฝึก) | ปลดล็อกระดับทหารใหม่ (T2 ที่เลเวล 3, T3 ที่เลเวล 6, T4 ที่เลเวล 10, T5 ที่เลเวล 14, T6 ที่เลเวล 17, T7 ที่เลเวล 20, T8 ที่เลเวล 24, T9 ที่เลเวล 27, T10 ที่เลเวล 30) และเพิ่มความจุในการฝึก | อัปสนามฝึก 1 แห่งให้เต็มสำหรับระดับสูงสุด; เก็บอีก 3 แห่งที่เลเวล 10 เพื่อฟาร์ม T4 ควบคู่และเลื่อนขั้น (ประหยัด 6–7 ชม. ต่อรอบ) |
| ค่ายทหาร (ค่ายทหาร) | เพิ่มความจุของกองทัพประจำการทั้งหมดในเมืองของคุณ | อัปเกรดเพื่อรองรับกองทัพขนาดใหญ่สำหรับ KvK และสงครามอาณาจักร |
| โรงพยาบาล (Infirmary) | รักษาทหารที่บาดเจ็บหลังความพ่ายแพ้ | โรงพยาบาลขนาดเล็ก = สูญเสียทหารถาวรหลังการต่อสู้ที่แพ้ทุกครั้ง |
| โรงงานสารต้านพิษ (โรงปรุงยาแก้พิษ) | ผลิตยาแก้พิษ / สารต้านพิษ —ทรัพยากรฮีโร่สำคัญที่ใช้ในระบบการพัฒนาฮีโร่ทั้งหมด | สร้างที่เลเวล 10 และผลิตต่อเนื่อง 24/7 |
| โรงงานเกราะ / หลอมโลหะ / ทอผ้า (Gear / Smelting / Weaving Workshops) | คราฟต์และอัปเกรดอุปกรณ์ฮีโร่จากวัตถุดิบที่ฟาร์มมา | เร่งโรงงานหลอมโลหะไปที่เลเวล 25 เพื่อการผลิตหินอุปกรณ์ที่สม่ำเสมอ; โรงงานเกราะปลดล็อกที่ศูนย์บัญชาการ 20 |
| วิหาร (รูปปั้นนักรบ) (วิหารเทพ / รูปปั้นนักรบ) | สิ่งปลูกสร้างลัทธิรวม (รวมรูปปั้นนักรบ, เรนเจอร์, และ Warlock เข้าด้วยกัน) ให้โบนัสค่าสถานะเป็นเปอร์เซ็นต์แก่ฝ่ายที่คุณเลือก | อัปเกรดเพื่อเพิ่มพลังกองทัพและตอบสนองเงื่อนไขของศูนย์บัญชาการ |
| หอเกียรติยศ (หอเกียรติยศ) | แสดงเลเวลเกียรติยศของฮีโร่และปลดล็อกร้านค้าเกียรติยศ (แหล่งหลักของพิมพ์เขียวอุปกรณ์ UR) | จำเป็นสำหรับการพัฒนาอุปกรณ์ช่วงท้ายเกม ซื้อพิมพ์เขียวอุปกรณ์ UR เท่านั้น |
| หอคูริโอ (หอสะสม) | เก็บสะสมคูริโอที่ให้โบนัสติดตัวแก่สิ่งปลูกสร้าง, เศรษฐกิจ, และพลังต่อสู้ของกองทัพ | อัปเกรดระดับดาวของคูริโอเพื่อบูสต์ถาวรทั้งไอดี |
| โรงเตี๊ยม (โรงเตี๊ยม) | รับสมัครฮีโร่ — แบนเนอร์และระบบสุ่มอยู่ที่นี่ | เก็บเพชรไว้สำหรับอีเวนต์ UR เฉพาะกิจ แทนที่จะเอามาทิ้งที่นี่ |
| หอคอยฟอลคอน (Falcon Tower) | สร้างภารกิจประจำวันให้รางวัลเป็นเพชร, ความเร็ว, ชิ้นส่วนฮีโร่, และสารต้านพิษ เลเวล 8 ปลดล็อกการกดรับครั้งเดียว | ใช้กลยุทธ์ “สะสมสูงสุด − 1” เพื่อดองเควสต์ที่ทำเสร็จแล้วไว้สำหรับวันเบิ้ลคะแนน |
| หอประชุมพันธมิตร (ศูนย์สื่อสารกิลด์) | เพิ่มจำนวนการช่วยเหลือจากพันธมิตรที่คุณได้รับ ไม่มีผลกับทหารรักษาการณ์หรือการระดมพล! | เลเวลสูงขึ้น = ได้รับความช่วยเหลือจากพันธมิตรมากขึ้น (สูงสุด 30 ครั้งที่เลเวล 25, ลดเวลาลง ~30% ฟรีๆ) สำคัญมากในการประหยัดความเร็วและเป็นเงื่อนไขบังคับสำหรับศูนย์บัญชาการเลเวล 7, 8, 9, 13, 20 และ 29 |
ค่ายทหาร vs สนามฝึกทหาร — กับดักการตั้งชื่อ
สิ่งปลูกสร้างหนึ่งเปิดระดับทหารใหม่ (สนามฝึกทหาร - ลานฝึก), และอีกแห่งเพิ่มจำนวนทหารที่คุณสามารถถือครองได้ (ค่ายทหาร - ค่ายทหาร) เปิดสิ่งปลูกสร้างและอ่านทูล팁: หากผลลัพธ์ที่ระบุคือการปลดล็อกระดับและขีดจำกัดคิวฝึก นั่นคือสนามฝึกทหาร; หากเป็นความจุทหารทั้งหมด นั่นคือค่ายทหาร
แผนผังเส้นทางศูนย์บัญชาการตามเลเวล (1 ถึง 30)
ความเข้าใจผิดที่พบบ่อยคือ กำแพงเมืองจำเป็นสำหรับทุกๆ เลเวล พวกมันไม่ใช่! กำแพงเมืองจำเป็นเพียง 6 ครั้งตลอดทั้งเกม (เลเวล 5, 6, 9, 10, 12 และ 24)
โครงสร้างการควบคุมที่แท้จริง:
- ห้องวิจัยคือคอขวดหลัก: สำหรับทุกเลเวลตั้งแต่ 12 ถึง 30 ห้องวิจัยจะต้องอยู่ที่
เลเวล (เป้าหมาย − 1) - เงื่อนไขทางการทหารรองจะหมุนเวียนไป: สนามฝึกทหาร (7, 8, 11, 15, 18, 21, 25, 27, 30), วิหาร / รูปปั้นนักรบ (14, 16, 19, 22, 26), หอประชุมพันธมิตร (7, 8, 9, 13, 20, 29), ค่ายทหาร (17, 28), และโรงพยาบาล (10, 23)
- เงื่อนไขทรัพยากรย่อยหมุนเวียนไป: คลังไม้/ยุ้งฉาง/คลังสมุนไพร, โรงงานสารต้านพิษ, ฟาร์ม, โรงเลื่อย, และสวนสมุนไพร
ด้านล่างคือข้อมูลระดับต่อระดับที่สมบูรณ์และเป็นทางการซึ่งสกัดโดยตรงจากไบนารีไคลเอนต์เกม:
ช่วงต้นเกม (เลเวล 1 – 10)
| เลเวล | เงื่อนไขเบื้องต้น | เวลาพื้นฐาน | ทรัพยากร (ธัญพืช / ไม้ / สมุนไพร) | การปลดล็อก |
|---|---|---|---|---|
| 2 | ไม่มี | 2 วินาที | 32 / 32 / 0 | ความคืบหน้าฐาน, ขีดจำกัดเลเวลฮีโร่ 10 |
| 3 | ไม่มี (เควสต์บทที่ 17) | 3 วินาที | 983 / 983 / 0 | ทหารระดับ 2 (ที่สนามฝึกทหาร เลเวล 3) |
| 4 | คลังไม้ 1 + ยุ้งฉาง 1 + คลังสมุนไพร 1 | 5 นาที | 2.6K / 2.6K / 0 | คลังทรัพยากร, กระท่อมผู้สร้าง |
| 5 | กำแพงเมือง เลเวล 3 | 10 นาที | 19.7K / 19.7K / 0 | ขีดจำกัดเลเวลฮีโร่ 20 |
| 6 | กำแพงเมือง เลเวล 5 | 34 นาที | 92.7K / 92.7K / 0 | ทหารระดับ 3 (ที่สนามฝึกทหาร เลเวล 6), หอสังเกตการณ์, เรดาร์ |
| 7 | สนามฝึกทหาร 4 + หอประชุมพันธมิตร 3 | 1.5 ชม. | 235.8K / 235.8K / 0 | หอประชุมพันธมิตร (ปุ่มช่วยเหลือพันธมิตร), ห้องวิจัย |
| 8 | สนามฝึกทหาร 6 + หอประชุมพันธมิตร 5 | 3 ชม. | 395.6K / 395.6K / 0 | หอคอยฟอลคอน (ภารกิจประจำวัน) |
| 9 | กำแพงเมือง 8 + หอประชุมพันธมิตร 7 | 4.3 ชม. | 605.8K / 605.8K / 208.7K | ขีดจำกัดเลเวลฮีโร่ 30 |
| 10 | กำแพงเมือง 9 + โรงพยาบาล 7 | 5.6 ชม. | 748.7K / 748.7K / 232.9K | ทหารระดับ 4 (ที่สนามฝึกทหาร เลเวล 10), โรงงานสารต้านพิษ, โรงเตี๊ยม |
ช่วงกลางเกม (เลเวล 11 – 19)
| เลเวล | เงื่อนไขเบื้องต้น | เวลาพื้นฐาน | ทรัพยากร (ธัญพืช / ไม้ / สมุนไพร) | การปลดล็อก |
|---|---|---|---|---|
| 11 | สนามฝึกทหาร 10 + ห้องวิจัย 7 | 7.2 ชม. | 1.9M / 1.9M / 601.8K | ช่องเดินทัพ 2 (กองทัพ 2 ผ่านวิจัยในห้องวิจัย) |
| 12 | ห้องวิจัย 11 + กำแพงเมือง 10 + โรงงานสารต้านพิษ 7 | 9.4 ชม. | 3.1M / 3.1M / 959K | ความสามารถในการวิจัยที่ลึกซึ้งขึ้น |
| 13 | ห้องวิจัย 12 + หอประชุมพันธมิตร 11 + ฟาร์ม 7 | 12.2 ชม. | 3.5M / 3.5M / 1.1M | ขีดจำกัดเลเวลฮีโร่ 40 |
| 14 | ห้องวิจัย 13 + รูปปั้นนักรบ (วิหาร) 12 + โรงเลื่อย 7 | 15.9 ชม. | 4.9M / 4.9M / 1.6M | ทหารระดับ 5 (ที่สนามฝึกทหาร เลเวล 14), วิหาร |
| 15 | ห้องวิจัย 14 + สนามฝึกทหาร 14 + สวนสมุนไพร 7 | 22.3 ชม. | 6.5M / 6.5M / 2.3M | โรงงานหลอมโลหะ, ช่องเดินทัพ 3, ขีดจำกัดเลเวลฮีโร่ 50 |
| 16 | ห้องวิจัย 15 + รูปปั้นนักรบ (วิหาร) 14 + ยุ้งฉาง 7 | 1.3 วัน (31.2 ชม.) | 11.9M / 11.9M / 4.0M | สเกลการผลิตและการเก็บเกี่ยวสมุนไพรเพิ่มขึ้น |
| 17 | ห้องวิจัย 16 + ค่ายทหาร 15 + คลังไม้ 7 | 1.8 วัน (43.6 ชม.) | 16.7M / 16.7M / 5.1M | ทหารระดับ 6 (ที่สนามฝึกทหาร เลเวล 17), โรงงานทอผ้า, ขีดจำกัดเลเวลฮีโร่ 60 |
| 18 | ห้องวิจัย 17 + สนามฝึกทหาร 17 + คลังสมุนไพร 7 | 2.5 วัน (61.1 ชม.) | 28.2M / 28.2M / 9.3M | อุปกรณ์ฮีโร่ เลเวล 18 |
| 19 | ห้องวิจัย 18 + รูปปั้นนักรบ (วิหาร) 17 + โรงงานสารต้านพิษ 10 | 3.6 วัน (85.5 ชม.) | 32.7M / 32.7M / 11.3M | โหนดเทคโนโลยีการทหารขั้นสูง |
ช่วงท้ายเกม (เลเวล 20 – 25)
| เลเวล | เงื่อนไขเบื้องต้น | เวลาพื้นฐาน | ทรัพยากร (ธัญพืช / ไม้ / สมุนไพร) | การปลดล็อก |
|---|---|---|---|---|
| 20 | ห้องวิจัย 19 + หอประชุมพันธมิตร 18 + ฟาร์ม 10 | 5.0 วัน (119.7 ชม.) | 60.0M / 60.0M / 18.4M | ไมล์สโตนสำคัญ! ทหารระดับ 7 (TG 20), โรงงานเกราะ, ช่องเดินทัพ 4 |
| 21 | ห้องวิจัย 20 + สนามฝึกทหาร 20 + โรงเลื่อย 10 | 6.7 วัน (160.3 ชม.) | 85.5M / 85.5M / 27.6M | ขีดจำกัดเลเวลฮีโร่ 70, คราฟต์อุปกรณ์สีม่วง |
| 22 | ห้องวิจัย 21 + รูปปั้นนักรบ (วิหาร) 21 + สวนสมุนไพร 10 | 8.7 วัน (208.4 ชม.) | 111.2M / 111.2M / 36.7M | ขยายค่าสถานะฝ่าย |
| 23 | ห้องวิจัย 22 + โรงพยาบาล 22 + ยุ้งฉาง 10 | 11.3 วัน (271.0 ชม.) | 145.2M / 145.2M / 42.8M | คราฟต์อุปกรณ์สีทอง |
| 24 | ห้องวิจัย 23 + กำแพงเมือง 23 + คลังไม้ 10 | 15.8 วัน (379.4 ชม.) | 171.2M / 171.2M / 56.2M | ทหารระดับ 8 (ที่สนามฝึกทหาร เลเวล 24), เพิ่มความจุการระดมพล |
| 25 | ห้องวิจัย 24 + สนามฝึกทหาร 24 + คลังสมุนไพร 10 | 22.1 วัน (531.1 ชม.) | 277.9M / 277.9M / 97.5M | ขีดจำกัดเลเวลฮีโร่ 80, สายเทคโนโลยีการทหารระดับปรมาจารย์ |
ช่วงปลายเกม (เลเวล 26 – 30)
| เลเวล | เงื่อนไขเบื้องต้น | เวลาพื้นฐาน | ทรัพยากร (ธัญพืช / ไม้ / สมุนไพร) | การปลดล็อก |
|---|---|---|---|---|
| 26 | ห้องวิจัย 25 + รูปปั้นนักรบ (วิหาร) 25 + โรงงานสารต้านพิษ 13 | 31.0 วัน (743.5 ชม.) | 386.8M / 386.8M / 123.5M | ความเชี่ยวชาญอุปกรณ์โรงงานระดับสูงสุด |
| 27 | ห้องวิจัย 26 + สนามฝึกทหาร 26 + ฟาร์ม 13 | 43.4 วัน (1041.0 ชม.) | 548.0M / 548.0M / 168.6M | ทหารระดับ 9 (ที่สนามฝึกทหาร เลเวล 27) |
| 28 | ห้องวิจัย 27 + ค่ายทหาร 27 + โรงเลื่อย 13 | 60.7 วัน (1457.3 ชม.) | 731.1M / 731.1M / 236.5M | ความจุคลังเก็บปลอดภัยสูงสุด & ความจุโรงพยาบาลสูงสุด |
| 29 | ห้องวิจัย 28 + หอประชุมพันธมิตร 28 + สวนสมุนไพร 13 | 78.9 วัน (1894.5 ชม.) | 1.05 B / 1.05 B / 316.4M | เตรียมความพร้อมก่อน T10 |
| 30 | ห้องวิจัย 29 + สนามฝึกทหาร 29 + โรงงานสารต้านพิษ 15 | 102.6 วัน (2462.9 ชม.) | 1.36 B / 1.36 B / 441.3M | ขีดจำกัดสูงสุด! ทหารระดับ 10 (TG 30 + เทคโนโลยี), สาขาเทคโนโลยีพิเศษ |
การดันศูนย์บัญชาการไม่ใช่การฟาร์มแบบยาวนานครั้งเดียว — แต่มันคือการวิ่งสپرินต์ 4 ช่วงระหว่างไมล์สโตนที่แต่ละช่วงปลดล็อกการก้าวกระโดดทางพลังที่แท้จริง
- ศูนย์บัญชาการ 20 — ทหารระดับ 7 และโรงงานเกราะเลเวลสูงมาถึงพร้อมกัน นี่คือการก้าวกระโดดทางพลังครั้งใหญ่ที่สุดของช่วงกลางเกมและเป็นการดันครั้งแรกที่คุ้มค่าแก่การเผาความเร็วที่สะสมไว้
- ศูนย์บัญชาการ 24, จากนั้น 27 — การดันระดับถัดไป แต่ละระดับจะเพิ่มระดับทหารและเพดานโรงงานขึ้นอีกครั้ง
- ศูนย์บัญชาการ 30 — ขีดจำกัดสูงสุด ทุกสิ่งที่เหลืออยู่ในเมืองสามารถสร้างให้เสร็จได้แล้ว
โปรดระวังต้นทุนของไมล์สโตนช่วงท้าย: เกินช่วงกลางเลเวล 20 เป็นต้นไป การอัปเกรดครั้งเดียวจะใช้ทรัพยากรเกิน 100 ล้าน เริ่มต้นมองว่าการสะสมทรัพยากรเป็นส่วนหนึ่งของแผนการสร้าง — ดูหัวข้อการสเกลทรัพยากรด้านล่าง
การซ้อนทับความเร็วในการก่อสร้าง — คณิตศาสตร์ที่ถูกต้อง
บัฟความเร็วในการก่อสร้างซ้อนทับกันจาก 5 แหล่ง และเมื่อรวมกันจะบีบอัดการอัปเกรด 38 วันให้เหลือ 20 วัน (จากคู่มือของ chuppergaming) บัฟเหล่านี้ประกอบด้วย:
| แหล่งที่มา | โบนัส |
|---|---|
| วิจัยการพัฒนาส่วนบุคคล | +5%, จากนั้น +10% ที่โหนดเลเวล 5 |
| วิจัยพันธมิตร — การก่อสร้างรวดเร็ว | +20% |
| VIP เลเวล 11 | +45% |
| เมืองหลวง (Royal City) — ตำแหน่งรัฐมนตรีว่าการกระทรวงก่อสร้าง | +50% |
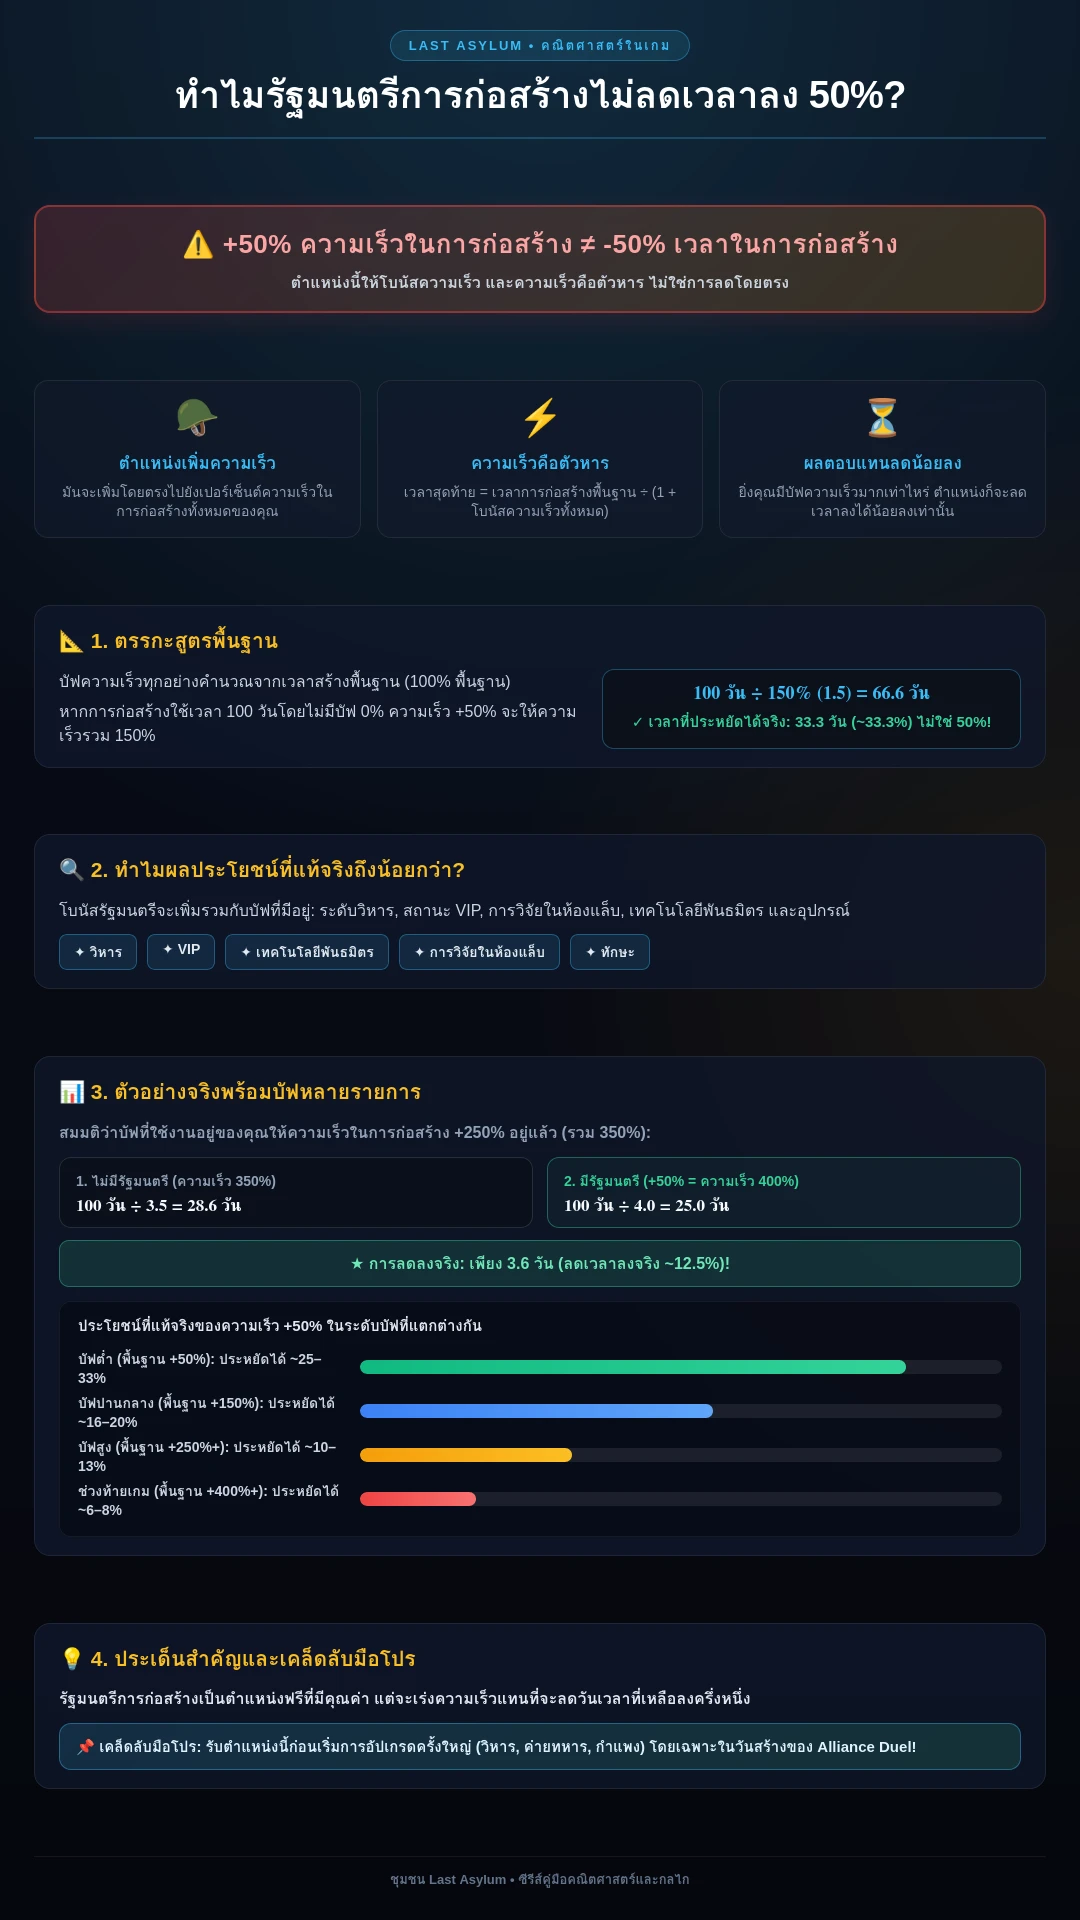
ตอนนี้คือส่วนที่เกือบทุกคนเข้าใจผิด: บัฟเหล่านี้ บวกเพิ่มเป็นตัวคูณความเร็ว นำไปใช้กับเวลาพื้นฐาน — คุณไม่สามารถเอา 10% + 5% + 20% + 45% + 50% มาบวกกันแล้วตัดเวลาลง 130% ของอะไรก็ตาม เพราะเกมจะหารด้วยความเร็วรวม:
$$T = \frac{T_{base}}{100% + \sum \text{speed buffs}}$$
นี่คือการคำนวณจริงสำหรับการอัปเกรดเวลาพื้นฐาน 37 วัน:
- เวลาพื้นฐาน: 37 วัน
- เมื่อเปิดใช้งาน +10% และ +5%: T = 37 / 1.15 ≈ 32.2 วัน
- เพิ่มตำแหน่งรัฐมนตรี (+50%): ความเร็วรวม 165% → T = 37 / 1.65 ≈ 22.4 วัน — ตำแหน่งนี้ช่วยประหยัดเวลาได้ ~10 วัน ไม่ใช่ “ครึ่งหนึ่งของเวลาทั้งหมด”
- และเมื่อซ้อนทับทุกอย่างครบถ้วน (+10% +5% +20% +45% +50% = +130%): T = 37 / 2.30 ≈ 16.1 วัน
ดังนั้น บัฟเพิ่มเติมแต่ละอันจะมีค่าน้อยลงเล็กน้อยในแง่ของจำนวนชั่วโมงเมื่อเทียบกับอันก่อนหน้า (ผลตอบแทนลดลง) ผลลัพธ์ในทางปฏิบัติ:
- ลำดับของบัฟไม่มีผลต่อผลลัพธ์สุดท้าย — แต่คุณต้องเปิดใช้งานบัฟเหล่านี้ไว้เมื่อตัวนับเวลามีค่ายาวนาน เนื่องจากมูลค่าของมันจะสเกลตามเวลาที่เหลืออยู่
- ใช้ทุกอย่าง ก่อน จะเริ่มการดันศูนย์บัญชาการ 20+ ครั้งใหญ่ ไม่ใช่ทำกลางคัน
- การคว้าตำแหน่งรัฐมนตรีว่าการกระทรวงก่อสร้างและ VIP 11 ก่อนการดันช่วงท้าย มีค่าเท่ากับการประหยัดเวลาไปหลายวันด้วยตัวมันเอง
[!TIP] ทริกการทำคะแนน “ถือค้อนไว้”: ในศึกพันธมิตร (Alliance Duel) และผู้รักษาอันดับสูงสุด (Supreme Healer) คะแนนการก่อสร้างจะถูกมอบให้ ในวินาทีที่คุณแตะไอคอนค้อนที่สร้างเสร็จแล้ว ไม่ใช่ตอนที่คุณเริ่มโปรเจกต์ เริ่มการอัปเกรดยาวๆ ล่วงหน้าหลายวัน และอย่าเพิ่งแตะค้อนจนกว่าวันก่อสร้าง/สร้าง (วันอังคาร) จะมาถึง
[!IMPORTANT] กฎสแนปชอตตำแหน่งรัฐมนตรีว่าการกระทรวงก่อสร้าง: ตำแหน่งรัฐมนตรี (+50% ความเร็วในการก่อสร้าง) จะมีผลอย่างเคร่งครัดต่อโปรเจกต์การก่อสร้างที่ เริ่มต้นในขณะที่ถือครองตำแหน่งอยู่
- ขอและรับตำแหน่งจากราชา/เจ้าหน้าที่
- แตะอัปเกรดเพื่อใส่คิวสิ่งปลูกสร้างของคุณ (ตัวนับเวลาจะล็อกค่าพร้อมกับบัฟที่ใช้แล้ว)
- คุณสามารถส่งต่อตำแหน่งให้ผู้เล่นคนอื่นได้ทันที — คิวการก่อสร้างที่ตั้งไว้จะ คงเวลาที่ลดราคาไว้ถาวร จนกว่าจะสร้างเสร็จ!
การสเกลทรัพยากร — วางแผนกองทุนสำรองของคุณ
ต้นทุนของสิ่งปลูกสร้างที่ศูนย์บัญชาการ 8 ไม่ได้บอกอะไรคุณเลยเกี่ยวกับต้นทุนที่ศูนย์บัญชาการ 25 เส้นโค้งนี้ดำเนินไปใน 3 เฟส:
| เฟส | ต้นทุนทั่วไปต่อการอัปเกรด | ความหมาย |
|---|---|---|
| ช่วงต้น (ศูนย์บัญชาการ 1-10) | หลักพันถึงหลักล้านต้นๆ | การผลิตครอบคลุม ใช้จ่ายได้อย่างอิสระ รักษาคิวให้เต็มอยู่เสมอ |
| ช่วงกลาง (ศูนย์บัญชาการ 11-24) | หลักสิบล้าน | การปล้นสะดมและอีเวนต์แบกรับภาระ — การปล้นประจำวันเลิกเป็นทางเลือกไปแล้ว |
| ช่วงท้าย (ศูนย์บัญชาการ 25-30) | เกิน 100 ล้าน | ต้องสะสมล่วงหน้าเป็นวันๆ ก่อนเริ่ม การอัปเกรดที่คุณป้อนทรัพยากรไม่ไหวจะทำให้คิวทั้งหมดของคุณชะงัก |
และรักษาสัดส่วนให้สมดุล: เก็บธัญพืช, ไม้, และสมุนไพรไว้ในคลังเสมอ การอัปเกรดช่วงท้ายจะกินทั้งสามอย่างพร้อมกัน และการที่อันใดอันหนึ่งหมดลงกลางคันระหว่างการดัน จะทำให้เสียเวลาที่คุณอุตส่าห์สะสมบัฟมาเพื่อประหยัดไปเปล่าๆ
แผนผังห้องวิจัยขั้นสูงสุด: ทั้ง 13 สายเทคโนโลยี
เทคโนโลยีในห้องวิจัยให้ตัวคูณถาวรแบบทบต้นข้ามผ่านการต่อสู้, เศรษฐกิจ, และคะแนนของพันธมิตร อ้างอิงจาก แผนผังการวิจัยขั้นสูงสุด ที่ตรวจสอบแล้ว นี่คือลำดับความสำคัญของเทียร์ที่แน่นอน:
| ระดับความสำคัญ | สายการวิจัย | ผลกระทบหลัก | กลยุทธ์ที่แนะนำ |
|---|---|---|---|
| เทียร์ S (บังคับ) | ศึกพันธมิตร (Alliance Duel) | Super Reward 1 & 2 | ความสำคัญสูงสุดอันดับแรกในเกม! Super Reward ปปลดล็อกหีบประจำวันระดับ 4 ถึง 9 ในศึกพันธมิตร มอบเพชร, ความเร็ว, และโทเค็นฮีโร่นับล้าน ให้ความสำคัญกับสิ่งนี้เป็นอันดับแรกสุด! |
| เทียร์ S (บังคับ) | การพัฒนา (Development) | ความเร็วในการก่อสร้าง & วิจัย (+10-25%) | ต้องวิจัยก่อนเริ่มเวลาสร้างศูนย์บัญชาการ 20+ ยาวๆ เพื่อประหยัดเวลาเร่งความเร็วนับร้อยวัน |
| เทียร์ A (สูง) | เศรษฐกิจ (การเก็บเกี่ยว - Economy) | ความเร็วในการเก็บเกี่ยวบนแผนที่โลก (+50-100%) | การเก็บเกี่ยวบนแผนที่ให้ทรัพยากรมากกว่าโหนดผลิตในเมืองถึง 20 เท่า ให้ความสำคัญกับสายเก็บเกี่ยวมากกว่าสายการผลิต |
| เทียร์ A (สูง) | ฝ่ายหลัก (นักรบ/เรนเจอร์/Warlock) | ATK, DEF & HP สำหรับคลาสที่เลือก | มุ่งเน้นการวิจัยการทหาร 100% ไปที่ฝ่ายหลักของกองทัพที่ 1 ของคุณ อย่ากระจายค่าสถานะเท่าๆ กันทั้งสามคลาส |
| เทียร์ A (สูง) | ขนาดกองทัพ (March Size) | ความจุทหาร +20,000 ถึง +50,000 | ตัวคูณโดยตรงต่อความเสียหายในการระดมพลและการป้องกันกองทัพรักษาการณ์ กองทัพที่ใหญ่กว่าชนะการปะทะ |
| เทียร์ B (กลาง/ท้าย) | ทหารชั้นยอด (Elite Troops) | ปลดล็อกทหารระดับ 10 (T10) | ต้องใช้ศูนย์บัญชาการ 30 และทำเงื่อนไขเบื้องต้นให้ครบถ้วน ไมล์สโตนช่วงท้ายเกม |
| เทียร์ B (กลาง/ท้าย) | การขนส่งคาราวาน (Caravan Transport) | ความจุคาราวานและค่าสถานะคุ้มกัน | เสริมการป้องกันคาราวานทองคำและผลตอบแทนจากการปล้นโดยไม่มีการสูญเสียทหาร |
| เทียร์ C (ตามสถานการณ์) | ยุทธวิธี (รุก/รับ - Tactics) | ลดการสูญเสียในศึกระดมพลป้อมปราการ KvK | เหมาะสมก่อนฤดูกาลสงครามอาณาจักรจะเริ่มต้น |
| เทียร์ S (ช่วงท้ายเกม) | เทคโนโลยีพิเศษ (Specialty Tech) | บัฟพิเศษใช้งานและติดตัวยุคทรงพลัง | ปลดล็อกเมื่อห้องวิจัยถึงเลเวล 30 และเทคโนโลยีทหารชั้นยอดถึง 80% จุดสูงสุดของสายเทคโนโลยี |
ไมล์สโตนระดับทหาร
- ทหาร T7: ศูนย์บัญชาการ 20 + สนามฝึกทหาร 20
- ทหาร T8: ศูนย์บัญชาการ 24–25 + สนามฝึกทหาร 24
- ทหาร T9: ศูนย์บัญชาการ 27 + สนามฝึกทหาร 27
- ทหาร T10: ศูนย์บัญชาการ 30 + สนามฝึกทหาร 30 + วิจัยสายทหารชั้นยอด 100%
กลยุทธ์ย่อยรายสาย (วิเคราะห์โดย Korpez)
เมื่อลำดับความสำคัญในภาพรวมข้างต้นทำงานอยู่ นี่คือทางลัดในสายวิจัยที่จะช่วยประหยัดเวลาเร่งความเร็วไปได้เป็นสัปดาห์:
- สายการพัฒนา (Development tree) — รีบพุ่งไปที่โหนดที่ปลดล็อก ค่ายฝึกทหารเพิ่มเติม เพิ่มค่าปฐมพยาบาลด่วน (Quick Bandage) แค่เลเวล 2 (พอให้ผ่านไปต่อได้); อย่าเพิ่งอัปจนสุดในช่วงแรก ทำเสร็จได้ใน ~7 วันด้วยความช่วยเหลือจากพันธมิตรที่ active
- สายเศรษฐกิจ (Economy tree) — เปิด แปลงฟาร์มเพิ่มเติมก่อน, จากนั้นรีบดันโหนด ผลผลิตสมุนไพร ทันที; ปล่อยส่วนที่เหลือไว้ทำทีหลัง
- สายฮีโร่ (Hero trees) — อัปเกรดบันไดคลาสทั้งสามให้ถึง เลเวล 3 เท่าๆ กัน (ต้นทุน 7 วันต่อโหนดเป็นบั๊กที่ผู้พัฒนาอ้างว่ากำลังแก้ไขอยู่), จากนั้นดัน คลาสหลัก ของคุณไปที่เลเวล 5 โหนดฮีโร่ทั่วไปด้านล่าง (โจมตี/เลือด/ป้องกัน/ความเสียหาย) คือสิ่งล้ำค่า
- สายทหาร (Soldier tree) — ทุกโหนดค่าสถานะมาตรฐานคุ้มค่าทั้งหมด ยกเว้นโหนดน้ำหนักบรรทุกสุดท้าย: การอัปเกรด 9 วันเพื่อให้ได้น้ำหนักบรรทุก +1% คือกับดัก ข้ามมันไปซะ
- สายการพัฒนาเต็มรูปแบบ (หลังสายพัฒนาปกติ) — พุ่งตรงไปที่ อัตราการเสียชีวิตของทหาร (Soldier Fatality Rate) (−1% → −5% เมื่อเต็ม) — โหนดที่ดีที่สุดสำหรับ KvK ข้ามความเร็วในการรักษา; ความจุในการฝึกสามารถค่อยๆ ทำได้; ความเร็วในการฝึกคุ้มค่าที่จะเก็บระหว่างทาง
- เศรษฐกิจเจริญรุ่งเรือง (Prosperous Economy) — ปลดล็อกสวนสมุนไพร, แล้ว ออกจากสายนี้: ทุกอย่างที่เหลือแย่กว่าวันวิจัยจำนวนเท่ากันที่ใช้ไปกับสายการทหาร
- แท็บกองทัพ (หลังสายทหาร) — เติม ความจุเดินทัพ และ พลังโจมตีของกองทัพ สำหรับคลาสหลักของคุณ; จอดคลาสอื่นไว้ที่เลเวล 3 โหนดป้องกันเวิลด์บอสสามารถปล่อยไว้ที่ 3 ได้ — การอัปให้สุดไม่คุ้มค่าทุนคืน
📚 อ้างอิง: ขีดจำกัดสิ่งปลูกสร้าง: ทำไมสมุนไพรถึงหมด
ที่มา: wiki-last-asylum.com, ไคลเอนต์ v1.0.87.
ขีดจำกัดสิ่งปลูกสร้างกำหนดว่าเมืองหนึ่งสามารถถือครองสิ่งปลูกสร้างประเภทเดียวกันได้กี่แห่ง และขีดจำกัดที่แท้จริงนั้นสูงกว่าที่แผงสิ่งปลูกสร้างแนะนำ ห้องวิจัยมีโหนดที่เพิ่มสิ่งปลูกสร้างแต่ละประเภทได้อีกหนึ่งแห่ง และเมื่อรวมกันแล้วโควตาจะมีลักษณะดังนี้:
| สิ่งปลูกสร้าง | อนุญาตสูงสุดทั้งหมด |
|---|---|
| ฟาร์ม (ฟาร์ม) | 5 |
| โรงเลื่อย (โรงตัดไม้) | 5 |
| สวนสมุนไพร (Herb garden) | 5 |
| สนามฝึกทหาร (Training ground) | 4 |
| โรงพยาบาล (Infirmary) | 4 |
| ค่ายทหาร (ค่ายทหาร) | 4 |
สิ่งปลูกสร้างการผลิตหลังที่ห้าช่วยเพิ่มผลผลิตของทรัพยากรนั้นขึ้นหนึ่งในสี่ และมีต้นทุนถูกกว่าการอัปเกรดสิ่งปลูกสร้างที่มีอยู่เดิมอีกหนึ่งเลเวล การค้นพบเรื่องนี้คือส่วนที่ยาก เนื่องจากโหนดดังกล่าวซ่อนอยู่ในสายวิจัยแทนที่จะอยู่บนแผงสิ่งปลูกสร้าง
ทำไมสมุนไพรถึงหมดในช่วงกลางเกม
โควตาไม่ได้เปิดพร้อมกันทั้งหมด และกำหนดการของสมุนไพรตามหลังอยู่ ฟาร์มแห่งที่สี่และโรงเลื่อยแห่งที่สี่เปิดที่ศูนย์บัญชาการเลเวลสิบสอง สวนสมุนไพรแห่งที่สี่เปิดที่เลเวลสิบเก้าเท่านั้น เป็นเวลาเจ็ดเลเวลติดต่อกันที่ธัญพืชและไม้มาจากสิ่งปลูกสร้างประเภทละสี่แห่ง ในขณะที่สมุนไพรมาจากสามแห่ง
ดังนั้นจึงมีความรู้สึกว่าสมุนไพรหมดก่อนเสมอ ความรู้สึกนี้ถูกต้อง และมันมาจากการเปิดล็อกตามกำหนดเวลา มากกว่าวิธีที่ผู้เล่นใช้จ่าย
จำนวนสำเนาที่เมืองสามารถมีได้ รวมถึงโหนดของห้องวิจัย แสดงไว้โดยเครื่องคำนวณการสร้าง: ทุกช่องจะระบุด้วยเลเวลศูนย์บัญชาการที่ปลดล็อกมัน
📚 อ้างอิง: การวิจัย: ราคาของพลัง (Might), สาย และขีดจำกัด
ข้อมูลได้รับการตรวจสอบเทียบกับไคลเอนต์เกม (v1.0.87, ที่มา: wiki-last-asylum.com).
การวิจัยดำเนินไปอย่างช้าๆ และมีต้นทุนสูง ดังนั้นลำดับความสำคัญของสายจึงมีความสำคัญมากกว่ารายการของมัน พลัง (Might) มาในราคาที่แตกต่างกันอย่างมากในแต่ละหมวดหมู่ของห้องวิจัย สองสายทำซ้ำในสิ่งที่อีกสองสายมีให้อยู่แล้ว และหมวดหมู่หนึ่งไม่ต้องการทรัพยากรใดๆ เลย การพัฒนาและเศรษฐกิจขายพลังในราคาที่ถูกที่สุด ฮีโร่ขายมันแพงที่สุด
ราคาของพลัง (Might) ตามหมวดหมู่
การนำต้นทุนทั้งหมดของหมวดหมู่หารด้วยพลังทั้งหมดที่มันมอบให้ จะให้ภาพดังต่อไปนี้:
| หมวดหมู่ | ทรัพยากรต่อแต้ม |
|---|---|
| การพัฒนา (Development) | 794 |
| เศรษฐกิจ (Economy) | 2,640 |
| ทหาร (Soldier) | 12,152 |
| ฮีโร่ (Hero) | 18,065 |
ช่องว่างนี้ต่างกันถึงยี่สิบเท่า สายการพัฒนาและเศรษฐกิจในช่วงต้นคืนทุนเร็วที่สุดและควรทำก่อน ในขณะที่สายฮีโร่ต้องรอทีหลัง
สองสายกองทัพทำซ้ำอีกสองสาย
กองทัพ 1 และกองทัพ 4 ให้โบนัสและขีดจำกัดแบบเดียวกับกองทัพ 2 และกองทัพ 3 แต่มีต้นทุนถูกกว่ามาก: ประมาณ 310 ล้านทรัพยากรและเวลาคิว 38 วันเทียบกับหลักพันล้านทรัพยากรและเวลาหลายพันวันสำหรับสองคู่หลัง
สองคู่แรกคุ้มค่าที่จะอัปให้สุด และอีกสองคู่ที่เหลือสามารถรอได้ตราบเท่าที่มีอย่างอื่นที่คุ้มค่ากว่า
สายที่ไม่ใช้ทรัพยากรเลย
หมวดหมู่ที่ผูกติดกับศึกพันธมิตร (Alliance Duel) ไม่ต้องใช้ธัญพืช, ไม้ หรือสมุนไพร มันจ่ายด้วยคัมภีร์ศึกษา (Study Scrolls) ซึ่งได้รับจากการแข่งขัน: อันดับลีกพันธมิตร, การดวล, รางวัลฤดูกาลอารีน่า และเป้าหมายการเติบโต เบื้องหลังโหนดของมันคือสายทหารชั้นยอด และมาพร้อมกับระดับที่สิบลing ดังนั้นหมวดหมู่จึงไม่สามารถข้ามได้
ขีดจำกัดเศรษฐกิจ
ห้องวิจัยดันเศรษฐกิจขึ้นไปถึงขอบเขตที่กำหนดและไม่ไปไกลกว่านั้น ผลผลิตของแต่ละทรัพยากรเพิ่มขึ้นสูงสุดถึง +60%, ความเร็วในการเก็บเกี่ยวสูงสุด +25%, ความเร็วในการก่อสร้างสูงสุด +25%, ความเร็วในการวิจัยสูงสุด +50% และขีดจำกัดทรัพยากรที่ได้รับการคุ้มครองสูงสุด +50%
ความเร็วในการก่อสร้างมาจากสายการก่อสร้างรวดเร็ว (Fast Construction) สี่สาย แต่ละสายให้ 5% สำหรับสามสายแรกและ 10% สำหรับสายที่สี่ ความเร็วในการวิจัยทำงานในลักษณะเดียวกัน สามสายที่ 10% และสายที่สี่ที่ 20%
ปรมาจารย์การก่อสร้าง (Construction Master) อยู่เคียงข้างพวกมันและง่ายต่อการเข้าใจผิดว่าเป็นหนึ่งในนั้น มันไม่ได้ทำให้การก่อสร้างเร็วขึ้น แต่มันทำให้ถูกลง โดยลดต้นทุนทรัพยากรลงสูงสุด 5% over five levels ชื่อดูคล้ายกันในขณะที่ผลลัพธ์ไม่เหมือนกัน: สายหนึ่งประหยัดเวลา อีกสายประหยัดทรัพยากร
สิ่งที่ควรจำ
พลังและค่าโบนัสในตารางเป็นแบบสะสม ดังนั้นแถวจะแสดงยอดรวมทั้งหมดที่เลเวลนั้น แทนที่จะเป็นส่วนที่เพิ่มขึ้นจากเลเวลก่อนหน้า ห้ามนำเลเวลมารวมกัน
การที่โหนดความเร็ว, ต้นทุน และขีดจำกัดสำเนาเปลี่ยนแปลงคิวการสร้างสำหรับเมืองใดเมืองหนึ่ง แสดงไว้โดยเครื่องคำนวณการสร้าง
🏗️ คู่มือสิ่งปลูกสร้าง
- โต๊ะทำงานที่ 2
- หอประชุมพันธมิตร
- คอกม้าพันธมิตร
- โรงงานสารต้านพิษ
- อารีน่า
- ค่ายทหาร
- ปฏิบัติการลับ
- กระท่อมผู้สร้าง
- หอคูริโอ
- โรงงานจารึก
- ค่ายสำรวจ
- หอคอยฟอลคอน
- ฟาร์ม
- โรงงานเกราะ
- ยุ้งฉาง
- หอเกียรติยศ
- สวนสมุนไพร
- คลังสมุนไพร
- โรงพยาบาล
- รูปปั้นลอร์ด
- คลังไม้
- โรงเลื่อย
- อนุสาวรีย์ — ค่าสถานะสิ่งปลูกสร้าง สำหรับไทม์ไลน์อีเวนต์ยุคเซิร์ฟเวอร์ดูที่ ปฏิทิน: อนุสาวรีย์
- พ่อค้าเร่
- คอกม้าส่วนตัว
- รูปปั้นเรนเจอร์
- รังกาเวน
- โรงงานกาเวน
- ห้องวิจัย
- ที่พักอาศัย
- ศูนย์บัญชาการ
- หน่วยลาดตระเวน
- โรงงานหลอมโลหะ
- ที่พักทหาร
- กองทัพ 1
- กองทัพ 2
- กองทัพ 3
- กองทัพ 4
- โรงเตี๊ยม
- วิหาร
- สนามฝึกทหาร
- กำแพงเมือง
- รูปปั้น Warlock
- รูปปั้นนักรบ
- หอสังเกตการณ์
- โรงงานทอผ้า
🧱 กลยุทธ์การก่อสร้างสำหรับผู้เริ่มต้น
การอัปเกรดสิ่งก่อสร้างให้กระจายเท่าๆ กันทั่วทั้งฐานจะทำให้พัฒนาการของไอดีสะดุด: ทรัพยากรจะหมดเกลี้ยงในตอนที่ Sanctuary, Lab, Training Grounds หรือ Antitoxin Workshops ต้องการมันพอดี หัวข้อนี้คือคู่มือสำหรับผู้เริ่มต้น — สิ่งก่อสร้างแต่ละอย่างมีไว้เพื่ออะไร และควรเริ่มแตะอัปเกรดตามลำดับไหน
Sanctuary มาก่อน, เลเวลฮีโร่ถูกจำกัดด้วยสิ่งนี้
Sanctuary เป็นตัวกำหนดเพดานสำหรับทุกสิ่ง: เลเวลฮีโร่ (ประมาณ +5 ต่อเลเวลของ Sanctuary — เช่น Sanctuary 28 อนุญาตให้ฮีโร่เลเวลสูงสุดถึง 140) และสิ่งก่อสร้างอื่นๆ ทั้งหมด หากฮีโร่หลัก 5 ตัวชนเพดานแล้ว ยาต้านพิษส่วนเกินก็ช่วยไม่ได้ — มีเพียงเลเวลถัดไปของ Sanctuary เท่านั้นที่จะปลดล็อกมัน เลเวลของ Sanctuary แต่ละเลเวลยังต้องการสิ่งก่อสร้างที่เป็นเงื่อนไขล่วงหน้าหลายอย่าง (Lab, Training Grounds, Barracks, รูปปั้น) ดังนั้นให้เปิดดูเงื่อนไขล่วงหน้าและเตรียมห่วงโซ่การสร้างทั้งหมดไว้ อย่ารอจนกว่าฮีโร่ทุกตัวจะชนเพดานเลเวล — ให้เริ่มอัปเกรด Sanctuary เลเวลถัดไปล่วงหน้า
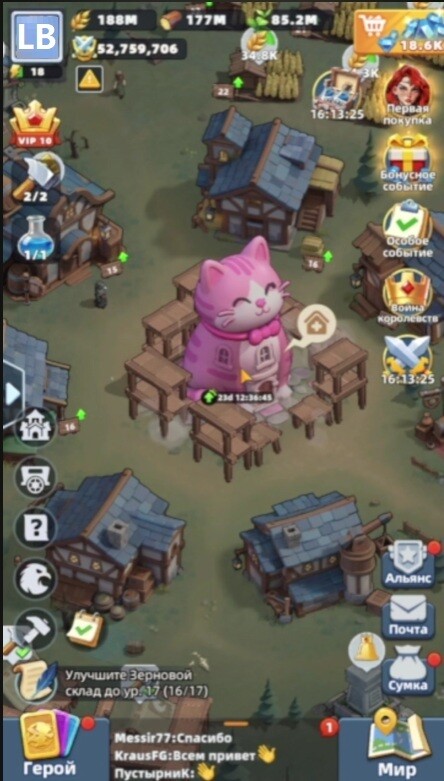
สองช่างก่อสร้าง, สองหน้าที่
ช่องช่างก่อสร้างคนที่สองแบบชั่วคราว (500 ไดมอนด์) ควรทำงานคนละอย่างกับคนแรก: ช่องระยะยาวใช้สำหรับ Sanctuary, Lab หรือสิ่งก่อสร้างบังคับหลายวันที่ต้องใช้เวลา ส่วนช่างก่อสร้างฟรีจะจัดการอัปเกรดสั้นๆ — ฟาร์ม, โรงเลื่อย, สวนสมุนไพร, โรงงานผลิตยาต้านพิษ และสิ่งก่อสร้างที่เป็นเงื่อนไขระดับกลางสำหรับ Sanctuary เลเวลถัดไป การใช้ช่างก่อสร้างสองคนกับโปรเจกต์ยาวทั้งคู่หมายความว่าจะไม่มีช่องว่างสำหรับความต้องการฉุกเฉิน ส่วนการใช้สองคนกับงานเล็กๆ จะทำให้สิ่งก่อสร้างหลักล้าหลังไปตลอดกาล
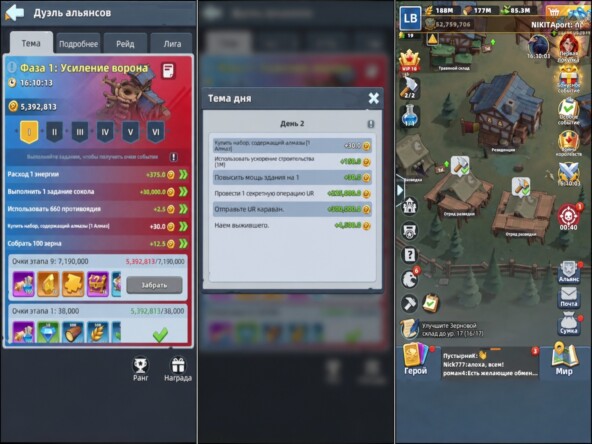
กะเวลาการสร้างช่างก่อสร้างให้เสร็จตรงกับวันสร้างสิ่งก่อสร้างของ Alliance Duel (ศึกพันธมิตร): สิ่งก่อสร้างที่สร้างเสร็จแล้วไม่ต้องกดรับทันที — คาฆ้อนค้างไว้แบบนั้นแล้วค่อยกดแตะหลังจบช่วงเวลากิจกรรม เพื่อรับคะแนนสำหรับงานที่ทำเสร็จไปแล้ว สิ่งก่อสร้างจะยังคงใช้ช่องนั้นอยู่ ดังนั้นให้ค้างค้อนไว้เฉพาะกับโปรเจกต์ใหญ่ๆ เท่านั้น ให้รับความช่วยเหลือจากพันธมิตรก่อนทั้งหมด จากนั้นค่อยใช้ไอเทมเร่งเวลา แล้วค่อยกดรับ
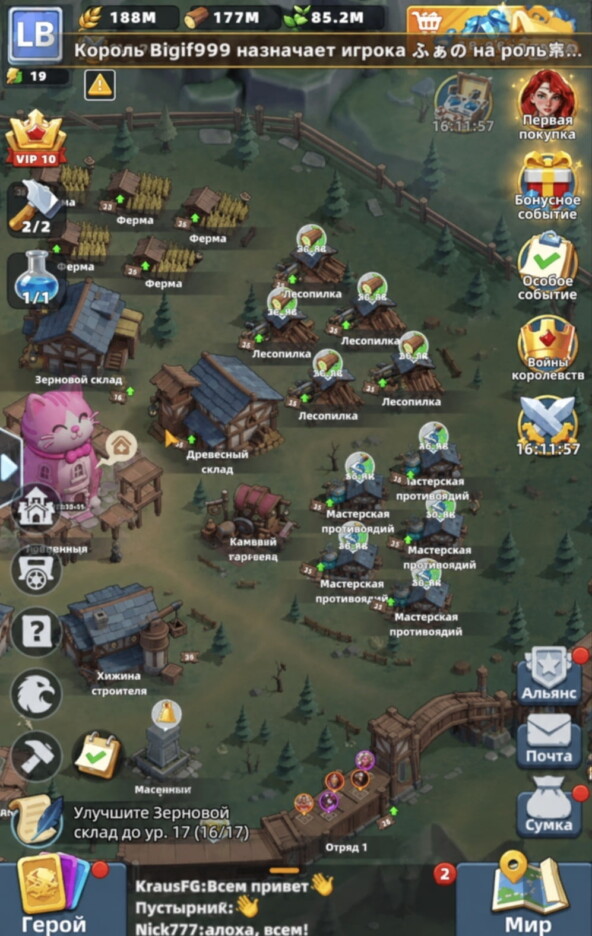
สิ่งก่อสร้างทรัพยากรปล่อยให้ล้าหลังได้
ฟาร์ม, โรงเลื่อย และสวนสมุนไพร ผลิตเสบียง ไม้ และสมุนไพร — แต่ไม่จำเป็นต้องมีเลเวลเท่ากับ Sanctuary การปล่อยให้ห่างกันสักห้าถึงหกเลเวลยังคงเล่นได้อย่างสบายๆ ในขณะที่ช่างก่อสร้างคนที่สองง่วนอยู่กับ Sanctuary ช่างก่อสร้างคนแรกจะทยอยอัปเกรดสิ่งก่อสร้างทรัพยากร และที่สำคัญที่สุดคือโรงงานผลิตยาต้านพิษ: ยาต้านพิษถูกใช้ตลอดเวลาในการอัปเลเวลฮีโร่
คลังเก็บ (ไม้, เสบียง, สมุนไพร) เพิ่มเฉพาะปริมาณที่ได้รับการปกป้องซึ่งผู้โจมตีไม่สามารถปล้นไปได้ พวกมันไม่ได้ปลดล็อกเลเวล เทคโนโลยี หรือทหารใดๆ ดังนั้นให้ปล่อยให้เลเวลตามหลังอย่างเห็นได้ชัดเว้นแต่ว่าเงื่อนไขของ Sanctuary จะระบุไว้ กลยุทธ์ที่ปลอดภัยที่สุด: เก็บแพ็กวัสดุไว้ในกระเป๋าโดยไม่ต้องเปิด และเปิดพวกมันทันทีในตอนก่อนสร้าง — ด้วยวิธีนี้ ต่อให้คลังเก็บของคุณจะกาก ก็แทบจะไม่เสียทรัพยากรไปเลย
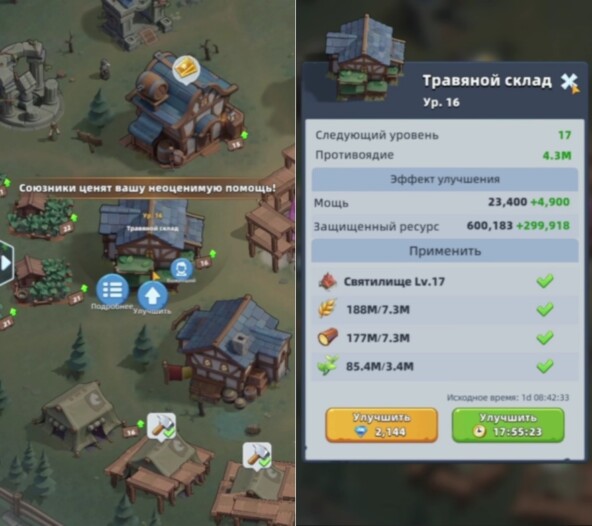
Tavern, Temple และ Research Lab
Tavern ใช้สำหรับสุ่มหาฮีโร่และผู้รอดชีวิต และการอัปเกรดมันจะช่วยลดคูลดาวน์การจ้างฟรี — แต่ลดลงแค่ประมาณหนึ่งชั่วโมงหลังจากผ่านไปหลายเลเวล ให้อัปเกรดตามเงื่อนไขของ Sanctuary หรือในวันสร้างสิ่งก่อสร้าง; สิ่งที่สำคัญกว่ามากๆ คือการกดรับสิทธิ์จ้างฟรีที่พร้อมใช้งานจริง การสุ่ม 50 ครั้งแรกจะการันตีชิ้นส่วนของ Arthur
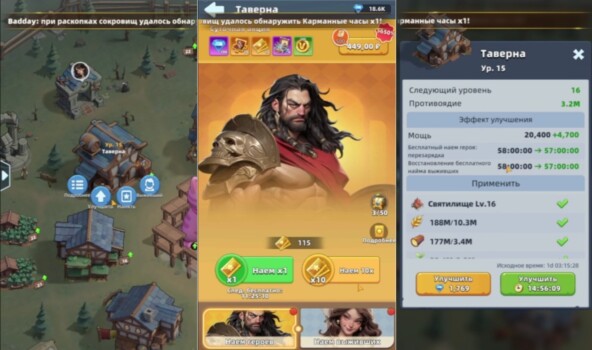
รูปปั้น Warrior, Ranger และ Warlock ของ Temple จะมอบค่า ATK/HP/DEF ของฝ่ายนั้นๆ โดยตรง เริ่มต้นด้วยฝ่ายของทีมที่ 1 (Squad 1) ของคุณ แต่ไม่ต้องทุ่มเทให้ฝ่ายเดียวมากเกินไป: รูปปั้นอื่นๆ จะกลายเป็นเงื่อนไขของ Sanctuary และทีมที่ 2–3 ก็จำเป็นต้องใช้พวกมันสำหรับการสำรวจ
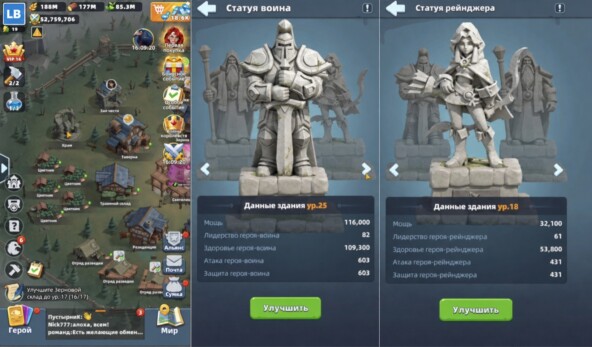
หลังจาก Sanctuary แล้ว Research Lab คือสิ่งก่อสร้างอันดับหนึ่ง — เทคโนโลยีเศรษฐกิจ ฮีโร่ ทหาร และการพัฒนาทั้งหมดอยู่ที่นี่ ให้ทำการวิจัยสาย Alliance Duel ในวันพุธ เพื่อให้ไอเทมเร่งเวลาอันเดียวกันได้คะแนนกิจกรรมด้วย และอย่าเผาผลาญไอเทมเร่งเวลาอเนกประสงค์ทั้งหมดไปกับการก่อสร้าง: คลังส่วนหนึ่งต้องเก็บไว้สำหรับการวิจัย โดยเฉพาะเทคโนโลยีทหารที่มีราคาแพง
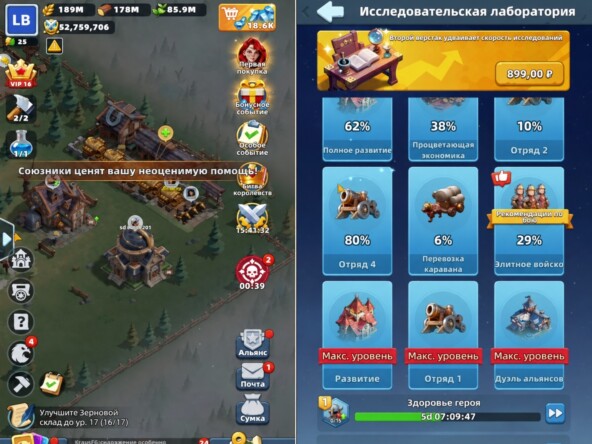
กองทัพ: Training Grounds, Barracks, Infirmary
Training Grounds ที่เลเวลสูงขึ้นจะปลดล็อกยศทหารที่แข็งแกร่งขึ้น (T1–T10) อย่าอัปเกรดโรงฝึกทุกแห่งให้เท่ากัน: ให้คงอันหนึ่งไว้ที่เลเวลสูงสุดและใช้ที่เหลือในการฝึกทหารราคาถูกจำนวนมาก จากนั้นค่อยนำมาเลื่อนยศที่โรงฝึกหลัก — ต้นทุนทรัพยากรใกล้เคียงกัน แต่ใช้เวลาน้อยกว่ามาก โรงฝึกหลักต้องอัปตาม Sanctuary เนื่องจากทั้งยศใหม่และเงื่อนไขของ Sanctuary ต่างก็พึ่งพามัน
Barracks ใช้เก็บกองทัพที่ฝึกแล้ว และความจุจะเต็มอย่างรวดเร็ว: การโจมตีล่าโจรและศึกวันศุกร์/เสาร์เผาผลาญทหารไปหลายพันนาย หาก Barracks เต็ม โรงฝึกจะว่างงานและมาร์ชออกไปไม่เต็มกอง — ให้อัปเกรดพวกมันไปพร้อมกับโรงฝึกหลัก ความจุและความเร็วในการรักษาของ Infirmary เป็นตัวกำหนดว่าบัญชีของคุณจะรับความเสียหายได้มากแค่ไหน: หากการรบครั้งเดียวทำให้มันเต็ม แสดงว่าถึงเวลาอัปเกรดแล้ว โรงพยาบาลที่เล็กเกินไปจะทำให้ทหารบาดเจ็บกลายเป็นความสูญเสียถาวร
Builder’s Hut, Alliance Hall และ Walls
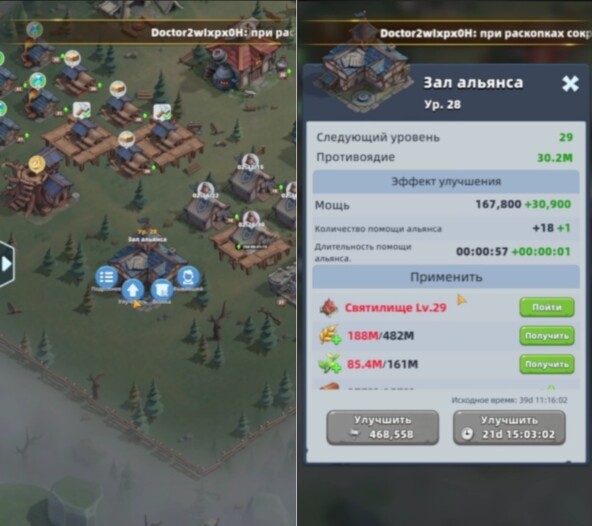
Builder’s Hut ช่วยลดเวลาของทุกโปรเจกต์ในอนาคต ดังนั้นการลงทุนนี้จึงส่งผลดีสะสมทั่วทั้งไอดี Alliance Hall จะช่วยเพิ่มประสิทธิภาพความช่วยเหลือจากพันธมิตร (แตะได้มากขึ้น, ได้เวลาเพิ่มขึ้นต่อการแตะหนึ่งครั้ง) — ขอความช่วยเหลือทันทีที่เวลานับถอยหลังเริ่มขึ้น และค่อยใช้ไอเทมเร่งเวลาหลังจากที่พันธมิตรช่วยจนครบแล้วเท่านั้น ไม่เช่นนั้นเวลาฟรีจะเสียเปล่า
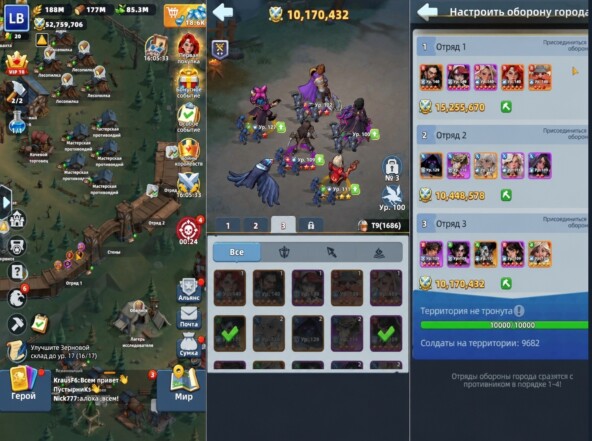
กองกำลังป้องกันสามชุดจะประจำการอยู่บน Walls (กำแพงเมือง) พร้อมด้วยป้อมปราการและปุ่มดับเพลิง หากต้องการจัดระเบียบใหม่ กองทัพที่ออกไปมาร์ชทั้งหมดต้องกลับมาถึงฐาน คอยดูช่องทำเครื่องหมายป้องกัน: หากเปิดใช้งาน ฮีโร่และทหารจะเข้าร่วมการป้องกัน — หากเจอผู้โจมตีที่แข็งแกร่งกว่า นั่นหมายถึงความสูญเสียมหาศาล ผู้เล่นหลายคนจึงเลือกปิดเครื่องหมายนี้ในช่วงสงครามข้ามเซิร์ฟเวอร์เพื่อรักษา quân แต่ต้องเปิดติ๊กกลับคืนก่อนศึก Undead Siege ไม่อย่างนั้นคลื่นซอมบี้จะไม่ถูกหยุด เลเวลของกำแพงยังช่วยเพิ่มความเร็วในการมาร์ชสำหรับการโจมตี Blight การหาวัตถุดิบ และการเดินทางกลับด้วย
Research Camp, Watchtower, Falcon Tower
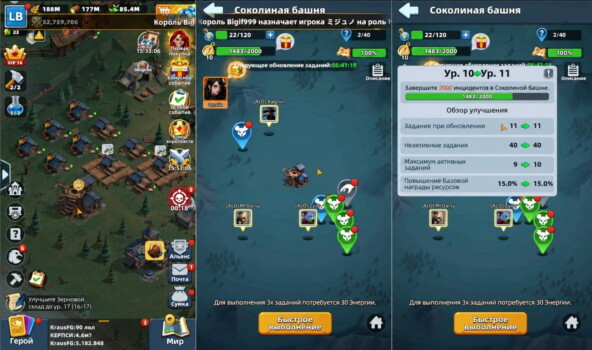
Research Camp (แบตเทิลพาส) การต่อสู้ไม่เสียทหาร — เป็นห้องทดลองที่สมบูรณ์แบบสำหรับการทดสอบกองทัพและการเปรียบเทียบฮีโร่ — พร้อมทั้งรายได้ passive รายชั่วโมง (เสบียง, ไม้, สมุนไพร, ยาต้านพิษ) และหีบสมบัติทุกๆ ไม่กี่ด่าน Watchtower ใช้สำหรับการสำรวจฝ่าย (หนึ่งฝ่ายต่อโหมด รีเฟรชทุกๆ ประมาณ 3 วัน): อย่าเลือกดาวสูงสุด “เพื่อการเติบโต” — การวิ่งกลางทางที่ติดขัดจะได้คะแนนแยกว่าการเคลียร์เต็มจำนวนที่ต่ำกว่าหนึ่งดาว
Falcon Tower จะแจกเควสต์ประจำวัน (เควสต์ใหม่ทุกๆ ประมาณ 6 ชั่วโมง; มีประมาณ 11 เควสต์ในหอคอยที่พัฒนาแล้ว แต่บอร์ดรับได้แค่ 9 เควสต์ ที่เหลือจะเข้าคิวรอ — เควสต์ล้นคิวจะหายไป) เควสต์ต้องใช้พลังงานและให้ผลตอบแทนเป็นทรัพยากร, ยาต้านพิษ และไอเทม Raven เป็นต้น ให้อัปเกรดหอคอยนี้ก็ต่อเมื่อคุณเคลียร์เควสต์ทุกวันจริงๆ เท่านั้น
โซนอุปกรณ์และสิ่งที่ควรละไว้ก่อน
Smelting Workshop ผลิต Gear Stones (ดาบเลเวลสูงอันเดียวอาจต้องการหินมากกว่า 20,000 ก้อนต่อการอัปเกรดหนึ่งครั้ง — ให้พัฒนาไว้แต่เนิ่นๆ), Weaving Workshop ผลิตผ้าที่จะถูกนำไปสังเคราะห์เป็นเหล็กสำหรับอุปกรณ์ทองในเวลาต่อมา และ Gear Workshop สร้างชิ้นส่วนอุปกรณ์ เซตทองเต็มยศสำหรับทีมที่ 1 ใช้เวลานาน ดังนั้นการผลิตจึงไม่ควรหยุดนิ่ง — ดาบพกพาที่ดีและเกราะแทงค์ดีกว่าการมีเลเวลสุ่มๆ หลายเลเวลในที่อื่น
ให้ชะลอการอัปเกรดไว้ก่อนเมื่อทรัพยากรฝืดเคือง: Scout Squad (ช่วยให้สำรวจเร็วขึ้น แต่ไม่มีความเร็วในการพัฒนา), คลังเก็บที่เกินกว่าเงื่อนไข, Tavern ที่เกินกว่าเงื่อนไข Raven Workshop สามารถอัปเกรดในวันสร้างสิ่งก่อสร้างเพื่อเอาคะแนนดวลได้ Arena, Raven Nest, Black Ops Center และ Curio Hall ไม่ต้องอัปเกรดเลเวลเลย — แค่ใช้งานพวกมันตามปกติก็พอ พวกมันไม่กินทรัพยากรก่อสร้าง
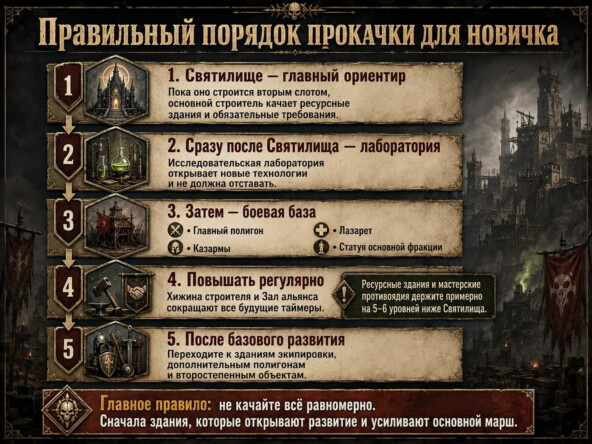
ลำดับสำหรับผู้เริ่มต้นในบรรทัดเดียว: Sanctuary ในช่องยาว → Lab → Training Ground หลัก, Barracks, Infirmary, รูปปั้นฝ่ายหลัก → Builder’s Hut และ Alliance Hall อย่างสม่ำเสมอ → สิ่งก่อสร้างทรัพยากรต่ำกว่า Sanctuary ประมาณ 5–6 เลเวล → โซนอุปกรณ์ → โรงฝึกเสริมและสิ่งก่อสร้างรอง → คลังเก็บ, Tavern, หน่วยสำรวจ ตามเงื่อนไขหรือเมื่อมีทรัพยากรเหลือ
ที่มา: Здания Last Asylum: Plague - гайд для новичков โดย Гейм-Знаток บน DTF
🎥 วิดีโอแนะนำ
วิดีโอแนะนำและบทวิเคราะห์กลยุทธ์ที่คัดสรรจากผู้สร้างคอนเทนต์ในชุมชน
📝 ถอดข้อความ 17:42 (1062 сек) ▼
📝 ถอดข้อความ 13:24 (804 сек) ▼
ค้นหาหัวข้อนี้บน YouTube: «Buildings & Base»
คำค้นหา: Last Asylum Plague building speed construction guide
🏰 เครื่องมือวางแผนอัปเกรดฐานที่มั่น
คำนวณทรัพยากรที่ต้องใช้ทั้งหมด, เวลาในการก่อสร้างสุทธิพร้อมบัฟความเร็ว, และลำดับสิ่งก่อสร้างที่จำเป็น
ธัญพืช
0
ไม้
0
สมุนไพร
0
เวลาพื้นฐาน
0
เมื่อรวมบัฟของคุณ
0
เวลาที่ประหยัดได้
0
สิ่งก่อสร้างที่จำเป็น:
💡 กฎทอง "ถือค้อนไว้ก่อน":
คะแนนพลังจากการก่อสร้างในกิจกรรม Alliance Duel และ Supreme Healer จะได้รับก็ต่อเมื่อคุณกดไอคอนค้อนเพื่อเสร็จสิ้นการก่อสร้างเท่านั้น เริ่มอัปเกรดล่วงหน้าได้หลายวัน แต่อย่ากดค้อนจนกว่าจะถึงวันก่อสร้างที่กำหนด (วันอังคาร)!
ไอเทมเร่งความเร็วการก่อสร้างและเพชรลดสูงสุด 20%
กำลังอัปเกรด Sanctuary ไปที่เลเวล 25–30 อยู่ใช่ไหม? เติมเพชรและซื้อแพ็กก่อสร้างพร้อมรับของทันทีผ่าน UID บน LDShop
📖 อ่านต่อ
คู่มือนี้มีประโยชน์หรือไม่?