Priorità degli Edifici e Tabella di Marcia del Santuario
Tabella di marcia del Santuario fino al livello 30, l'ordine di priorità di costruzione, la funzione di ogni edificio e come cumulare correttamente i bonus di velocità di costruzione in sequenza.
☰ In questa pagina 31 ▾
🗓 Aggiornato: 2026-10-12
Costruire in Last Asylum: Plague è un gioco a lungo termine: la spinta del Santuario dal livello 1 al livello 30 richiede mesi, e l’ordine sbagliato vi costerà settimane di tempo. Questa pagina rappresenta la build order della community: quali edifici contano e in quale sequenza, una tabella di marcia del Santuario livello per livello e la matematica esatta del cumulo della velocità di costruzione.
L’unica domanda che determina ogni slot nella coda è: questo mi rende più forte o più veloce? Se la risposta è no, può aspettare.
L’Ordine di Priorità di Costruzione
Quando sono disponibili più edifici contemporaneamente, l’ordine della community è fisso:
- Santuario — sempre. Regola ogni altro livello nella città, il limite di livello degli eroi e i livelli delle truppe. Ogni volta che è disponibile un potenziamento del Santuario, va per primo nella coda.
- Laboratorio di Ricerca — gestisce il vostro albero tecnologico e funge da prerequisito obbligatorio per i livelli del Santuario dall’11 al 30 (senza un Laboratorio potenziato, non potete avviare alcun potenziamento di metà/fine gioco del Santuario).
- Campi di Addestramento — sbloccano i livelli delle truppe (da T1 a T10). Usate la divisione 1 Max + 3 Basse: portate al massimo solo 1 campo principale per abbinarlo al limite di livello del vostro Santuario, e mantenete gli altri 3 al Livello 10 per produrre in massa T4 economici da promuovere (si risparmiano 6–7 ore per ciclo e milioni di risorse!).
- Caserma — capacità dei soldati. Un esercito permanente più grande significa più potenza e maggiore impatto per marcia.
- Infermeria — cura i feriti dopo le sconfitte. Un’infermeria piccola significa che ogni combattimento perso dissangua truppe che non potete recuperare.
- Officina di Fonderia — produce e raffina Pietre per Equipaggiamento per i potenziamenti dell’equipaggiamento. Portatela al Livello 25 non appena il vostro Santuario lo consente, per evitare un collo di bottiglia a metà gioco sulle armi da trasporto.
- Mura — potenziate rigorosamente per i traguardi di sblocco (richieste solo per i livelli del Santuario 5, 6, 9, 10, 12 e 24; mai richieste per gli altri 24 livelli). Le Mura NON forniscono statistiche di combattimento né proteggono le truppe dai danni! Forniscono solo durabilità alla Difesa della Città per resistere al fuoco e ai teletrasporti forzati durante gli assedi.
- Edifici di Risorse e Depositi — potenziati strettamente secondo le necessità per i prerequisiti del Santuario (Legname, Granaio e Depositi di Erbe).
La regola dietro questo elenco: se un edificio non vi rende più forte o più veloce, non è urgente. Gli edifici di produzione, i depositi e le decorazioni vengono comunque costruiti, ma solo quando i sette precedenti non hanno nulla da fare o un vincolo di sblocco li rende necessari.
Cosa Fa Ogni Edificio
Un rapido riferimento per gli edifici con cui interagirete davvero. Le traduzioni differiscono tra i client di gioco, quindi quando due nomi sembrano simili, controllate il tooltip in-game per l’effetto esatto sulla vostra versione.
| Edificio | Cosa fa | Note della community |
|---|---|---|
| Santuario | Vincola tutti gli altri livelli degli edifici, imposta il limite di livello degli eroi, garantisce EXP per ogni potenziamento e sblocca edifici e funzionalità man mano che sale di livello. | Da potenziare costantemente. È il vostro effettivo livello giocatore. |
| Mura | Forniscono durabilità alla Difesa della Città e riducono il tasso di decadimento della difesa durante gli assedi. NON proteggono le truppe in battaglia e non conferiscono statistiche di combattimento! | Da livellare rigorosamente come prerequisito ai livelli 5, 6, 9, 10, 12 e 24. Non sprecate costruttori altrimenti. |
| Capanna del Costruttore | Estende la finestra di completamento gratuito sui timer di costruzione (tempo di accelerazione gratuito). I sopravvissuti di stanza all’interno offrono bonus extra: sostituiteli con sopravvissuti migliori man mano che li reclutate. | Mantenetela al livello del Santuario fino al Santuario 15 per ottenere la massima finestra di completamento gratuito. |
| Laboratorio di Ricerca | Gestisce il vostro albero tecnologico: ricerca economica, militare e di sviluppo. Laboratori di Ricerca 1 e 2 uniti: entrambe le code beneficiano dei Buff di Velocità ottimali. | Priorità n. 2: prerequisito continuo per i Santuari 11–30. Accelerate Super Ricompensa 1 e 2 nell’albero del Duello dell’Alleanza per sbloccare i livelli di forzieri dal 4 al 9! |
| Campi di Addestramento | Sbloccano nuovi livelli di truppe (T2 al Lv.3, T3 al Lv.6, T4 al Lv.10, T5 al Lv.14, T6 al Lv.17, T7 al Lv.20, T8 al Lv.24, T9 al Lv.27, T10 al Lv.30) e aumentano la capacità di addestramento. | Portate al massimo 1 campo per il livello più alto; mantenete gli altri 3 al Lv.10 per il farming parallelo di T4 e la promozione (si risparmiano 6–7 ore a ciclo). |
| Caserma | Aumenta la capacità totale dell’esercito permanente nella vostra città. | Da potenziare per mantenere un esercito massiccio per KvK e Guerre tra Regni. |
| Infermeria | Cura i soldati feriti dopo le sconfitte. | Un’infermeria sottodimensionata = perdite permanenti di truppe dopo ogni combattimento perso. |
| Officina di Antitossina | Produce Antidoti / Antitossina, la risorsa chiave degli eroi utilizzata nei vari sistemi di progressione. | Da costruire al Lv.10 e mantenere in produzione 24/7. |
| Officina dell’Equipaggiamento / Fonderia / Tessitura | Creano e potenziano l’equipaggiamento degli eroi usando i materiali raccolti. | Portate l’Officina di Fonderia al Lv.25 per una produzione costante di Pietre per Equipaggiamento; l’Officina dell’Equipaggiamento si sblocca al Santuario 20. |
| Tempio (Statua del Guerriero) | Edificio di culto unificato (che unisce le ex Statue del Guerriero, dell’Esploratore e dello Stregone). Fornisce bonus percentuali alle statistiche della fazione scelta. | Da potenziare per aumentare la potenza delle squadre e soddisfare i prerequisiti del Santuario. |
| Sala dell’Onore | Mostra i livelli di onore degli eroi e sblocca il Negozio d’Onore (fonte principale di Progetti per Equipaggiamento UR). | Essenziale per la progressione dell’equipaggiamento a fine gioco. Acquistate esclusivamente i Progetti per Equipaggiamento UR. |
| Sala delle Curiosità | Ospita le Curiosità raccolte che forniscono bonus passivi agli edifici, all’economia e alla potenza di combattimento delle squadre. | Potenziate i livelli a stelle delle Curiosità per bonus permanenti validi per tutto l’account. |
| Taverna | Reclutamento degli eroi: il sistema dei banner e delle estrazioni si trova qui. | Conservate i diamanti per gli eventi UR a tempo invece di sprecarli qui. |
| Torre del Falcone | Genera missioni giornaliere che premiano con diamanti, accelerazioni, frammenti di eroe e antitossina. Il Lv.8 sblocca la riscossione con un solo tocco. | Usate la strategia “Cumulo massimo − 1” per accumulare le missioni completate per i giorni a punti doppi. |
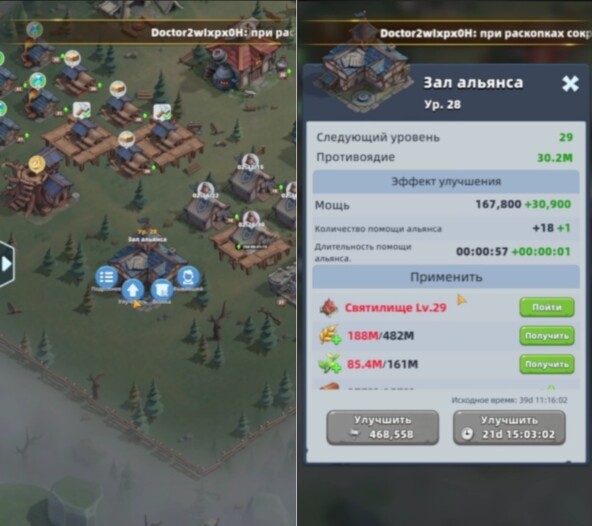
| Sala dell’Alleanza | Aumenta il numero di Aiuti dell’Alleanza che potete ricevere. NON influisce sulle guarnigioni o sui raduni! | Livello più superiore = più aiuti dagli alleati (fino a 30 aiuti al Lv.25, riducendo qualsiasi timer di circa il 30% gratuitamente). Fondamentale per risparmiare accelerazioni e prerequisito obbligatorio per i Santuari Lv. 7, 8, 9, 13, 20 e 29. |
Caserma vs Campi di Addestramento — La Trappola dei Nomi
Un edificio sblocca nuovi livelli di truppe (Campi di Addestramento), mentre l’altro aumenta il numero di soldati che potete ospitare (Caserma). Aprite l’edificio e leggete il tooltip: se l’effetto elencato è lo sblocco dei livelli e il limite della coda di addestramento, si tratta dei Campi di Addestramento; se si tratta della capacità totale dei soldati, è la Caserma.
Tabella di Marcia del Santuario per Livello (da 1 a 30)
Un malinteso comune è che le Mura siano richieste per ogni singolo livello. Non è così! Le Mura sono richieste solo 6 volte in tutto il gioco (ai livelli 5, 6, 9, 10, 12 e 24).
La vera struttura dei vincoli:
- Il Laboratorio di Ricerca è il collo di bottiglia principale: per ogni livello dal 12 al 30, il Laboratorio di Ricerca deve essere a
Lv. (Livello Obiettivo − 1). - Il vincolo militare secondario ruota: Campi di Addestramento (7, 8, 11, 15, 18, 21, 25, 27, 30), Tempio / Statua del Guerriero (14, 16, 19, 22, 26), Sala dell’Alleanza (7, 8, 9, 13, 20, 29), Caserma (17, 28) e Infermeria (10, 23).
- Il vincolo di risorse terziario ruota: Depositi di Legname/Granaio/Erbe, Officina di Antitossina, Fattoria, Segheria e Giardino di Erbe.
Di seguito sono riportati i dati completi e ufficiali livello per livello estratti direttamente dal file binario del client di gioco:
Primo Gioco (Livelli 1 – 10)
| Lv. | Prerequisiti | Tempo Base | Risorse (Grana / Legname / Erbe) | Sblocchi |
|---|---|---|---|---|
| 2 | Nessuno | 2 sec | 32 / 32 / 0 | Progressione di base, Limite eroe Lv.10 |
| 3 | Nessuno (Missione Capitolo 17) | 3 sec | 983 / 983 / 0 | Truppe di Livello 2 (presso Campi di Addestramento Lv.3) |
| 4 | Deposito Legname 1 + Granaio 1 + Deposito Erbe 1 | 5 min | 2,6K / 2,6K / 0 | Depositi di Risorse, Capanna del Costruttore |
| 5 | Mura Lv.3 | 10 min | 19,7K / 19,7K / 0 | Limite eroe Lv.20 |
| 6 | Mura Lv.5 | 34 min | 92,7K / 92,7K / 0 | Truppe di Livello 3 (presso Campi di Addestramento Lv.6), Torre di Guardia, Radar |
| 7 | Campo di Addestramento 4 + Sala dell’Alleanza 3 | 1,5 h | 235,8K / 235,8K / 0 | Sala dell’Alleanza (Pulsante Aiuto Alleanza), Laboratorio di Ricerca |
| 8 | Campo di Addestramento 6 + Sala dell’Alleanza 5 | 3 h | 395,6K / 395,6K / 0 | Torre del Falcone (missioni giornaliere) |
| 9 | Mura 8 + Sala dell’Alleanza 7 | 4,3 h | 605,8K / 605,8K / 208,7K | Limite eroe Lv.30 |
| 10 | Mura 9 + Infermeria 7 | 5,6 h | 748,7K / 748,7K / 232,9K | Truppe di Livello 4 (presso Campi di Addestramento Lv.10), Officina di Antitossina, Taverna |
Gioco Intermedio (Livelli 11 – 19)
| Lv. | Prerequisiti | Tempo Base | Risorse (Grana / Legname / Erbe) | Sblocchi |
|---|---|---|---|---|
| 11 | Campo di Addestramento 10 + Laboratorio di Ricerca 7 | 7,2 h | 1,9M / 1,9M / 601,8K | Slot Marcia 2 (Squadra 2 tramite ricerca nel Lab) |
| 12 | Laboratorio di Ricerca 11 + Mura 10 + Officina di Antitossina 7 | 9,4 h | 3,1M / 3,1M / 959K | Capacità di ricerca avanzate |
| 13 | Laboratorio di Ricerca 12 + Sala dell’Alleanza 11 + Fattoria 7 | 12,2 h | 3,5M / 3,5M / 1,1M | Limite eroe Lv.40 |
| 14 | Laboratorio di Ricerca 13 + Statua del Guerriero (Tempio) 12 + Segheria 7 | 15,9 h | 4,9M / 4,9M / 1,6M | Truppe di Livello 5 (presso Campi di Addestramento Lv.14), Tempio |
| 15 | Laboratorio di Ricerca 14 + Campo di Addestramento 14 + Giardino di Erbe 7 | 22,3 h | 6,5M / 6,5M / 2,3M | Officina di Fonderia, Slot Marcia 3, Limite eroe Lv.50 |
| 16 | Laboratorio di Ricerca 15 + Statua del Guerriero (Tempio) 14 + Granaio 7 | 1,3 g (31,2 h) | 11,9M / 11,9M / 4,0M | Produzione ed estrazione di erbe aumentate |
| 17 | Laboratorio di Ricerca 16 + Caserma 15 + Deposito Legname 7 | 1,8 g (43,6 h) | 16,7M / 16,7M / 5,1M | Truppe di Livello 6 (presso Campi di Addestramento Lv.17), Officina di Tessitura, Limite eroe Lv.60 |
| 18 | Laboratorio di Ricerca 17 + Campo di Addestramento 17 + Deposito Erbe 7 | 2,5 g (61,1 h) | 28,2M / 28,2M / 9,3M | Equipaggiamento Eroe Lv.18 |
| 19 | Laboratorio di Ricerca 18 + Statua del Guerriero (Tempio) 17 + Officina di Antitossina 10 | 3,6 g (85,5 h) | 32,7M / 32,7M / 11,3M | Nodi tecnologici militari avanzati |
Fine Gioco - Parte 1 (Livelli 20 – 25)
| Lv. | Prerequisiti | Tempo Base | Risorse (Grana / Legname / Erbe) | Sblocchi |
|---|---|---|---|---|
| 20 | Laboratorio di Ricerca 19 + Sala dell’Alleanza 18 + Fattoria 10 | 5,0 g (119,7 h) | 60,0M / 60,0M / 18,4M | GRANDE TRAGUARDO! Truppe di Livello 7 (CA 20), Officina dell’Equipaggiamento, Slot Marcia 4 |
| 21 | Laboratorio di Ricerca 20 + Campo di Addestramento 20 + Segheria 10 | 6,7 g (160,3 h) | 85,5M / 85,5M / 27,6M | Limite eroe Lv.70, Creazione equipaggiamento viola |
| 22 | Laboratorio di Ricerca 21 + Statua del Guerriero (Tempio) 21 + Giardino di Erbe 10 | 8,7 g (208,4 h) | 111,2M / 111,2M / 36,7M | Espansione delle statistiche di fazione |
| 23 | Laboratorio di Ricerca 22 + Infermeria 22 + Granaio 10 | 11,3 g (271,0 h) | 145,2M / 145,2M / 42,8M | Creazione equipaggiamento dorato |
| 24 | Laboratorio di Ricerca 23 + Mura 23 + Deposito Legname 10 | 15,8 g (379,4 h) | 171,2M / 171,2M / 56,2M | Truppe di Livello 8 (presso Campi di Addestramento Lv.24), Aumento capacità raduni |
| 25 | Laboratorio di Ricerca 24 + Campo di Addestramento 24 + Deposito Erbe 10 | 22,1 g (531,1 h) | 277,9M / 277,9M / 97,5M | Limite eroe Lv.80, Alberi tecnologici militari magistrali |
Fine Gioco - Parte 2 (Livelli 26 – 30)
| Lv. | Prerequisiti | Tempo Base | Risorse (Grana / Legname / Erbe) | Sblocchi |
|---|---|---|---|---|
| 26 | Laboratorio di Ricerca 25 + Statua del Guerriero (Tempio) 25 + Officina di Antitossina 13 | 31,0 g (743,5 h) | 386,8M / 386,8M / 123,5M | Maestrie d’equipaggiamento avanzate dell’officina |
| 27 | Laboratorio di Ricerca 26 + Campo di Addestramento 26 + Fattoria 13 | 43,4 g (1041,0 h) | 548,0M / 548,0M / 168,6M | Truppe di Livello 9 (presso Campi di Addestramento Lv.27) |
| 28 | Laboratorio di Ricerca 27 + Caserma 27 + Segheria 13 | 60,7 g (1457,3 h) | 731,1M / 731,1M / 236,5M | Capacità massime di stoccaggio sicuro e infermeria |
| 29 | Laboratorio di Ricerca 28 + Sala dell’Alleanza 28 + Giardino di Erbe 13 | 78,9 g (1894,5 h) | 1,05 B / 1,05 B / 316,4M | Preparazione pre-T10 |
| 30 | Laboratorio di Ricerca 29 + Campo di Addestramento 29 + Officina di Antitossina 15 | 102,6 g (2462,9 h) | 1,36 B / 1,36 B / 441,3M | LIMITE ASSOLUTO! Truppe di Livello 10 (CA 30 + Tecnologia), Ramo Tecnologico Specialistico |
La scalata del Santuario non è un unico lungo grind, ma quattro scatti tra traguardi che sbloccano ciascuno un vero salto di potenza.
- Santuario 20 — Arrivano insieme le truppe di livello 7 e un’officina dell’equipaggiamento di alto livello. Questo è il singolo picco di potenza più importante del mid-game e la prima spinta per cui vale la pena bruciare le accelerazioni conservate.
- Santuario 24, poi 27 — Le spinte ai livelli successivi. Ognuna innalza nuovamente i livelli delle truppe e i tetti dell’officina.
- Santuario 30 — Il limite massimo. Tutto ciò che è rimasto in città può ora essere completato.
Siate consapevoli del costo dei traguardi avanzati: oltre la metà dei venti, i singoli potenziamenti superano i 100 milioni di risorse. Iniziate a considerare l’accumulo di risorse come parte del piano di costruzione; consultate la sezione sul dimensionamento delle risorse sottostante.
Cumulo della Velocità di Costruzione — La Matematica Corretta
I bonus di velocità di costruzione si accumulano da cinque fonti e insieme comprimono un potenziamento di 38 giorni in 20 giorni (dalla guida di chuppergaming). I bonus sono:
| Fonte | Bonus |
|---|---|
| Ricerca Sviluppo Personale | +5%, poi +10% al livello del nodo 5 |
| Ricerca Alleanza — Costruzione Rapida | +20% |
| VIP livello 11 | +45% |
| Città Reale — Titolo di Ministro della Costruzione | +50% |
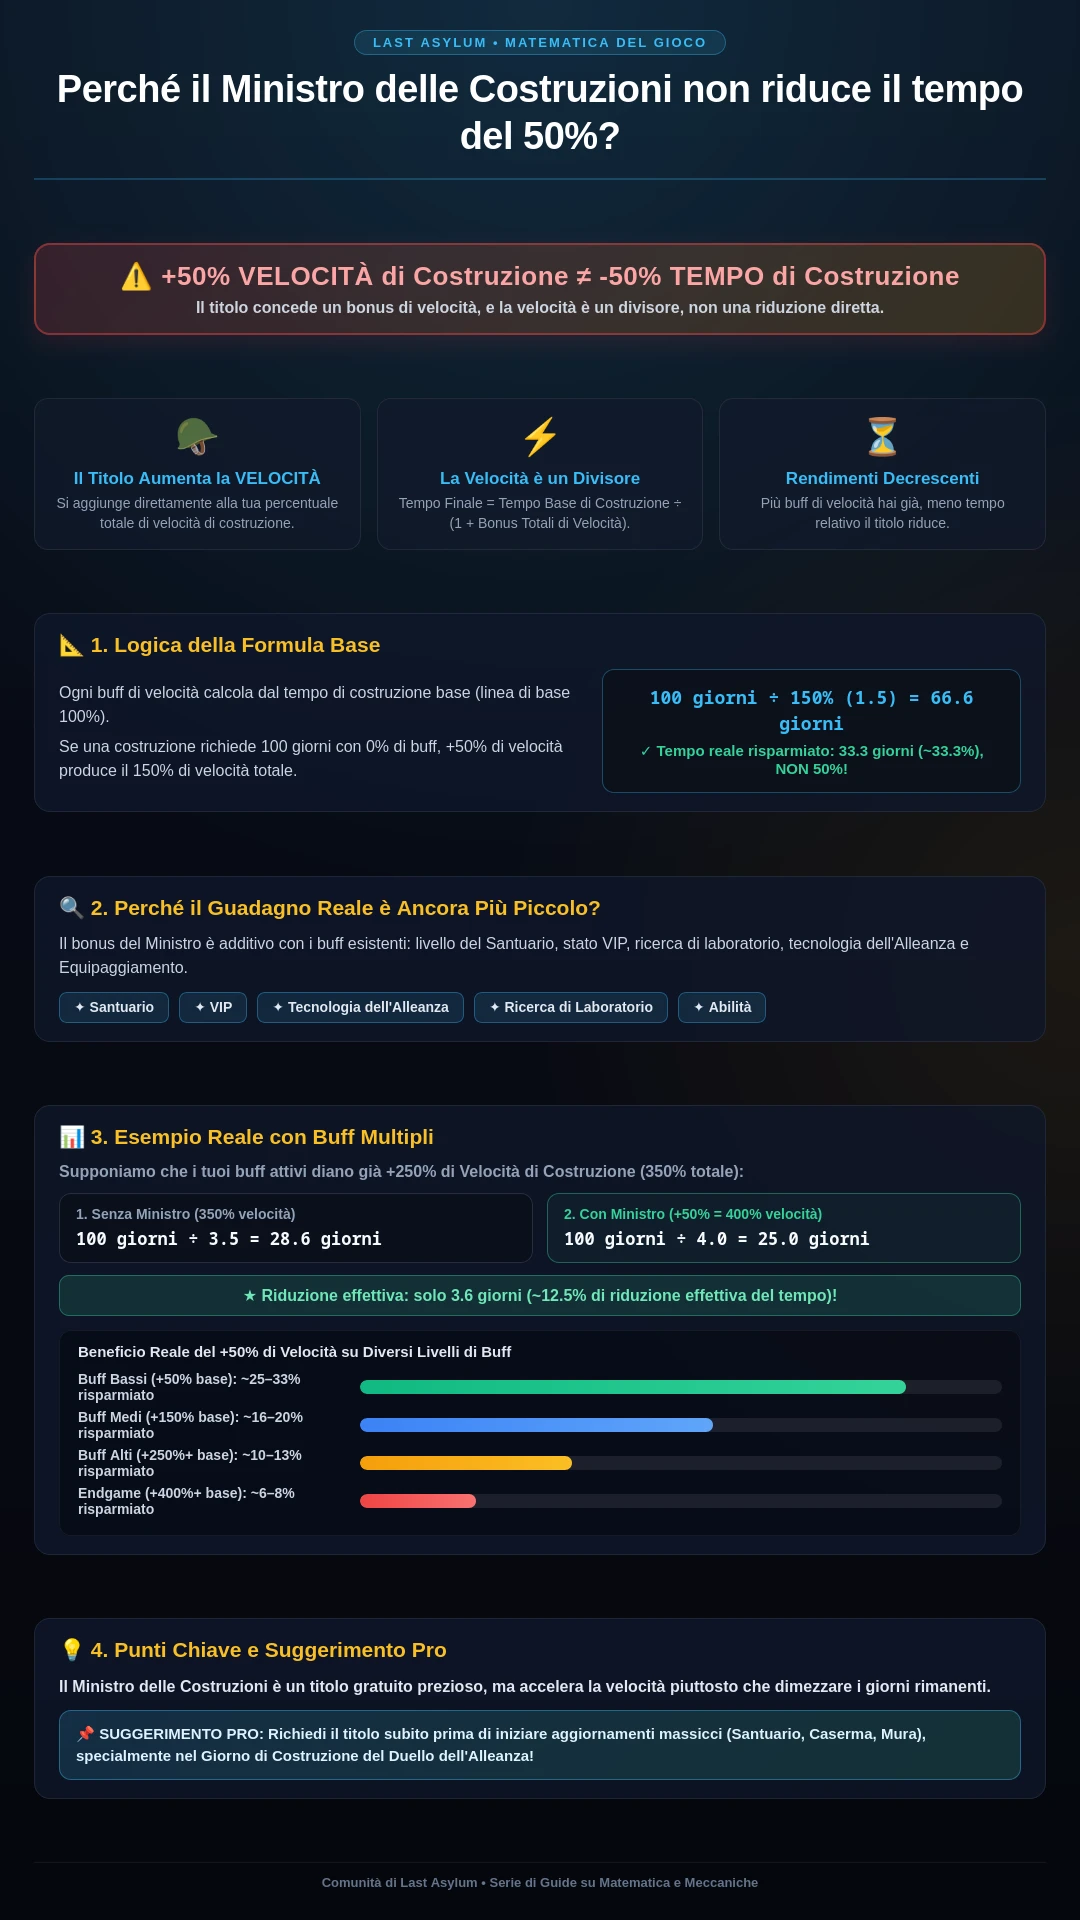
Ora la parte che quasi tutti sbagliano: questi bonus si sommano come moltiplicatori di velocità, applicati al tempo base — non potete sommare 10% + 5% + 20% + 45% + 50% e tagliare il timer del 130% di qualcosa, perché il gioco divide per la velocità totale:
$$T = \frac{T_{base}}{100% + \sum \text{speed buffs}}$$
Ecco l’aritmetica reale su un potenziamento con tempo base di 37 giorni:
- Tempo base: 37 giorni.
- Con +10% e +5% attivi: T = 37 / 1,15 ≈ 32,2 giorni.
- Aggiungendo il titolo di Ministro (+50%): velocità totale 165% → T = 37 / 1,65 ≈ 22,4 giorni — il titolo fa risparmiare ~10 giorni, non “la metà del timer”.
- E con tutto cumulato (+10% +5% +20% +45% +50% = +130%): T = 37 / 2,30 ≈ 16,1 giorni.
Ogni bonus aggiuntivo vale quindi leggermente meno ore rispetto a quello precedente (rendimenti decrescenti). Le conseguenze pratiche:
- L’ordine dei bonus non influisce sul risultato finale, ma dovete avere i bonus attivi quando il timer è lungo, poiché il loro valore scala con il tempo rimanente.
- Applicate tutto prima di avviare le grandi spinte del Santuario 20+, non a metà strada.
- Ottenere il titolo di Ministro della Costruzione e il VIP 11 prima della spinta finale vale già da solo giorni di timer.
[!TIP] Il trucco dei punteggi “Trattieni il Martello”: Nel Duello dell’Alleanza e in Guaritore Supremo, i punti di costruzione vengono assegnati nel momento in cui toccate l’icona del martello completato, non quando avviate il progetto. Avviate i potenziamenti lunghi con giorni di anticipo e non toccate il martello finché non arriva il giorno della Costruzione (martedì).
[!IMPORTANT] Regola dell’Istantanea del Titolo di Ministro della Costruzione: Il titolo di Ministro (+50% di velocità di costruzione) si applica rigorosamente ai progetti di costruzione avviati MENTRE si detiene il titolo.
- Richiedete e ricevete il titolo dal Re o da un ufficiale.
- Toccate Potenzia per mettere in coda il vostro edificio (il timer si blocca con il bonus applicato).
- Potete passare immediatamente il titolo al giocatore successivo: la costruzione in coda mantiene permanentemente il suo timer scontato fino al completamento!
Ridimensionamento delle Risorse — Pianificate le vostre Scorte
Il costo di un edificio al Santuario 8 non vi dice nulla su ciò che costerà al Santuario 25. La curva si sviluppa in tre fasi:
| Fase | Costo tipico per potenziamento | Cosa significa |
|---|---|---|
| Inizio (Santuario 1-10) | Da migliaia a pochi milioni | La produzione copre il fabbisogno. Spendete liberamente, tenete le code piene. |
| Metà (Santuario 11-24) | Decine di milioni | Saccheggi ed eventi reggono il carico — il saccheggio giornaliero smette di essere facoltativo. |
| Fine (Santuario 25-30) | Oltre 100 milioni | Fate scorte per giorni prima di iniziare. Un potenziamento che non potete alimentare blocca l’intera coda. |
E mantenete il mix bilanciato: abbiate sempre a magazzino Grana, Legname ed Erbe. I potenziamenti avanzati divorano tutte e tre le risorse contemporaneamente, e rimanere a secco di una di esse a metà spinta vanifica esattamente il timer che avete accumulato per risparmiare tempo.
Tabella di Marcia Definitiva del Laboratorio di Ricerca: Tutti i 13 Alberi Tecnologici
Le tecnologie del Laboratorio di Ricerca forniscono moltiplicatori permanenti cumulativi tra combattimento, economia e punteggio dell’alleanza. Sulla base della collaudata Tabella di Marcia Definitiva per la Ricerca, ecco l’esatta priorità dei livelli:
| Livello di Priorità | Ramo di Ricerca | Impatto Principale | Strategia Consigliata |
|---|---|---|---|
| Livello S (Obbligatorio) | Duello dell’Alleanza | Super Ricompensa 1 e 2 | La singola priorità più alta del gioco! Super Ricompensa sblocca i forzieri giornalieri dal livello 4 al 9 nel Duello dell’Alleanza, garantendo milioni in diamanti, accelerazioni e token eroe. Massimizzatelo per primo! |
| Livello S (Obbligatorio) | Sviluppo | Velocità di Costruzione e Ricerca (+10-25%) | Deve essere ricercato prima di avviare lunghi timer di costruzione per il Santuario 20+ per risparmiare centinaia di giorni di accelerazioni. |
| Level A (Alto) | Economia (Raccolta) | Velocità di Raccolta sulla Mappa del Mondo (+50-100%) | La raccolta sulla mappa rende 20 volte di più rispetto ai nodi di produzione passiva in città. Priorità ai rami di Raccolta rispetto alla Produzione. |
| Livello A (Alto) | Fazione Primaria (Guerriero/Esploratore/Stregone) | ATK, DIF e HP per la classe scelta | Concentrate il 100% della ricerca militare sulla fazione principale della vostra Squadra 1. Non distribuite mai le statistiche equamente tra tutte e tre le classi. |
| Livello A (Alto) | Dimensione Marcia | Capacità truppe da +20.000 a +50.000 | Moltiplicatore diretto sui danni dei raduni e sulla difesa della guarnigione. Eserciti più grandi vincono gli scontri. |
| Livello B (Medio/Tardo) | Truppe d’Élite | Sblocca Truppe di Livello 10 (T10) | Richiede il Santuario 30 e il completamento di tutti i prerequisiti. Traguardo di fine gioco. |
| Livello B (Medio/Tardo) | Trasporto Carovana | Capacità della carovana e statistiche di scorta | Migliora la difesa della Carovana d’Oro e i ritorni dei saccheggi senza perdite di truppe. |
| Livello C (Situazionale) | Tattiche (Offensive/Difensive) | Riduzione delle perdite nei raduni del Bastione KvK | Ideale prima che inizi la stagione della Guerra tra Regni. |
| Livello S (Fine Gioco) | Tecnologia Specialistica | Potenti buff specialistici attivi e passivi dell’Era | Si sblocca quando il Laboratorio di Ricerca raggiunge il Lv.30 e la Tecnologia Truppe d’Élite raggiunge l’80%. Il pinnacolo supremo dell’albero tecnologico. |
Traguardi dei Livelli delle Truppe
- Truppe T7: Santuario 20 + Campi di Addestramento 20.
- Truppe T8: Santuario 24–25 + Campi di Addestramento 24.
- Truppe T9: Santuario 27 + Campi di Addestramento 27.
- Truppe T10: Santuario 30 + Campi di Addestramento 30 + 100% del ramo di ricerca Truppe d’Élite.
Micro-Strategia per Singolo Albero (analisi di Korpez)
Una volta avviata la priorità macro sopra indicata, queste sono le scorciatoie all’interno degli alberi che fanno risparmiare settimane di accelerazioni di ricerca:
- Albero dello Sviluppo — accelerate verso il nodo che sblocca il Campo di Addestramento extra. Portate Fasciatura Rapida solo al livello 2 (quanto basta per procedere); non massimizzatela mai all’inizio. Completato in ~7 giorni con l’aiuto attivo dell’alleanza.
- Albero dell’Economia — aprite prima i terreni della Fattoria extra, poi spingete immediatamente sui nodi di Produzione di Erbe; lasciate perdere tutto il resto fino a molto più tardi.
- Alberi degli Eroi — portate tutte e tre le scale di classe al Lv 3 in modo uniforme (il costo di sette giorni per nodo è un bug che gli sviluppatori presumibilmente risolveranno), quindi portate la vostra classe principale al Lv 5. I nodi generici degli eroi sottostanti (Attacco/Salute/Difesa/Danno) sono oro puro.
- Albero dei Soldati — ogni nodo di statistica standard vale la pena, tranne l’ultimo nodo di Carico: un potenziamento di 9 giorni per un +1% di carico è una trappola; saltatelo.
- Albero dello Sviluppo completo (post-sviluppo) — puntate dritto al Tasso di Mortalità dei Soldati (da −1% a −5% al massimo): il singolo nodo migliore per il KvK. Saltate la velocità di guarigione; la capacità di addestramento può essere presa con calma; vale la pena prendere la velocità di addestramento lungo il percorso.
- Economia Prospera — sbloccate il Giardino di Erbe, poi lasciate stare l’albero: tutto il resto lì dentro è peggiore rispetto agli stessi giorni di ricerca spesi in ambito militare.
- Scheda Squadra (post-Soldado) — potenziate Capacità di Marcia e Attacco Squadra per la vostra classe primaria; parcheggiate le altre al Lv 3. I nodi di difesa contro i boss mondiali possono essere lasciati a 3: massimizzarli non ripaga.
📚 Riferimento: Limiti degli edifici: perché le erbe si esauriscono
Fonte: wiki-last-asylum.com, client v1.0.87.
I limiti di costruzione stabiliscono quanti edifici dello stesso tipo una città può ospitare, e il limite reale è superiore a quanto suggerito dal pannello degli edifici. Il laboratorio possiede nodi che aggiungono un ulteriore edificio di ogni tipo, e con essi la disponibilità appare così.
| Edificio | Totale consentito |
|---|---|
| Fattoria | 5 |
| Segheria | 5 |
| Giardino di erbe | 5 |
| Campo di addestramento | 4 |
| Infermeria | 4 |
| Caserma | 4 |
Un quinto edificio di produzione aggiunge un quarto alla produzione della sua risorsa e costa meno di un altro livello sugli edifici già in piedi. Scoprirlo è la parte difficile, poiché il nodo si nasconde nell’albero della ricerca anziché nel pannello degli edifici.
Perché le erbe finiscono a metà gioco
Le disponibilità non si sbloccano insieme e la tabella di marcia delle erbe rimane indietro. La quarta fattoria e la quarta segheria si sbloccano al livello dodici del Santuario, il quarto giardino di erbe solo al diciannovesimo. Per sette livelli di fila, grano e legno provengono da quattro edifici ciascuno, mentre le erbe provengono da tre.
Da qui la sensazione che le erbe si esauriscano sempre per prime. La sensazione è esatta e deriva dal programma di sblocco piuttosto che da come il giocatore spende.
Il calcolatore di costruzione mostra quante copie una città può avere, inclusi i nodi del Laboratorio: ogni casella è etichettata con il livello del Santuario che la sblocca.
📚 Riferimento: Ricerca: prezzo della Potenza, rami e limiti
Dati verificati rispetto al client di gioco (v1.0.87, fonte: wiki-last-asylum.com).
La ricerca procede lentamente e costa molto, quindi l’ordine dei rami conta più del loro elenco. La Potenza ha prezzi estremamente diversi tra le categorie del laboratorio, due rami replicano ciò che altri due offrono già e una categoria non richiede alcuna risorsa. Sviluppo ed Economia vendono la Potenza al prezzo più basso, Eroe la vende al prezzo più alto.
Prezzo della Potenza per categoria
Dividendo tutto ciò che una categoria costa per l’intera Potenza che garantisce, si ottiene il seguente quadro.
| Categoria | Risorse per punto |
|---|---|
| Sviluppo | 794 |
| Economia | 2.640 |
| Soldato | 12.152 |
| Eroe | 18.065 |
Il divario è venti volte tanto. I rami iniziali di Sviluppo ed Economia ripagano più velocemente e vengono affrontati per primi, mentre quelli di Eroe aspettano fino a tardi.
Due rami di squadra ne duplicano altri due
La Squadra 1 e la Squadra 4 offrono gli stessi bonus e gli stessi limiti della Squadra 2 e della Squadra 3, ma costano molto meno: circa 310 milioni di risorse e 38 giorni di coda contro miliardi di risorse e migliaia di giorni per la seconda coppia.
I primi due meritano di essere massimizzati, mentre gli altri due possono aspettare finché qualcos’altro vale la pena di essere acquistato.
Il ramo che non costa risorse
La categoria legata al Duello dell’Alleanza non richiede grano, legno o erbe. Si paga con pergamene di studio, che vengono assegnate per la competizione: classifiche di lega dell’alleanza, duello, ricompense di stagione dell’arena e obiettivi di crescita. Dietro il suo nodo si trova il ramo delle truppe d’élite e con esso il decimo livello, quindi la categoria non può essere saltata.
Limiti dell’economia
Il laboratorio spinge l’economia fino a un confine fisso e non oltre. La produzione di ciascuna risorsa sale al +60%, la velocità di raccolta al +25%, la velocità di costruzione al +25%, la velocità di ricerca al +50% e il limite di risorse protette al +50%.
La velocità di costruzione deriva da quattro rami di Costruzione Rapida, 5% ciascuno per i primi tre e 10% per il quarto. La velocità di ricerca funziona allo stesso modo, tre al 10% e una quarta al 20%.
Maestro della Costruzione si trova accanto ad essi ed è facile confonderlo con uno di loro. Non accelera la costruzione, la rende più economica, sottraendo fino al 5% al costo delle risorse in cinque livelli. I nomi si assomigliano ma gli effetti no: un ramo fa risparmiare tempo, l’altro fa risparmiare risorse.
Da ricordare
I valori di Potenza e bonus nelle tabelle sono cumulativi, quindi una riga mostra il totale a quel livello anziché l’incremento rispetto a quello precedente. I livelli non devono essere sommati.
Il calcolatore di costruzione mostra come i nodi di velocità, costo e limite di copie modificano la coda di costruzione per una particolare città.
🏗️ Guide agli edifici
- 2° banco da lavoro
- Sala dell’alleanza
- Scuderia dell’alleanza
- Laboratorio antitossine
- Arena
- Caserma
- Operazione segreta
- Capanna del costruttore
- Sala dei cimeli
- Laboratorio Epigrafi
- Campo degli esploratori
- Falcon Tower
- Fattoria
- Armeria
- Granaio
- Sala d’onore
- Giardino botanico
- Deposito erboristico
- Infirmary
- Statua del Lord
- Legnaia
- Segheria
- Monumento — statistiche degli edifici; per la cronologia degli eventi dell’età del server vedi Calendar: Monumento
- Mercante nomade
- Scuderia privata
- Statua del ramingo
- Nido del Corvo
- Officina del Corvo
- Research Lab
- Residenza
- Sanctuary
- Presidio di ricognizione
- Fonderia
- Riposo del Soldato
- Squadra 1
- Squadra 2
- Squadra 3
- Squadra 4
- Taverna
- Tempio
- Campo di addestramento
- Walls
- Statua dello stregone
- Statua del guerriero
- Torre di guardia
- Tessitoria
🧱 Tattiche di costruzione per principianti
Anche i miglioramenti distribuiti uniformemente in tutta la fortezza bloccano l’account: le risorse finiscono esattamente quando il Santuario, il Laboratorio, i Campi di Addestramento o le Officine di Antitossina ne hanno bisogno. Questa sezione è la guida per principianti: a cosa serve ciascun edificio e in quale ordine toccarlo.
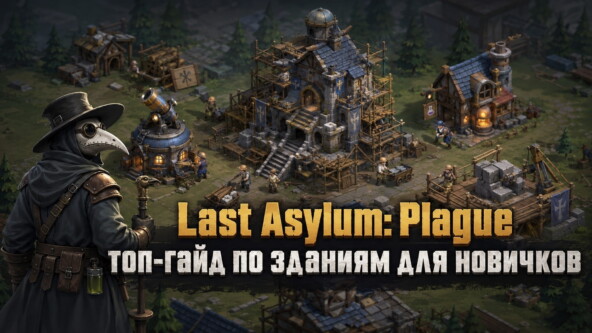
Prima il Santuario, eroi limitati da esso
Il Santuario stabilisce il limite massimo per tutto: i livelli degli eroi (circa +5 per livello del Santuario, es. il Santuario 28 permette agli eroi di arrivare fino a 140) e tutti gli altri edifici. Se i cinque principali raggiungono il limite, l’antitossina extra non aiuterà: solo il livello successivo del Santuario lo innalzerà. Ogni livello del Santuario richiede anche diversi edifici preliminari (Laboratorio, Campi di Addestramento, Caserme, statue), quindi sblocca i requisiti in anticipo e prepara l’intera catena. Non aspettare che tutti gli eroi siano al massimo: avvia il livello successivo del Santuario in anticipo.
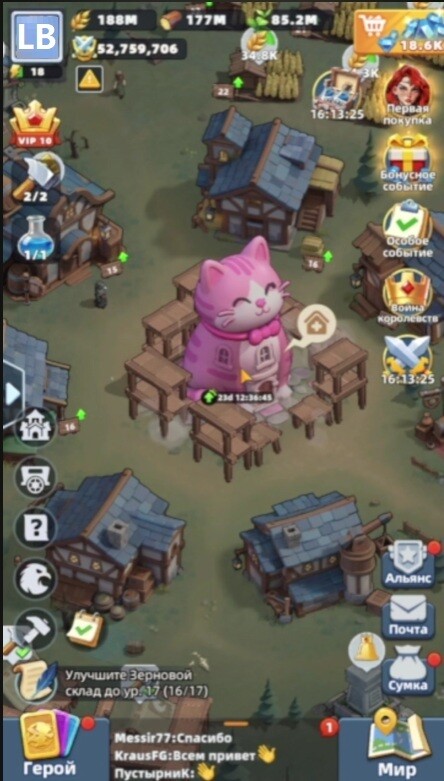
Due costruttori, due ruoli
Lo slot temporaneo del secondo costruttore (500 diamanti) dovrebbe svolgere un compito diverso rispetto al primo: lo slot lungo si occupa del Santuario, del Laboratorio o di un altro edificio obbligatorio che richiede più giorni, mentre il costruttore libero chiude i miglioramenti brevi — fattorie, segherie, giardini, officine di antitossina e i prerequisiti intermedi per il successivo livello del Santuario. Due costruttori su progetti lunghi significano nessuno slot per le esigenze improvvise; due su piccoli lavori significano che l’edificio principale rimane perennemente indietro.
Pianifica il completamento delle grandi opere in concomitanza con il giorno della costruzione del Duello dell’Alleanza: un edificio terminato non deve necessariamente essere riscosso subito — lascia il martello sopra di esso e toccalo dopo il cambio di fase dell’evento, ottenendo punti per il lavoro già svolto. L’edificio continuerà a occupare lo slot, quindi tieni il martello solo sui grandi progetti. Accetta prima tutto l’aiuto dell’alleanza, poi usa le accelerazioni e infine riscuoti.
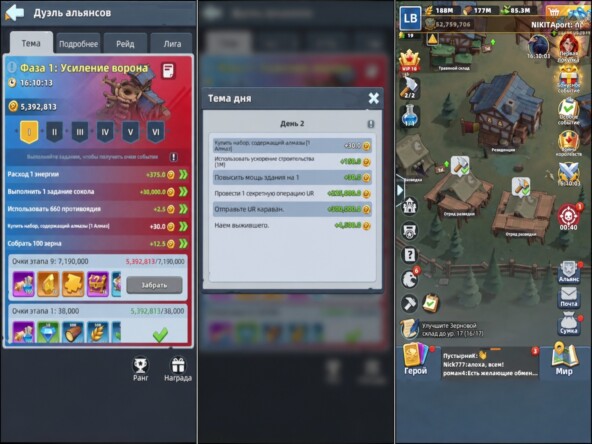
Gli edifici di risorse possono rimanere indietro
Fattorie, segherie e giardini di erbe forniscono grano, legname ed erbe, ma non hanno bisogno di eguagliare il Santuario. Un divario di cinque o sei livelli rimane confortevole. Mentre il secondo costruttore è occupato con il Santuario, il primo potenzia gradualmente gli edifici di risorse, e soprattutto le officine di antitossina: l’antitossina viene consumata costantemente per far salire di livello gli eroi.
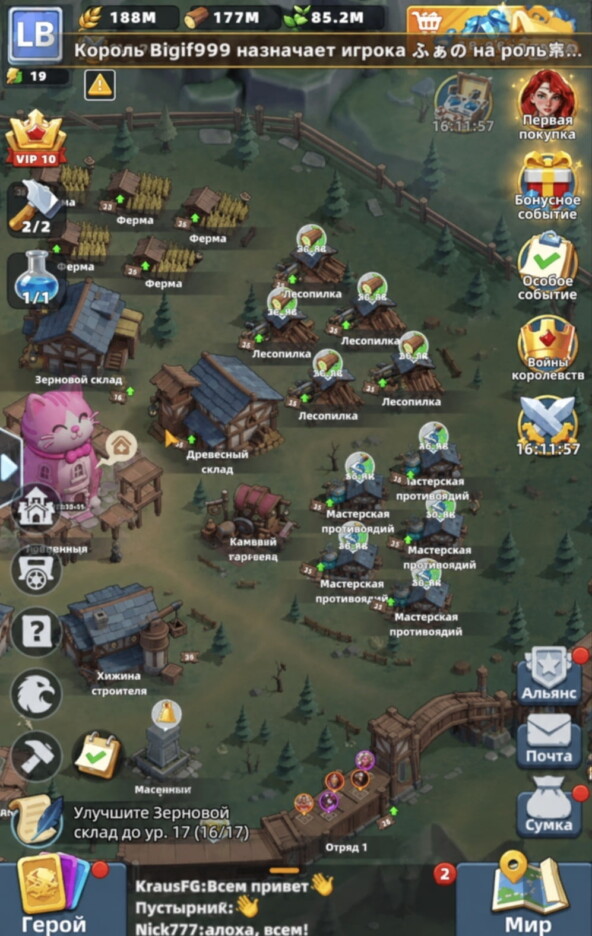
I depositi (legname, grano, erbe) aumentano solo la quantità protetta che gli attaccanti non possono saccheggiare. Non sbloccano livelli, tecnologie o truppe, quindi tienili sensibilmente indietro a meno che un requisito del Santuario non li richieda. La strategia più sicura: tieni i pacchetti di risorse non aperti nell’inventario e aprili subito prima della costruzione — in questo modo anche i depositi deboli non perderanno quasi nulla.
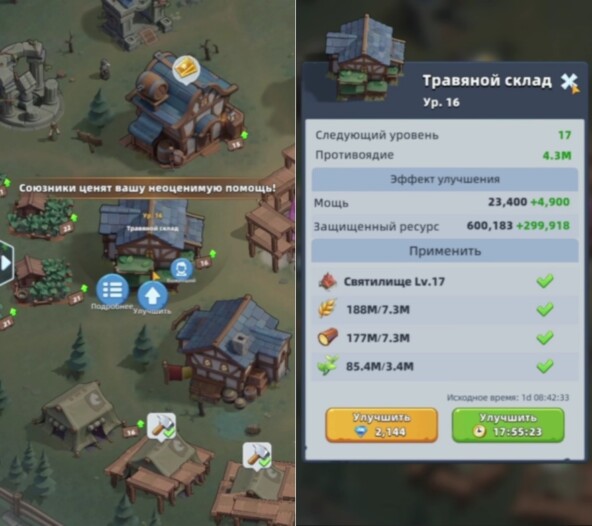
Taverna, Tempio e Laboratorio di Ricerca
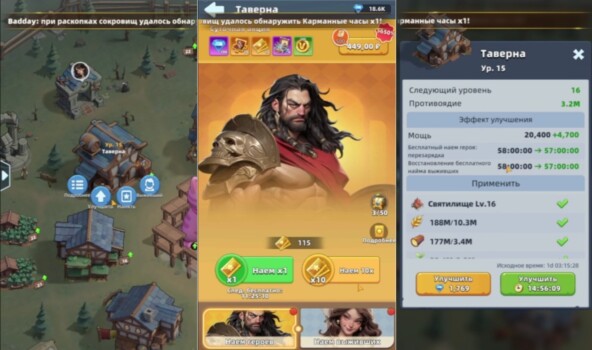
La taverna recluta eroi e sopravvissuti, e potenziarla riduce il tempo di ricarica delle assunzioni gratuite, ma solo di circa un’ora dopo diversi livelli. Aggiornala in base ai requisiti del Santuario o nel giorno di costruzione; molto più importante è toccare effettivamente le assunzioni gratuite pronte. Le prime 50 estrazioni garantiscono frammenti di Arthur.
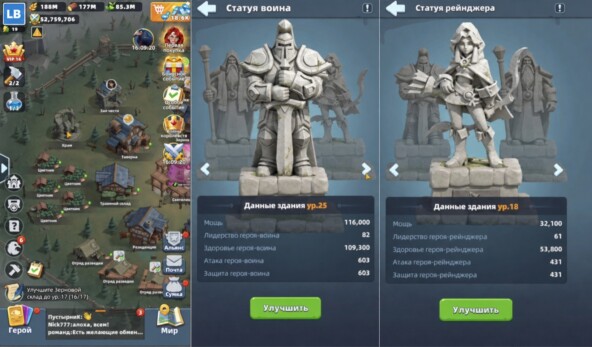
Le statue di Guerriero, Ranger e Stregone del Tempio forniscono ATT/HP/DEF diretti di fazione. Inizia con la fazione della tua Squadra 1, ma non sbilanciarti troppo: le altre statue rientrano nei requisiti del Santuario e le squadre 2-3 ne hanno bisogno per le spedizioni.
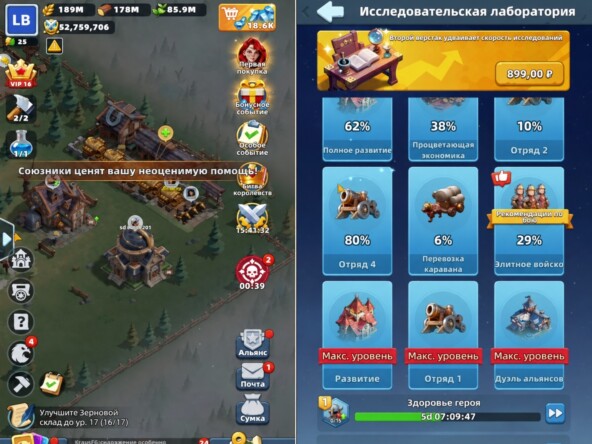
Dopo il Santuario, il Laboratorio di Ricerca è l’edificio principale: le tecnologie economiche, degli eroi, delle truppe e dello sviluppo risiedono tutte lì. Esegui la ricerca dell’albero del Duello dell’Alleanza il mercoledì in modo che le stesse accelerazioni diano punti per l’evento, e non brucia tutte le accelerazioni universali sugli edifici: una parte delle scorte deve coprire la ricerca, specialmente le costose tecnologie dell’esercito.
Esercito: Campi di Addestramento, Caserme, Infermeria
Campi di addestramento superiori sbloccano ranghi di truppe più forti (da T1 a T10). Non livellare tutti i campi in modo uniforme: mantieni uno al massimo e usa il resto per addestrare in massa truppe economiche, per poi promuoverle sul campo principale — costo delle risorse comparabile, tempo molto inferiore. Il campo principale deve seguire il Santuario poiché sia i nuovi livelli che i requisiti del Santuario dipendono da esso.
Le caserme contengono l’esercito addestrato e la capacità si esaurisce in fretta: gli assalti a caccia di ladri e i combattimenti del venerdì/sabato bruciano migliaia di soldati. Se le caserme sono piene, i campi rimangono inattivi e le marce partono incomplete: potenziale insieme al campo principale. La capacità e la velocità di guarigione dell’infermeria determinano quanti danni può subire l’account: se una battaglia la riempie, è ora di potenziarla. Infermerie sottodimensionate trasformano i feriti in perdite permanenti.
Capanna del Costruttore, Sala dell’Alleanza e Mura
La capanna del costruttore accorcia ogni progetto futuro, quindi l’investimento si accumula su tutto l’account. La Sala dell’Alleanza scala l’aiuto degli alleati (più tocchi, più minuti per tocco) — richiedi sempre aiuto nel momento in cui inizia un timer lungo e spendi accelerazioni solo dopo che gli alleati hanno finito, altrimenti il tempo libero andrà sprecato.
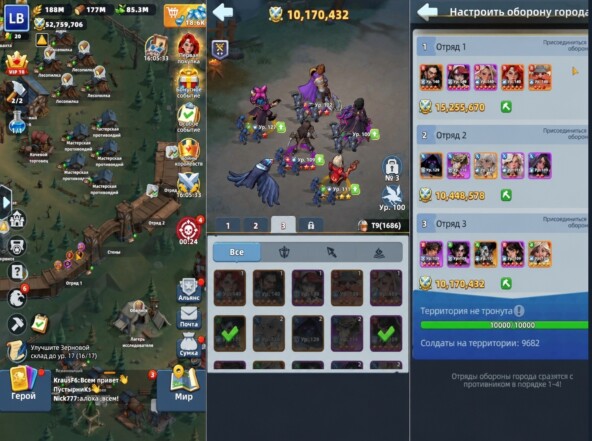
Tre squadre difensive stazionano sulle Mura, insieme alle fortificazioni e al pulsante di spegnimento. Per riorganizzarle, tutte le marce devono essere alla base. Controlla le caselle di spunta della difesa: se abilitate, eroi e soldati si uniscono alla difesa — contro un attaccante più forte ciò significa pesanti perdite, motivo per cui molti giocatori le deselezionano durante le guerre tra server per salvare l’esercito, ma le caselle devono essere riattivate prima dell’Assedio dei Non Morti o le ondate non verranno fermate. I livelli delle mura aumentano anche la velocità di marcia per gli attacchi alla Piaga, la raccolta e i ritorni.
Accampamento di Ricerca, Torre di Guardia, Torre dei Falchi
L’Accampamento di Ricerca (pass battaglia) non costa soldati: il laboratorio perfetto per testare formazioni e confrontare eroi, oltre a un reddito passivo orario (grano, legname, erbe, antitossina) e forzieri ogni pochi stadi. La Torre di Guardia gestisce le spedizioni di fazione (una fazione per modalità, che si aggiorna circa ogni 3 giorni): non scegliere le stelle massime “per la crescita” — una corsa a metà bloccata ottiene risultati peggiori di un completamento completo con una stella in meno.
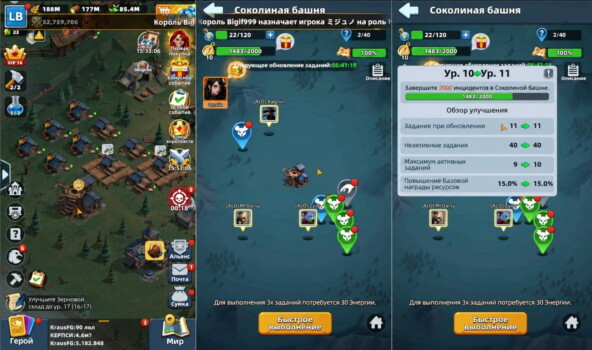
La Torre dei Falchi emette missioni giornaliere (nuove circa ogni 6 ore; ~11 disponibili su una torre sviluppata ma solo 9 si adattano alla bacheca, le altre vanno in coda — le missioni in eccesso svaniscono). Le missioni costano energia e pagano risorse, antitossina e oggetti Corvo tra gli altri. Potenzia la torre solo se le missioni vengono effettivamente completate ogni giorno.
Distretto dell’equipaggiamento e cosa rimandare
L’Officina di Fusione produce Pietre per Equipaggiamento (una singola spada di alto livello può richiedere più di 20.000 pietre per ogni miglioramento — sviluppala presto), l’Officina di Tessitura produce stoffa successivamente sintetizzata in acciaio per l’equipaggiamento dorato, e l’Officina dell’Equipaggiamento crea i pezzi. Un set d’oro completo per la squadra 1 richiede molto tempo, quindi la produzione non dovrebbe mai rimanere inattiva — una buona spada da trasporto e un’armatura da tank battono diversi livelli casuali altrove.
Rimanda quando le risorse scarseggiano: Squadra di Esplorazione (esplorazione più veloce, nessuna velocità di sviluppo), depositi superiori ai requisiti, Taverna superiore ai requisiti. L’Officina del Corvo può essere potenziata nel giorno di costruzione per ottenere punti duello. Arena, Nido del Corvo, Centro Operazioni Speciali e Sala dei Curiosità non salgono di livello affatto — usali regolarmente, non costano risorse di costruzione.
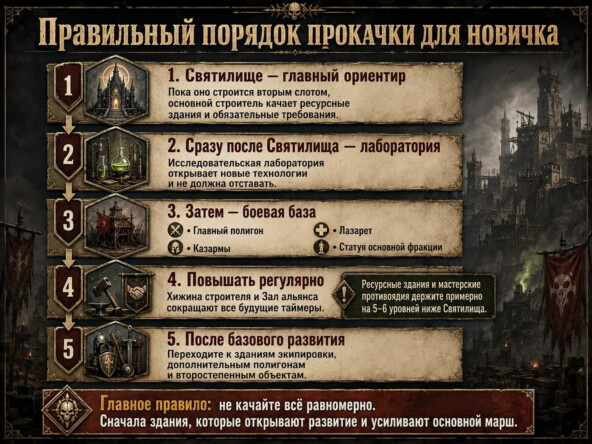
Ordine per principianti in una sola riga: Santuario sullo slot lungo → Laboratorio → Campo di addestramento principale, Caserme, Infermeria, statua della fazione principale → Capanna del costruttore e Sala dell’alleanza in modo costante → edifici di risorse ~5-6 sotto il Santuario → distretto dell’equipaggiamento → campi extra ed edifici secondari → depositi, Taverna, esploratori per requisito o surplus.
Fonte: Здания Last Asylum: Plague - гайд для новичков di Гейм-Знаток su DTF.
🎥 Video guide
Video guide selezionate e analisi strategiche dai creatori della community
📝 Trascrizione del testo 17:42 (1062 сек) ▼
📝 Trascrizione del testo 13:24 (804 сек) ▼
Cerca questo argomento su YouTube: «Buildings & Base»
Termine di ricerca: Last Asylum Plague building speed construction guide
🏰 Pianificatore di potenziamento del Santuario
Totale esatto delle risorse, tempo netto di costruzione con bonus velocità e catene di edifici prerequisiti
Grano
0
Legname
0
Erbe
0
Tempo base
0
Con il tuo bonus
0
Tempo risparmiato
0
Edifici prerequisiti richiesti:
💡 La regola d'oro "Tieni il martello":
I punti Potenza di costruzione nel Duello tra Alleanze e nel Guaritore Supremo vengono assegnati solo quando clicchi sull'icona del martello di completamento. Avvia i potenziamenti con giorni di anticipo, ma NON toccare il martello fino al Giorno della Costruzione designato (martedì)!
Accelerazioni costruzione e diamanti fino al 20% di sconto
Stai portando il Santuario al livello 25–30? Ricarica diamanti e pacchetti costruzione con consegna istantanea tramite UID su LDShop.
📖 Leggi il prossimo
Questa guida ti è stata utile?