Sistema del Corvo e delle Epigrafi
Livelli e piani del Corvo, strategia per l'equipaggiamento, rarità delle epigrafi e ordine di promozione, oltre alle regole mono-fazione che decidono quali epigrafi valga la pena potenziare.
☰ In questa pagina 17 ▾
🗓 Aggiornato: 2026-10-12
Il Corvo è il sistema che separa silenziosamente gli account: funziona come un eroe extra per tutte le tue squadre contemporaneamente, e le sue epigrafi sono il luogo in cui il meta mono-fazione viene effettivamente applicato. Il Corvo è anche il sistema che la maggior parte dei giocatori trascura: un Corvo bloccato al livello 1 è un errore classico.
Questa pagina copre i livelli e i piani del Corvo, la strategia per l’equipaggiamento, le rarità delle epigrafi e l’ordine di promozione, oltre alle regole che decidono quali epigrafi meritano materiali.
Cos’è il Corvo
Il Corvo è un eroe extra per tutte le tue squadre: i suoi bonus si applicano ovunque contemporaneamente, non solo a una formazione. Ne conseguono due conseguenze:
- Ogni punto di investimento nel Corvo migliora ogni marcia che schieri, rendendolo uno dei sistemi di maggior valore nel gioco.
- L’Essenza di Corvo, il suo cibo, è il collo di bottiglia dell’intero sistema. Coltivala presto e non smettere mai: il negozio VIP e il negozio del Santuario la vendono entrambi esattamente per questo motivo.
L’obiettivo a lungo termine è il Corvo di livello 110, in cui si ottiene l’abilità finale: +50% di danni ad area (AOE) ai bersagli colpiti. Questo è il fine gioco del sistema, e l’Essenza di Corvo è ciò che si erge tra te e questo traguardo.
Livelli e Piani del Corvo
I livelli del Corvo sbloccano gli slot delle epigrafi (chiamati Piani) uno alla volta:
| Livello Corvo | Sblocco |
|---|---|
| 10 | Epigrafi + Piano 1 (primo slot) |
| 150 | Piano 2 (+1 bonus di sistema), nuovo aspetto e statistiche del Corvo |
| 200 | Nuovo aspetto e statistiche migliorate del Corvo |
| 250 | Nuovo aspetto di fine gioco e statistiche base massime |
| 300 | Piano 3 (+2) |
| 450 | Piano 4 (+3) |
| 600 | Piano 5 (+4) |
Leggi la tabella come il vero percorso di progressione del Corvo: il livello 10 apre l’intero sistema delle epigrafi, e ogni 150 livelli successivi aggiunge un altro slot da riempire. Raggiungere i livelli 150, 200 e 250 sblocca anche nuovi aspetti visivi e importanti aumenti di statistiche. L’interfaccia ora presenta pulsanti separati per la selezione dell’Aspetto e l’Anteprima del potenziamento. Poiché ogni slot del Piano porta il proprio bonus dell’epigrafe, un livello del Corvo bloccato limita quanti di quei bonus puoi persino equipaggiare.
Strategia per l’Equipaggiamento del Corvo
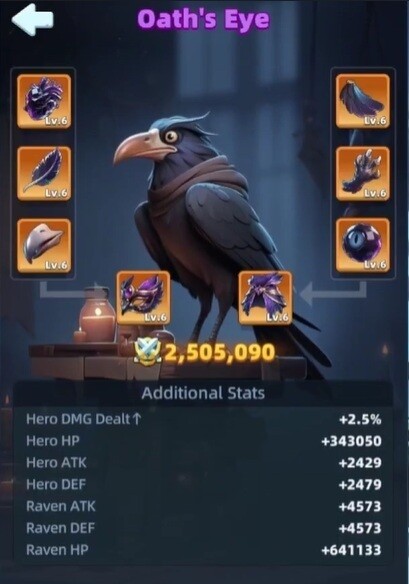
Spingi l’equipaggiamento del Corvo al livello 8: è lì che arrivano i bonus percentuali, e i bonus percentuali sono ciò che rende l’equipaggiamento degno di essere indossato.
Strategia secondaria, lato sinistro contro destro:
- Lato sinistro — HP e riduzione dei danni critici. Più facile da acquisire, valore difensivo.
- Lato destro — ATK e danno critico. Il miglior valore offensivo del sistema.
E una regola di calendario: conserva i tuoi bauli di equipaggiamento per i giorni del Duello dell’Alleanza. Aprirli in quei giorni fa guadagnare punti per il Duello dell’Alleanza, la stessa logica del “doppio vantaggio” che governa le accelerazioni nella guida all’Economia.
Epigrafi: Le Regole Fondamentali
Le epigrafi si inseriscono nei Piani del Corvo e potenziano gli eroi di una fazione. Le rarità si comportano in modo diverso e le differenze guidano ogni decisione di potenziamento:
-
UR (oro) — potenzia UNA sola fazione. L’obiettivo finale e il motivo per cui le squadre mono-fazione sono il meta. Dall’aggiornamento del 20 agosto 2026, le Epigrafi del Corvo possono ora essere potenziate fino a 6 Stelle (precedentemente limitate a 5★), scatenando una massiccia scalatura percentuale delle statistiche.
-
SR (blu) e R (verde) — potenziano TUTTE le fazioni, ma non possono essere promosse. Sono il livello in cui tutti ottengono una quota, utile mentre ti prepari per raggiungere gli UR.
L’unica regola più importante: potenzia solo le epigrafi della fazione della tua squadra principale. Un’epigrafe UR che potenzia una fazione che non schieri non ha alcun valore per te e, nel meta mono-fazione, i materiali fuori fazione sono esattamente ciò a cui serve il materiale di consumo (vedi Aggiunta rapida di seguito).
Le Epigrafi del Meta Iniziale
| Epigrafe | Tipo di slot | Effetto |
|---|---|---|
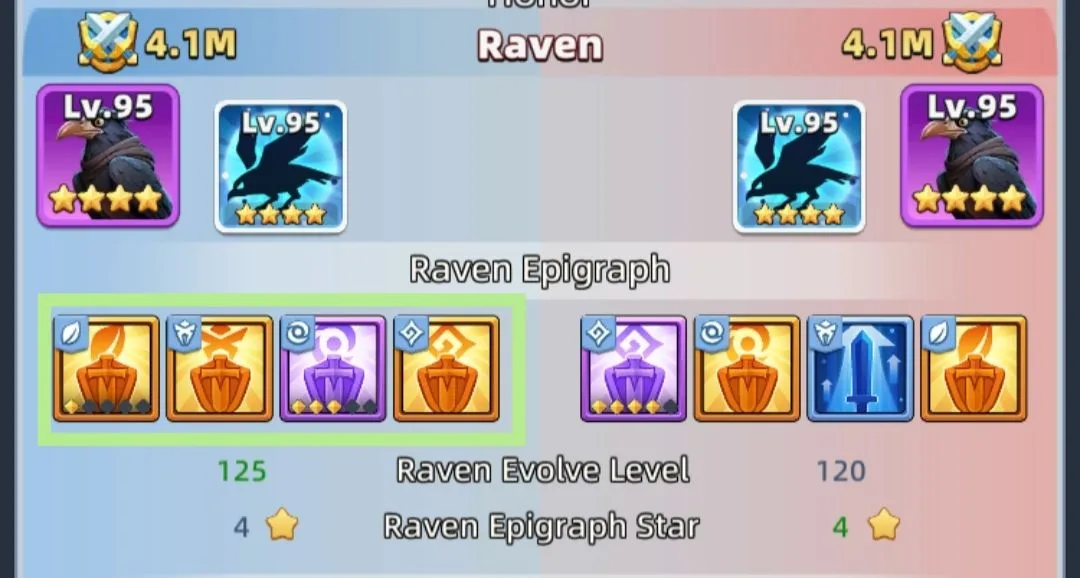
| Branco Frenetico | Attacco | Bonus ATK agli alleati Guerrieri dopo l’attivazione dell’abilità del Corvo, oltre a più bersagli del Corvo. |
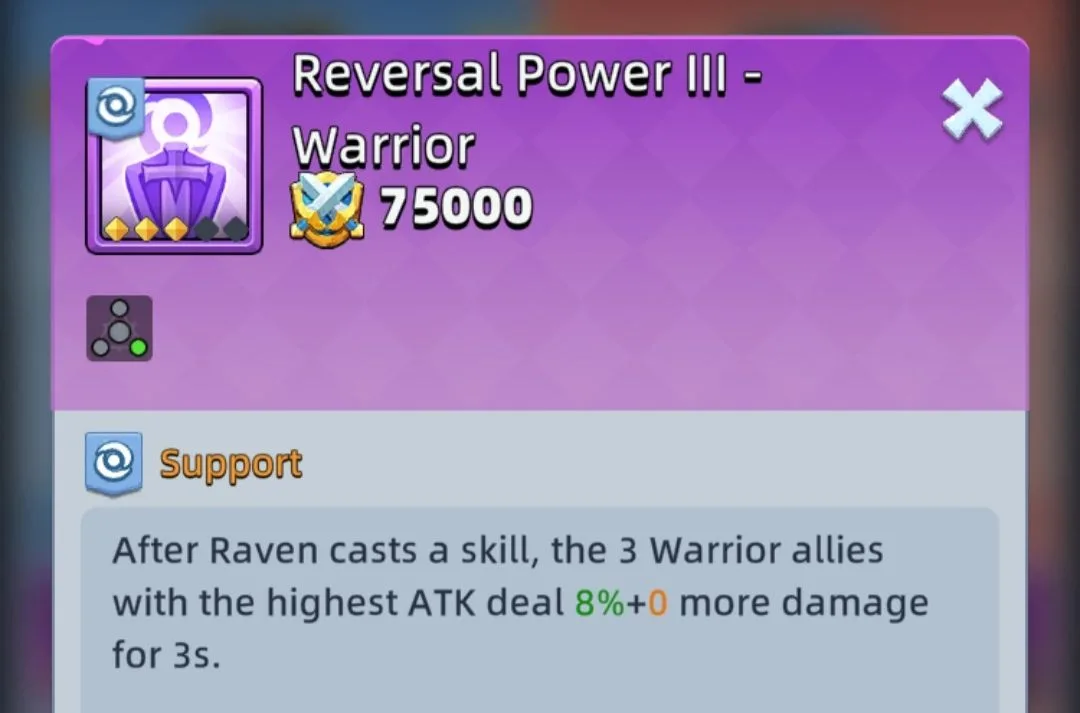
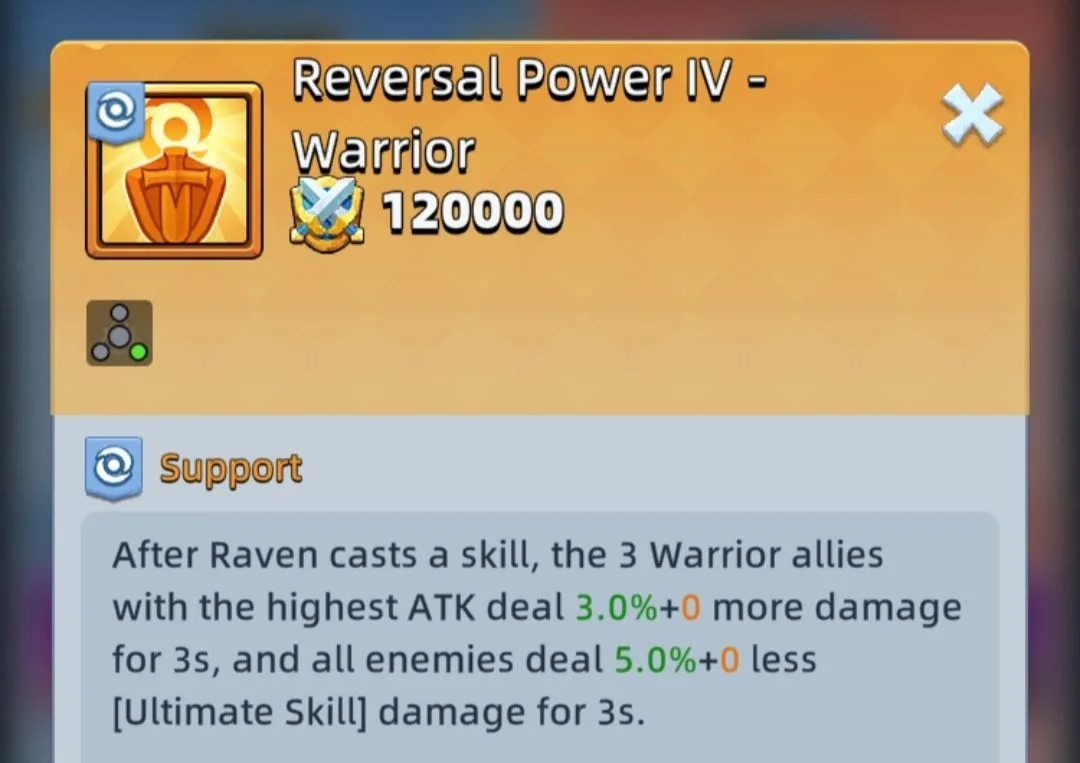
| Potere di Inversione | Supporto | Danni per i 3 alleati Guerrieri con l’ATK più alto e riduce i danni delle abilità ultimate nemiche. |
| Amuleto Protettivo | — | Scelta di sopravvivenza: la terza scelta standard quando la tua squadra continua a morire invece di perdere per mancanza di danni. |
| Guardia della Natura | Difesa (UR) | Lo scudo si attiva all’inizio della battaglia; la riduzione del danno si attiva dopo la rottura dello scudo. |
L’Officina delle Epigrafi
La creazione di epigrafi UR richiede il livello 20 dell’Officina. Tutto ciò che viene prima serve a prepararsi per questo.
La scala delle rarità e a cosa serve effettivamente ciascun colore:
| Colore | Ruolo | Note |
|---|---|---|
| Verde | Materiale | Il livello di materiale di consumo. |
| Blu | Materiale migliorato | Un SR blu con 2 stelle si comporta più o meno come un SSR viola: usa i blu finché non li superi. |
| Viola | Livello di transizione | Abbastanza buono per combattere mentre i tuoi UR crescono. |
| Oro (UR) | Obiettivo finale | Il traguardo dell’intero sistema. |
Una regola assoluta: non riciclare mai un’epigrafe dorata a meno che tu non ne sia sicuro. Le epigrafi UR sono la risorsa permanente più scarsa del gioco: un’epigrafe UR riciclata non tornerà indietro.
Ordine di Promozione delle Epigrafi
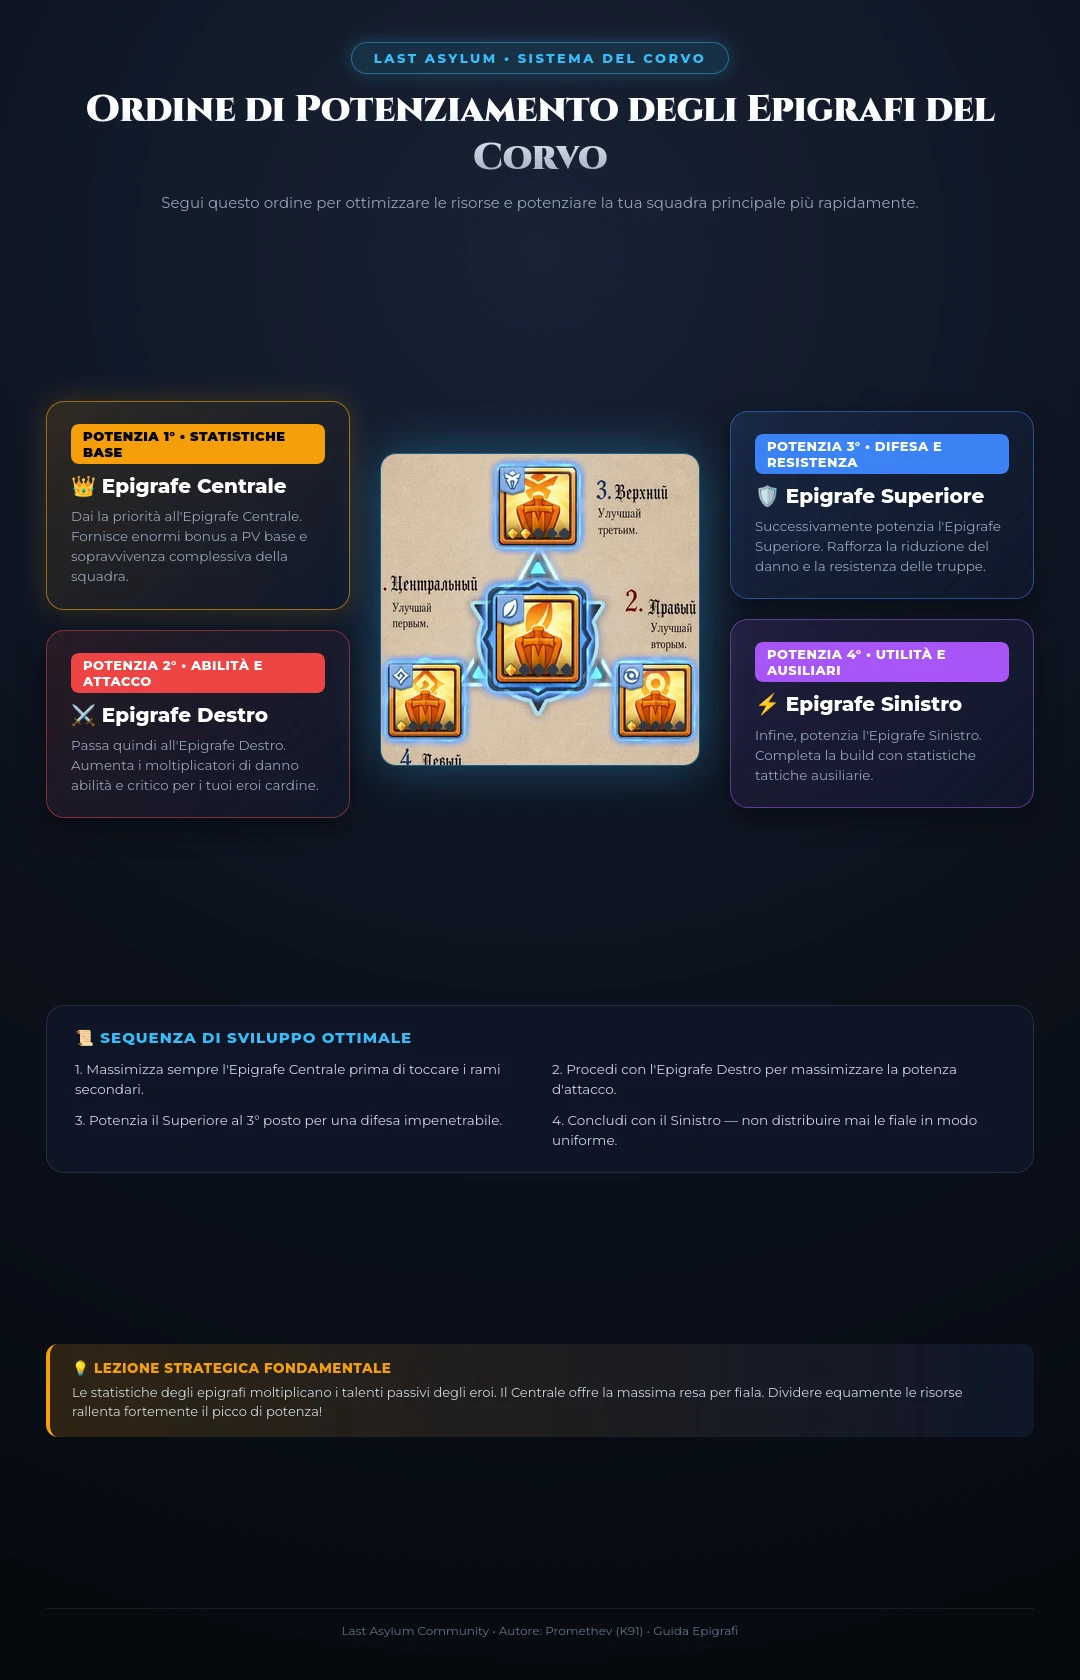
Segui questo ordine (da DrAction), promuovendo uno slot alla volta:
- Centro — Slot di Difesa (riduzione del danno).
- Alto — Slot di Attacco (Bersaglio del Corvo).
- Destra — Slot di Supporto (riduzione del danno).
- Sinistra — Slot di Iniziativa (Bonus % Difesa).
Nello specifico per le epigrafi di spade dei Guerrieri, la variante della community: Supporto (destra) UR per primo, poi Attacco (alto), quindi Iniziativa o Difesa.
Confronti di Rarità che Sorprendono la Gente
Il livello delle stelle può superare la rarità nello slot dei danni. Questi sono i confronti verificati su cui i giocatori discutono di più:
- Un viola a 4 stelle può superare in danno un giallo (UR) a 0 stelle nello slot d’attacco: la regola empirica della community è DANNO viola a tutti i costi.
- Un UR con scudo a 0 stelle è migliore di un SSR a 5 stelle.
- Il viola supera l’UR contro il Re del Ruggito (King Blight) finché l’UR non raggiunge 3 stelle o più.
La conclusione non è che il viola sia segretamente il livello migliore, bensì che un’epigrafe ad alte stelle del tipo giusto batte un UR nuovo del tipo sbagliato. Porta le tue epigrafi alle stelle prima di inseguire il loro limite massimo di rarità.
SSR, UR e Cosa si Potenzia Veramente
Un malinteso comune che vale la pena sfatare subito: non puoi potenziare un’epigrafe SSR in un UR. Ciò che potenzi è il Piano, ovvero lo slot in cui si trova l’epigrafe. Le epigrafi SSR sono segnaposto in quella progressione, non embrioni.
Ciò porta all’errore del Corvo più comune nel gioco: i giocatori accumulano epigrafi di fazioni non principali invece di dar “da mangiare” al Corvo tramite l’Aggiunta rapida e poi si chiedono perché il loro Corvo sia bloccato al livello 1. Le epigrafi fuori fazione e a bassa rarità sono il cibo del Corvo. Usaci l’Aggiunta rapida; servono esattamente a questo.
Analisi Video: NON Toccare il tuo Corvo Prima di Questo! (KorpezGaming)
Guida completa su equipaggiamento, abilità e priorità del negozio del Corvo a cura di KorpezGaming (DO NOT Touch Your Raven Before Watching This!):
| Timestamp | Argomento | Consiglio Pratico |
|---|---|---|
| 0:40 | Danno Globale del Corvo | Il danno del Corvo e le statistiche passive potenziano TUTTE le marce della tua squadra contemporaneamente, non solo la Squadra 1. |
| 2:15 | Aspetti del Corvo | Sbloccare aspetti visivi ai traguardi (Lv. 150, 200, 250) fornisce bonus permanenti alle statistiche per l’intero account. |
| 5:30 | Priorità Negozio del Santuario | Acquista TUTTE le Essenze di Corvo ogni lunedì: questa è una priorità settimanale assoluta e imprescindibile. |
| 8:45 | Ordine di Potenziamento dell’Equipaggiamento | Spingi prima il lato destro (ATK/Crit); il lato sinistro (HP/DEF) è un cuscino difensivo secondario. |
| 11:20 | Fusione delle Epigrafi | Dai in pasto spietatamente le epigrafi fuori fazione tramite l’Aggiunta rapida per far salire di livello i tuoi Piani del Corvo. |
📊 Tabelle dei dati client
Valori verificati dai dati del client di gioco (v1.0.87), fonte: wiki-last-asylum.com.
Quattro tracce
| Traccia | Cos’è |
|---|---|
| Livello | fino a 250, livelli normali per i frutti, traguardi per l’essenza |
| Evoluzione | una scala separata di 900 livelli, alimentata con epigrafi di basso rango |
| Equipaggiamento | sei slot con dodici livelli ciascuno |
| Epigrafi | quattro socket per tipo di abilità, dai ranghi generici a quelli legati alla fazione |
Sei slot di equipaggiamento
| Slot | Al massimo |
|---|---|
| Cuore di Saggezza | HP Corvo 8.995.299, probabilità colpo critico in arrivo -5% |
| Piuma della Notte | HP Eroe 4.997.388 e +30% HP eroe |
| Becco Affilato | DIF Eroe 35.731 e +30% DIF eroe |
| Coda di Vento | DIF Corvo 64.315, probabilità colpo critico +10% |
| Artiglio d’Attacco | ATK Corvo 64.316, danno critico +20% |
| Occhio di Percezione | ATK Eroe 35.731, +30% ATK eroe, danno eroe inflitto +15% |
Due set
| Set | Al livello dodici |
|---|---|
| Maschera del Corvo Notturno | HP Corvo 720.000, HP eroe 400.000, DIF eroe 2.860 |
| Mantellina di Piume di Corvo | ATK Corvo 5.150, DIF Corvo 5.150, ATK eroe 2.860 |
📚 Riferimento: Missioni del Falco: tipi e livello del Santuario
Fonte: wiki-last-asylum.com, client v1.0.87.
Le Missioni del Falco vengono assegnate dalla Torre del Falco stessa: l’elenco si aggiorna e il giocatore sceglie tra esse. Ogni missione ha una qualità da 1 a 5, la qualità decide l’entità della ricompensa e ci sono 8 ore di tempo per completarla. La cosa importante da sapere è che le missioni che compaiono dipendono dal livello del Santuario, quindi il progresso della città cambia il pescaggio stesso e non solo la vincita.
Tipi di missione
L’insieme delle missioni è fisso e differiscono per il costo in energia e per ciò che restituiscono.
| Attività | Energia | Bottino |
|---|---|---|
| Raccolta Efficiente | gratuito | diamanti, grano, erbe |
| Sterminio del Ruggito | 10 | Frutto del Corvo, Rifornimento Risorse (Generale), erbe |
| Sconfiggi la Legione del Ruggito | 20 | Frutto del Corvo, Rifornimento Risorse (Generale), grano |
| Eredità dei Pirati | gratuito | Rifornimento Risorse (Generale), Baule Equipaggiamento Corvo Lv.1, Essenza di Corvo |
| Aiuta i Membri dell’Alleanza | 10 | Rifornimento Risorse (Generale), grano, erbe |
| Recupero Scorte | gratuito | Pietra d’equipaggiamento, Rifornimento Risorse (Generale), erbe |
| Elimina i Ribelli | 10 | Frutto del Corvo, Rifornimento Risorse (Generale), grano |
| Salva i Feriti | 10 | Rifornimento Risorse (Generale), grano, legname |
| Elimina Minacce | 20 | Rifornimento Risorse (Generale), Biglietto Reclutamento Sopravvissuto, grano |
| Salva Rifugiato | gratuito | Frammento Infermiera Alice, Frammento Attendente Lancelot, Frammento Esploratrice Dorota |
| Prova di Celia 1 | gratuito | 1K Antitossina, Distintivo Abilità, XP eroe |
Il livello del Santuario decide cosa compare
La qualità delle missioni è casuale, ma i pesi dipendono dal livello di difficoltà, che mappa uno a uno il livello del Santuario. La difficoltà non può essere aumentata autonomamente, poiché segue il territorio. Al livello 1, la qualità quattro rappresenta il 18% dei lanci e la qualità cinque il 9%. Al livello 35, la qualità quattro è il 41% e la qualità cinque il 16%.
Il Santuario quindi fa molto di più che aumentare la ricompensa per missione: rimodella l’estrazione e le missioni costose iniziano a saltare fuori molte più volte. Questo è un altro motivo per non bloccarlo, e il gioco non lo spiega mai esplicitamente.
Metà delle missioni non costa alcuna energia, vale a dire raccolta, recupero scorte, salvataggio di rifugiati e scavi, il che le rende sempre degne di essere prese. Solo le missioni di combattimento costano energia, 10 per le cacce e 20 per i bersagli dei raduni.
Quante missioni contiene la torre
La Torre del Falco si aggiorna ogni 6 ore: un nuovo lotto di missioni arriva in memoria e una missione passa alla lista visibile non appena uno slot lì si libera. Quante missioni sono visibili, quante attendono in memoria e quante ne arrivano per aggiornamento dipendono dal livello della torre, e la tabella mostra cosa fornisce ciascun livello. Il livello cresce con il numero di ricompense riscosse e il livello quindici richiede 5000 missioni.
| Livello Torre | Missioni visibili | In memoria | Per aggiornamento | Aiutanti | Risorse |
|---|---|---|---|---|---|
| 1 | 5 | 25 | 6 | 5 | ×1.00 |
| 3 | 6 | 25 | 7 | 5 | ×1.05 |
| 5 | 7 | 25 | 9 | 5 | ×1.05 |
| 7 | 8 | 30 | 10 | 10 | ×1.10 |
| 9 | 9 | 35 | 11 | 10 | ×1.10 |
| 10 | 9 | 40 | 11 | 15 | ×1.15 |
| 12 | 10 | 40 | 12 | 15 | ×1.15 |
| 13 | 11 | 40 | 12 | 20 | ×1.20 |
| 15 | 12 | 40 | 13 | 20 | ×1.20 |
Se l’accumularle conviene
Accumulare missioni conviene solo per il Duello dell’Alleanza: nei giorni uno, tre e cinque ogni Missione del Falco consegnata frutta 10.000 punti. I giocatori completano una missione ma lasciano la ricompensa non riscossa, e questa rimane nell’elenco visibile con un punto rosso fino al giorno giusto. Secondo l’osservazione dei giocatori, una missione completata non scade mai, una non completata scompare dopo 8 ore e le missioni del Ruggito Errante non contengono limiti di memoria.
Il limite massimo di tale accumulo è dato dalle missioni visibili più la memoria, e la memoria si riempie in meno di un giorno: 30 ore al livello torre uno, 18-24 ore dal livello cinque in poi. Dopodiché ogni aggiornamento viene sprecato, mentre la torre distribuisce da 24 missioni al giorno al livello uno a 52 al livello quindici. Accumulare per più di un giorno non conviene quindi: nei giorni di duello due e quattro le missioni vengono completate e conservate, nei giorni uno, tre e cinque tutto viene consegnato e nel fine settimana le ricompense vengono riscosse tutte insieme. L’accumulo non influisce sul livello della torre, ne ritarda solo la progressione.
Crescita di Raven senza errori: Officina, Nido, Epigrafi, Routine
Note sul campo dalla guida alla progressione di DTF: il Raven vive in tre luoghi, non uno, e l’ordine conta più della velocità.
I tre edifici. L’Officina del Raven è la produzione in background: genera materiali nel tempo senza ricompense immediate, ma i progressi rallentano senza di essa. Il Nido del Raven è la schermata principale (livello, evoluzione, nuove fasi e abbinamenti di truppe). L’Officina delle Epigrafi è il luogo in cui si commettono la maggior parte delle scelte sbagliate: una creazione errata o una decisione sugli slot sbagliata vi rimarrà come bonus debole o vi costringerà a un reset.
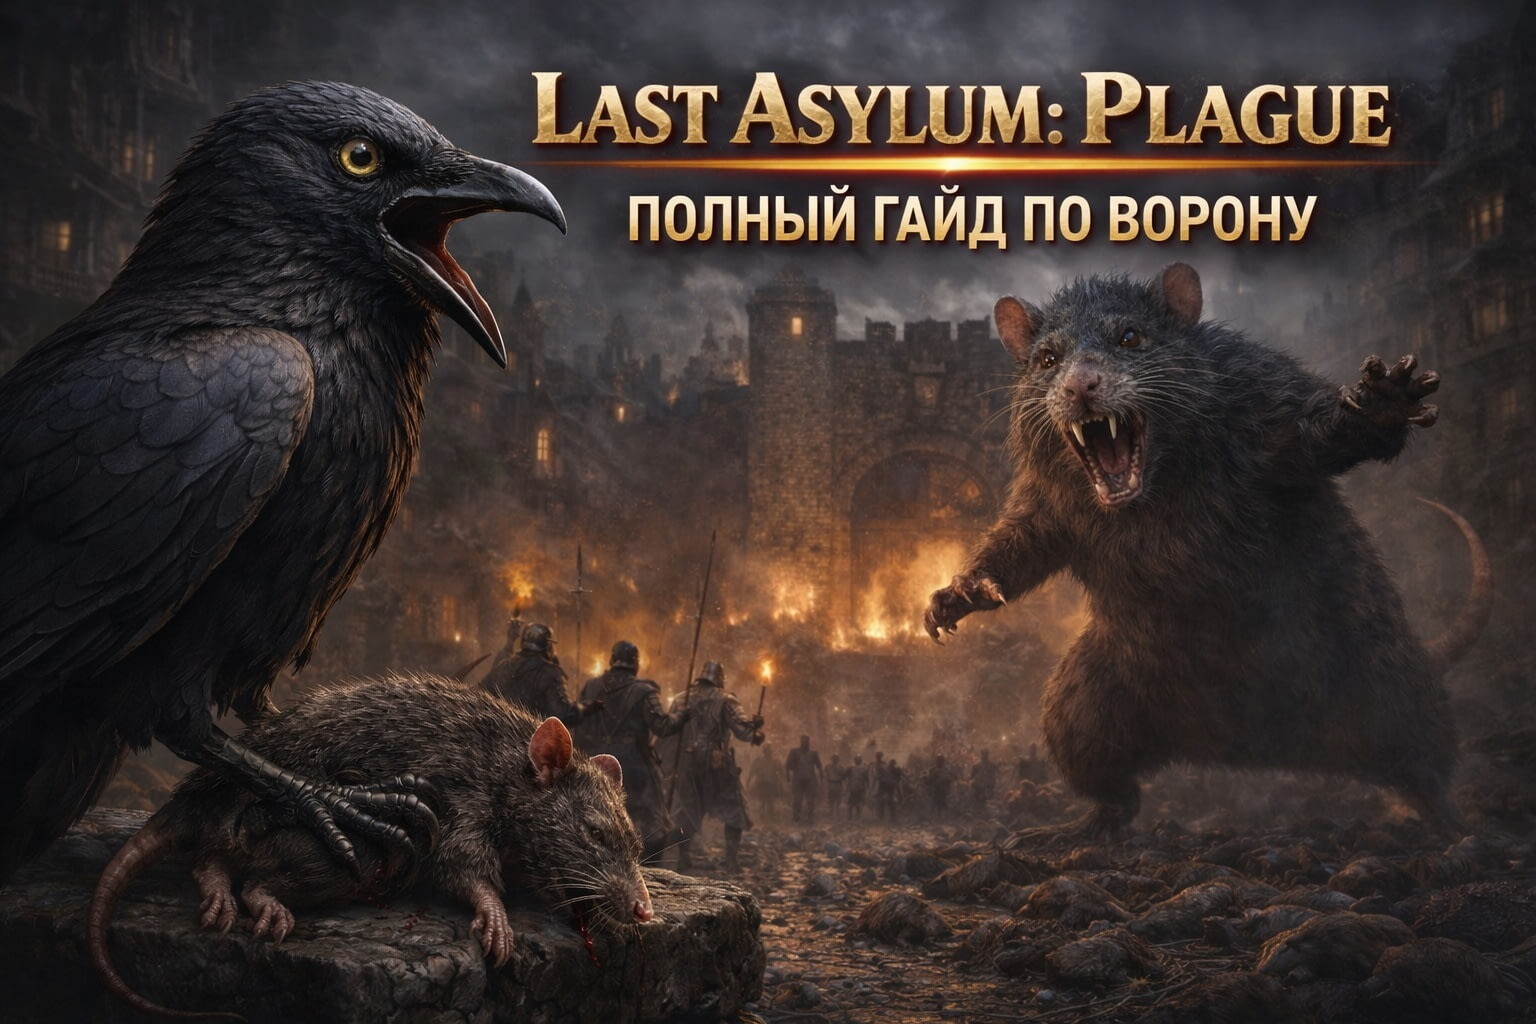
Livelli ed evoluzione. Il Raven sale di livello con i Frutti di Raven ed evolve con l’Essenza di Raven, con una fase di evoluzione ogni 10 livelli che sblocca il livello successivo di progressione. L’Essenza è il vincolo principale: i Frutti arrivano costantemente attraverso la normale routine di gioco, l’Essenza sembra sempre scarsa. Controllate prima la soglia di evoluzione successiva: i livelli privi della loro fase di evoluzione raggiungono rapidamente un limite massimo.
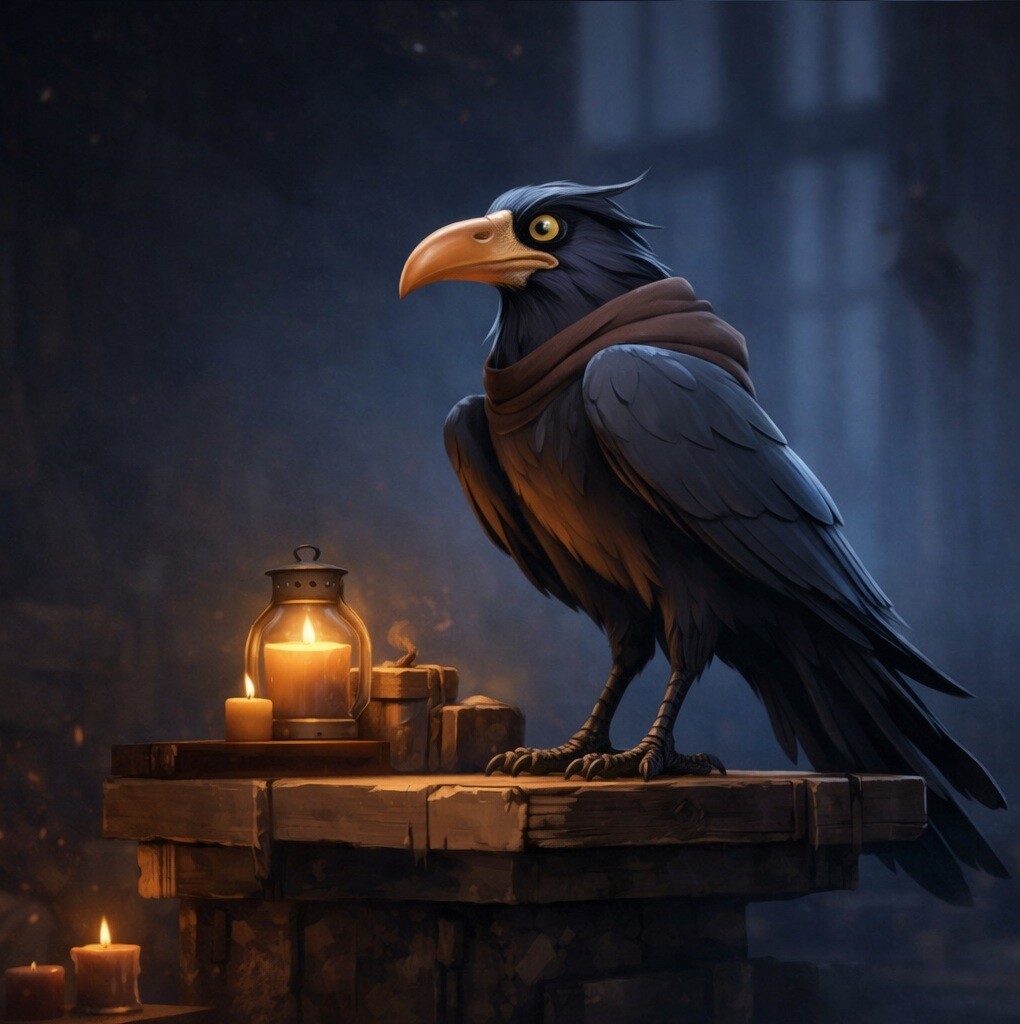
Equipaggiamento: costruisci la base, poi affina. Non aprite i forzieri e non applicate miglioramenti man mano che cadono. Assemblate prima l’intero set in modo uniforme, quindi unite i duplicati e aumentate l’equipaggiamento in modo deliberato. Alcuni miglioramenti sono bloccati in sequenza (altri slot devono raggiungere un livello prima che un pezzo si sblocchi), quindi massimizzare uno slot in anticipo lascia vuoti altrove. Trattate l’equipaggiamento come un kit, non come una lotteria.
Fonti giornaliere. Controllate ogni giorno: Negozio dell’Alleanza (materiali vari per Raven), Negozio VIP (Essenza e forzieri per diamanti), Negozio delle Spedizioni (forzieri di Raven di livello superiore), Negozio d’Onore (forzieri rari di fine gioco), Negozio del Santuario (Essenza a rotazione). Acquistate solo ciò che risolve il vostro compito attuale: accumulare ogni oggetto etichettato come “Raven” produce inventario senza progressi. Nominate esplicitamente la carenza prima di spendere: materiali dell’Officina delle Epigrafi o duplicati per la fusione.
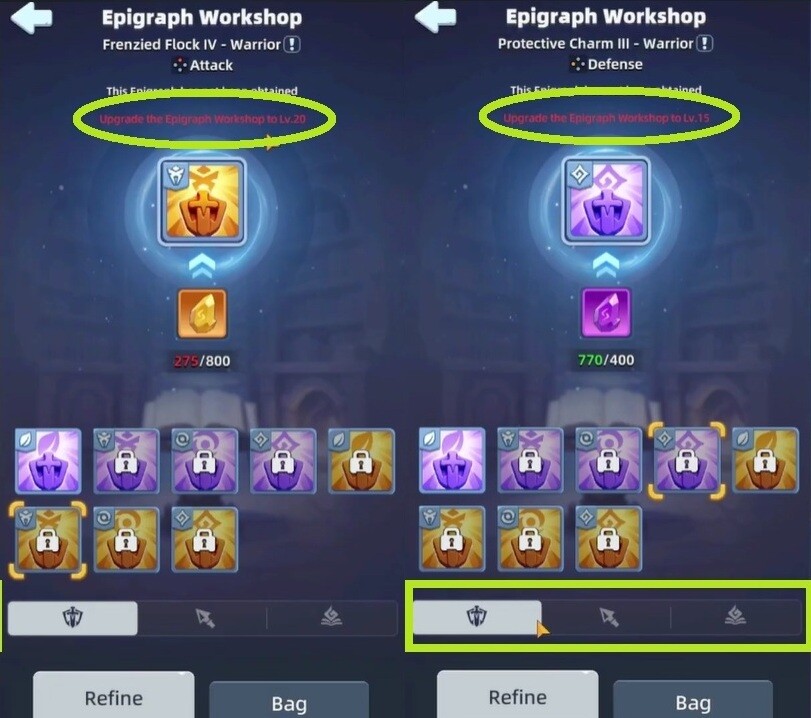
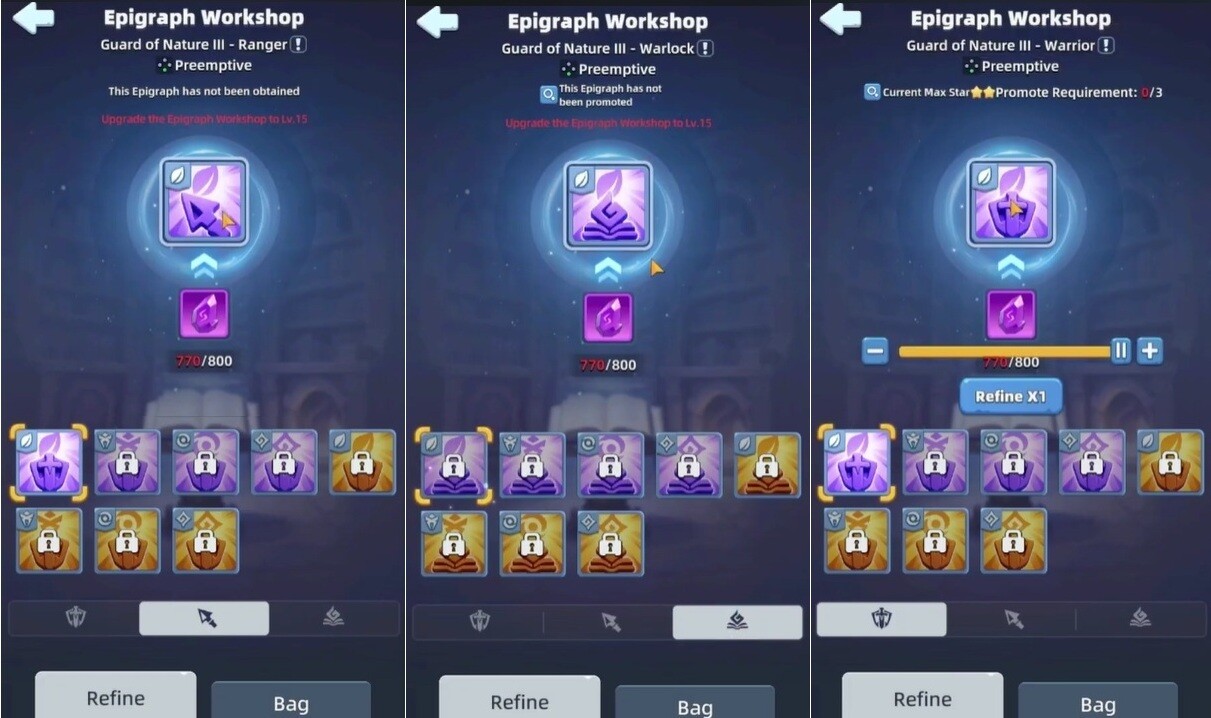
I duplicati sono carburante. Una seconda copia dell’epigrafe giusta non è un brutto drop: epigrafi identiche aumentano le stelle sul pezzo esistente e, per i pezzi UR, i duplicati esatti dell’oggetto giusto sono la risorsa più preziosa della linea. I duplicati del tipo sbagliato aspettano o passano attraverso la ridistribuzione del reset; i duplicati del tipo giusto ricevono stelle.
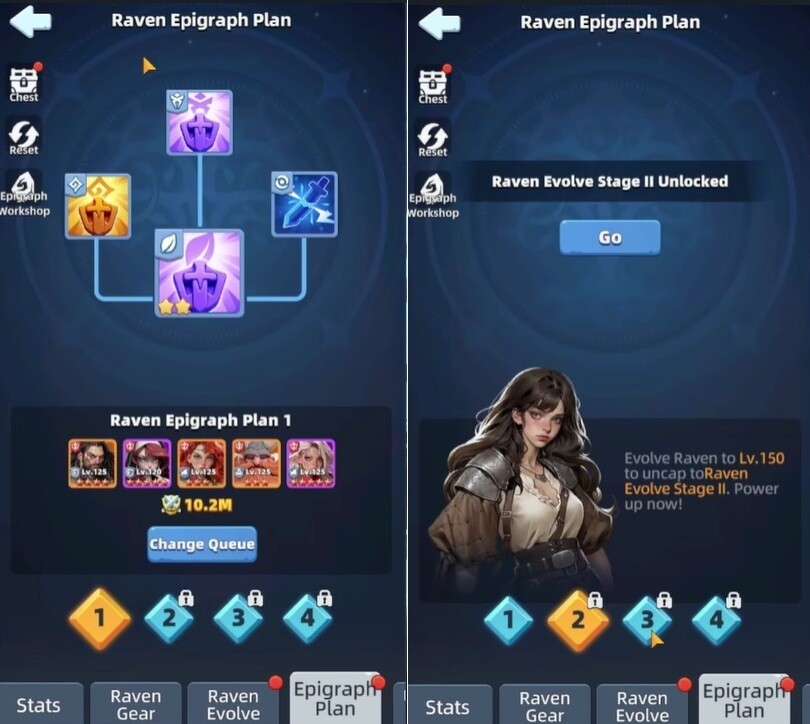
L’evoluzione sblocca le truppe. L’evoluzione non riguarda solo le statistiche: sblocca slot di truppe aggiuntivi. Iniziate solo con la prima truppa, il secondo slot si apre alla fase di evoluzione successiva e i requisiti continuano ad aumentare. Questo è un altro motivo per impegnarsi con la vostra truppa più forte fin dall’inizio: fisicamente non c’è spazio per disperdersi all’inizio.
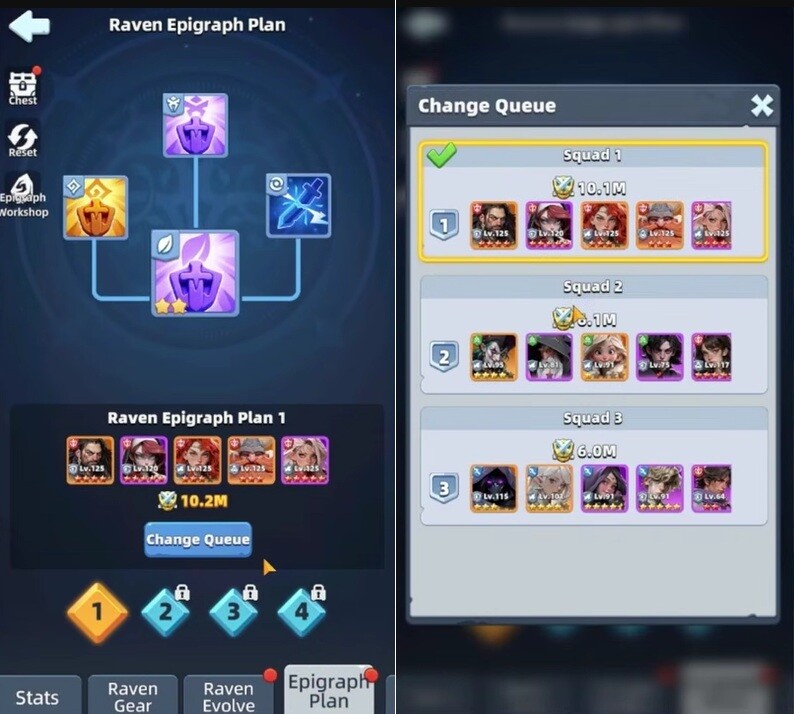
Il reset esiste. Le creazioni sbagliate sono recuperabili: il reset ripristina un miglioramento e restituisce i materiali per la ridistribuzione. È più utile quando cambiate la classe della truppa principale, superate una truppa temporanea o avete scelto l’epigrafe sbagliata all’inizio. Riduce il costo di un errore; non rende la creazione alla cieca gratuita.
Routine giornaliera. Controllate i negozi, tenete a mente l’evoluzione successiva, sviluppate solo il tipo di epigrafe della vostra truppa principale e resettate gli errori invece di conviverci. Giocato come un ciclo giornaliero, il Raven si sviluppa costantemente; giocato a raffiche, risulta costoso e vago.
Fonte: Last Asylum: Plague - полный гайд по Ворону. Как качать без ошибок, что делать с эпиграфами. di Гейм-Знаток su DTF..
🎥 Video guide
Video guide selezionate e analisi strategiche dai creatori della community
📝 Trascrizione del testo 13:07 (787 сек) ▼
Cerca questo argomento su YouTube: «Raven & Epigraphs»
Termine di ricerca: Last Asylum Plague Raven epigraph guide
🦅 Sistema Raven (UAV): Componenti, Set e Scaling delle Abilità
Analisi completa degli slot dei componenti, dei set leggendari e dei moltiplicatori percentuali delle abilità estratti dai file di gioco.
6 Slot Componenti Raven:
ATK (Атака)
Crit / Accuracy (Крит/Точность)
Damage Boost (Урон)
Defense (Защита)
HP / Durability (Здоровье)
Speed / Agility (Скорость)
Set Raven Leggendari:
✨ Maschera del Corvo Notturno
Offensive (Атакующий)Increases squad damage by 15% and defense piercing by 10%
✨ Mantellina di Piume di Corvo
Defensive (Защитный)Decreases squad damage taken by 15% and increases HP by 20%
Scaling Abilità di Combattimento Raven:
📖 Leggi il prossimo
Questa guida ti è stata utile?