Beginner Guides: Hub
Your first 24 hours: active alliance, Sanctuary push, two-three focus heroes, events before speedups, plundering from day one.
☰ On this page 45 ▾
🗓 Updated: 2026-10-12
Last Asylum: Plague rewards one thing above everything else: focus. Between construction timers, hero banners, events and alliance chores it is very easy to stay busy for two weeks and still end up weaker than someone who played three days correctly.
This guide compresses community expertise and tested strategy into a day-one playbook: what to do in the first 24 hours, when every important hero unlocks, how might and factions actually work, and the five mistakes that ruin new accounts.
📖 Articles in this section
The beginner section is split into standalone articles — read them in order:
- Day One: Checklist and Priorities — six must-do steps of the first 24 hours: living alliance, Sanctuary push, resource focus, event calendar before speedups, plunder from day one.
- Beginner Mistakes: What Not to Do — top critical mistakes (Honor Shop, Marlena stars, Smelter, Training Ground split, Super Reward) and common early blunders.
🦸 Beginner Heroes: timeline, Might, factions and first squad
Hero basics now live in the Heroes section, which collects every hero guide:
- Hero Unlock Timeline — when Arthur lands, the Cynthia/Shadow Wishing Wheel, the UR event train of days 36–85, Marlena
- How Hero Might Works — level, stars (the 4★ jump), skills and gear
- Factions and Counters — +5/+10/+15/+20% stack bonuses and the Warriors > Warlocks > Rangers > Warriors circle
- Your First Lineup — Arthur and Bella up front; Marlena, Claire and Celia in the back (full breakdown with alternatives)
Community Q&A: Answers That Keep Coming Up
Short answers to the questions Korpez’ mailbag keeps fielding — most of these will hit you in week 2–4.
- When is my Ranger squad ready to replace Warriors? Not by a star count alone — check three walls: every ranger at 8★ minimum (Cynthia and Red Lady at 10★, Louis at 8★, Bell at 9–10★), the Ranger Temple/Statue at ~22+, and hero research at the same stage as your Warriors branch. Site rule of thumb: the switch flips when the Ranger squad hits ~18M might against an existing 60M Warriors squad, boosted when all four flags clear.
- Zoya vs Claire — who wins? Zoya is the true PvP tank (paywalled); UR Claire is a PvE/monster specialist forever — her passive stays locked on monster damage even in UR form. Keep Claire for world bosses, Pandemic and KvK zombies; swap Zoya in as soon as she’s available for PvP.
- Can I skip keeping troops on my wall to save lives? No. Regardless of your garrison choice, a losing defense loses the same troops anyway. Put troops up whenever you can contest the attacker; only evacuate and teleport when the attacker is unbeatable. Shield up before every KvK, always — “you don’t need a shield in KvK” is a myth.
- Soldier’s Rest: revive deads? Yes, but cooldown is long and grow it with alliance help — treat it as a reserve you wipe after KvK, not a daily convenience. Don’t burn it on solo monster hunts.
- Cynthia sword at 10★ — next blueprint into her or Red Lady? Korpez: gloves, not a second sword. Flavor choice between Cynthia and Red Lady — Cynthia carries more AoE, Red Lady hits harder on single targets. One red sword + one red gloves on the same carry beats a double sword spread across two DPS.
- Freya or Elena (paid settlers)? If you’re spending at all: Freya first (Falcon Quest payout is daily lifetime income); Elena (+command/ATK) is a pure whale flex a mid-spender should skip.
- My second squad — warlocks or rangers? Korpez’s answer: warlocks, always — the endgame ceiling sits there; rangers for early-mid F2P but warlocks crush late. Tier List.
Read Next: Pro Tips & Hidden Mechanics
Mastered the day-one basics? Dive into the non-obvious rules of the game: speed buff snap-shotting, protecting troops with Ghost Rallies, avoiding hospital overflow wipes, the Claire conversion dip, and tile pre-farming in the Pro Tips & Hidden Mechanics Guide.
📊 Client data tables
Verified values from game client data (v1.0.87), source: wiki-last-asylum.com.
Tools
| Requirement | Unlocks |
|---|---|
| Sanctuary level 1 | Building menu |
| Sanctuary level 1 | Dawn breakout |
| Sanctuary level 1 | Heroes |
| Sanctuary level 1 | King appointments |
| Sanctuary level 1 | Quiz |
| Sanctuary level 1 | Survivors |
| Sanctuary level 3 | Castle skins |
| Sanctuary level 3 | Match-three |
| Sanctuary level 4 | Alliance |
| Sanctuary level 4 | Bag |
| Sanctuary level 4 | Campaign |
| Sanctuary level 4 | First purchase |
| Sanctuary level 4 | Gift shop |
| Sanctuary level 4 | |
| Sanctuary level 4 | Main missions |
| Sanctuary level 4 | VIP |
| Sanctuary level 5 | Daily missions |
| Sanctuary level 5 | Online reward |
| Sanctuary level 8 | Daily to-do list |
| Sanctuary level 8 | Leaderboards |
| Sanctuary level 10 | Alliance escort |
| Sanctuary level 10 | Escort |
| Sanctuary level 10 | Presents |
| Sanctuary level 15 | Raven gear |
| Alliance Hall level 1 | Alliance |
| Black Ops level 1 | Covert ops |
| Black Ops level 1 | Covert ops raiding |
| Epigraph Workshop level 1 | Raven evolution |
| Falcon Tower level 1 | Chat |
| Falcon Tower level 1 | World map |
| Raven Nest level 1 | Raven gear |
| Research Lab level 1 | Research |
| Residence level 1 | Daily reward |
| Squad 1 level 1 | Idle income |
| Squad 4 level 1 | Card build queue |
| Tavern level 1 | Hero recruit |
| Watchtower level 1 | March alarm |
📚 Reference: Where to start: clinic, lab and research
Data verified against the game client (v1.0.87, source: wiki-last-asylum.com).
Where to start in Last Asylum: Plague on a fresh server comes down to a handful of early decisions that are expensive to undo later. The clinic and the Research Lab have to stay ahead of the Sanctuary, the first hero shards are best saved for Arthur, and the early research branches buy Might more cheaply than anything else. The sections below take those decisions in order and close with a list of what unlocks at each Sanctuary level.
Current for game version 1.0.87, checked on 31 August 2026.
The clinic from day one
Sanctuary levels require clinic stars, and stars accumulate slowly and cannot be sped up. A postponed clinic turns into a wall in a place where nothing warned of a delay.
Keep the lab one step ahead
The Research Lab is first required at Sanctuary level eleven, which asks for a lab of level seven. From level twelve to level thirty it sits one level below the target. Keeping it ahead is cheaper than halting construction later and waiting for the lab to finish.
The first research node
The game itself marks a recommended first node, and it gives construction speed: cheap to take and applied to every building that follows. Then come the early Development and Economy branches, which buy Might an order of magnitude cheaper than the rest, see priorities.
The scale of the road
Getting to Sanctuary level seventeen costs roughly 250 million resources and 425 hours of pure construction on a single queue. Hence the value of extra queues and alliance help, see speed-ups and queues.
The hero cap
Hero level is capped by the Sanctuary: from level five the cap sits at five times the Sanctuary level, before that it stays at 5 for three levels and jumps to 15 at the fourth. Experience banks up in the meantime, so pushing the campaign is worth it even when heroes have already reached their cap.
Who to spend shards on
On Arthur. The base pool’s guarantee gives him and no one else, and he also sits in the guarantees of all four hero pools, so his shards pile up on their own for anyone who recruits at all. No other hero can be farmed through a guarantee, see where heroes come from.
The starter squad
The publisher’s official guide suggests a starter five of Arthur and Bella in the front row and Marlena, Claire and Celia in the back, with Marlena developed first and the fourth star treated as the first big goal. All five are warriors, so the squad gets the full +20% faction bonus. In the Teams model this five ranks 26,493rd of 169,911 possible squads across the whole roster, but among squads without UR heroes other than Arthur and Marlena it trails the best one by about 4%: the best such squad, Arthur, Lucius, Sivir, Bella and Marlena, differs by two heroes. The advice about Marlena matches the fact that she is the only UR who accumulates for free, see budget squads. The four-star threshold is not verified on this wiki.
What pays most in the first days
Four sources give noticeably more than the rest early on, and none of them costs anything.
- The exploration chain around the city: 153 one-time steps including 145 recruit tickets, the first at step four, see the chain.
- The quiz: 15 questions paying 10 diamonds for a correct answer and 5 for a wrong one, so entering is worth it even on guesses, see the quiz.
- Hunting rat hordes: recruit tickets for energy that regenerates anyway, see hunting.
- Squads: the second unlocks at Sanctuary 8 and the third at 20. Until the second squad every march waits its turn, so the eighth level changes the pace noticeably.
What unlocks by Sanctuary level
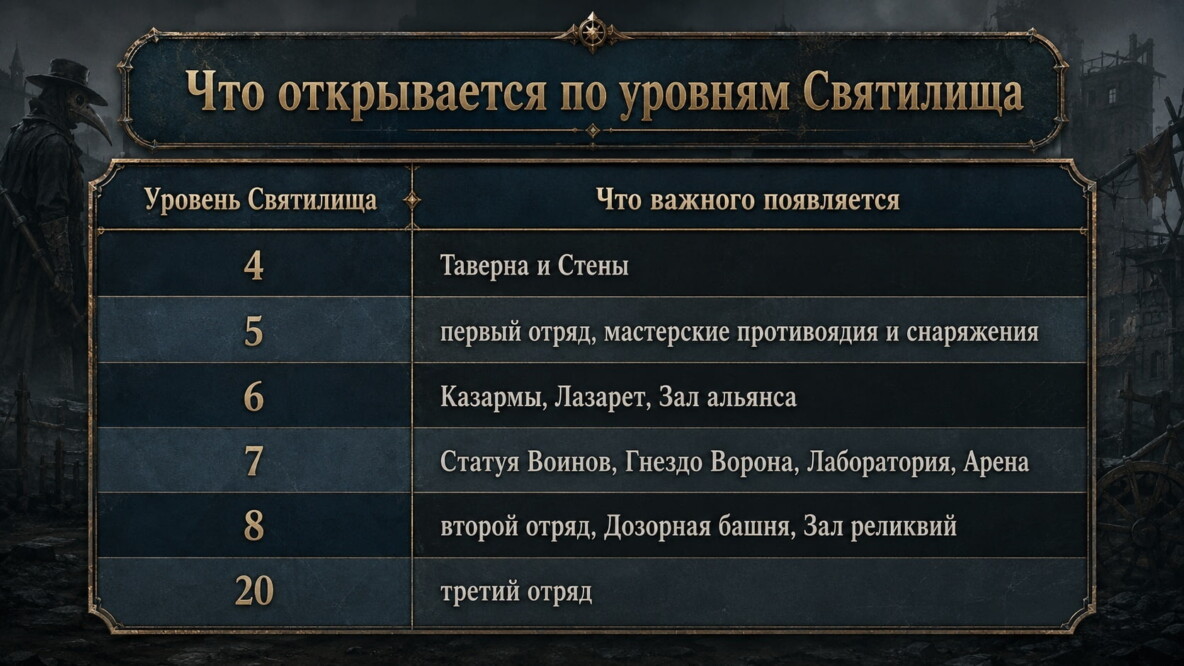
New features do not appear at every Sanctuary level, and the table gathers the levels where something noticeable opens.
| Level | What appears |
|---|---|
| 3 | castle skins, match-three |
| 4 | first squad, campaign, alliance, bag, mail, VIP, missions |
| 5 | daily missions, online reward |
| 8 | second squad, leaderboards, to-do list |
| 9 | treasure maps, second workbench |
| 10 | escort and alliance caravan, presents |
| 15 | entry to the Elixir Race, raven gear |
| 20 | third squad, gear stars |
| 30 | tier ten troops (plus a separate technology) |
The full list, with the building each feature hangs off, sits on its own page, Unlocks.
Where not to rush
Top levels of production buildings never pay back through production alone, and they are taken for Might and for requirements. Hiring troops also buys Might cheaply, but that Might dies with the soldiers, see Might.
FAQ
What should be built first? The clinic, see “The clinic from day one”.
When is the Research Lab needed? First at Sanctuary level eleven, see “Keep the lab one step ahead”.
Who gets the first hero shards? Arthur, see “Who to spend shards on”.
When does the second squad open? At Sanctuary level eight, and the third at twenty, see “What pays most in the first days”.
The build calculator assembles the upgrade order from day one: from the building levels it shows what the next Sanctuary level is missing and where to put speedups.
📚 Other reference sections
- Temple Battle: ministers, court posts and king decrees
- Surprise Encounter: call reward and boxes
- Dawn Breakout
- Hunting: targets, Raven Fruit and rallies
- Raven epigraphs: stars, crafting and start
- Curios: upgrading, cost and repeated bonuses
- Wandering Phantom: Wandering Blight levels, Kingdom Quests and rewards
- Trials
- Treasure Maps
- City Map: top targets and capture tasks
- Campaign: Might per level and hero experience
- Shields: free ones, prices and War Frenzy
- Antitoxin: where to get it and what it is for
- How the game counts: diamonds and percentages
- Skins: bonuses, durations and the Black Raven Fortress
- Daily routine: idle income, ops and arena
- Bonus events: Hero Pass, Hero’s Trial and Login Rewards
- Special events: the nine events of the tab and the day each one arrives
- Era Pass
- Era of Revival: what stays open, heroes by week and start
- Hunt Battle: Blight waves, difficulties and alliance rewards
- Wishing Wheels: hero and raven
- Bosses: Abyss, weekend and alliance boss
- Exploration Chain: rewards and step types
- Explorer Dungeon
- World map: distances, speed and gathering
- Changing server: transfers, server time and new servers
- Sanctuary: hero cap, buildings and clinic
- Virus resistance: why, experience and gaps
- Lord’s Specialty: levels, branches, points
- Last Asylum on PC: emulators and moving the account
- Hero awakening: gains and breakthrough
- Hero Road
- Honor levels: conditions, cost and payout
- Expedition: arena order and early-server bonus
Start Lean: Focus, Hospital, Warehouses, One Squad

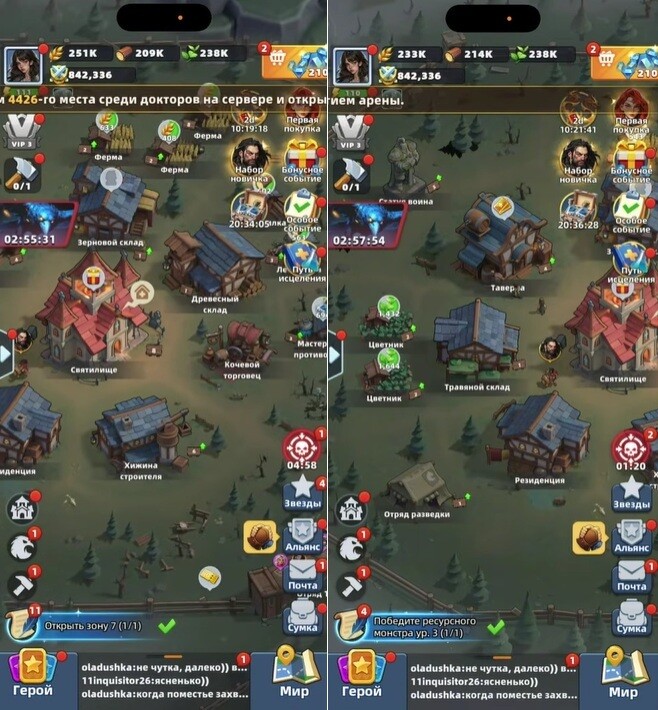
The classic start feels busy — a building here, a hero there, a research tap — but resources scatter in every direction while power stands still. The fix is sequencing, not effort: first the base into shape, then the heroes into content-clearing shape, and only then everything else. Strengthening everything a little strengthens nothing.

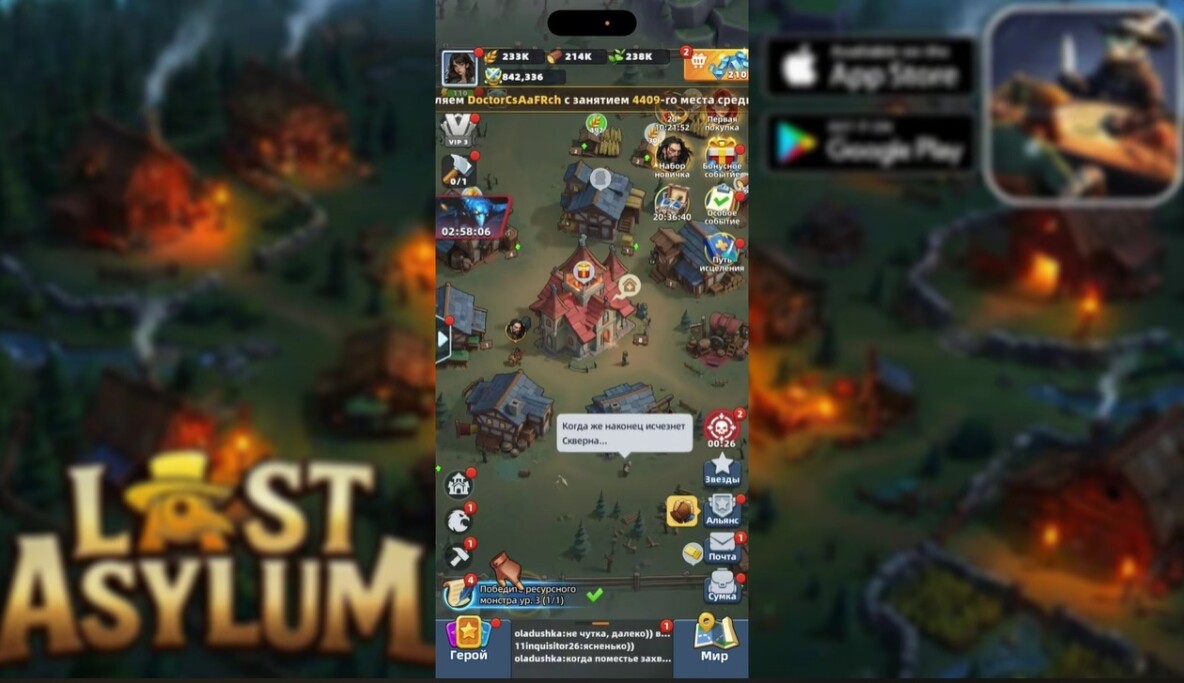
The Sanctuary is the compass
The Sanctuary gates buildings, mechanics and upgrades: while it stands still, you stall; while it builds, you move. Stop guessing what to upgrade — open the next Sanctuary level’s requirements and work strictly to them. Miss it once and the game simply says “no further” after you already burned the time elsewhere.
Follow the quests early
Quests are not a tutorial to outgrow — they are the main progress tool: resources, speedups, diamonds, and new mechanics unlock through them. Use them as a compass: when in doubt, do what moves the quest line. Ignoring them means doing the same things slower.
The hospital is a conveyor, not a chore
The hospital is one of the main resource engines: patient in, cured, reward out, next patient. If it runs slow, everything stalls.
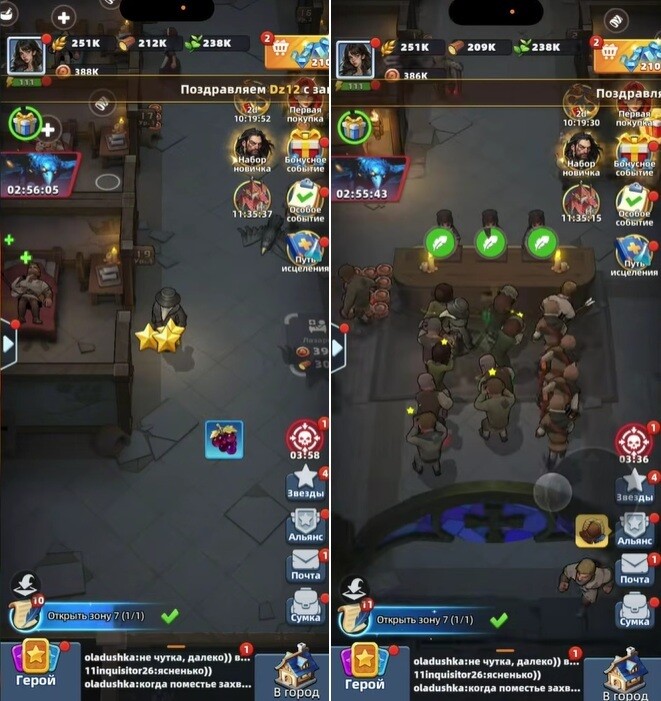
- Open new wards — patient flow grows.
- Hire workers — the manual routine disappears.
- Pre-craft potions — a patient without the right potion occupies a bed and halts the line; with stock on hand, curing is instant and the bed frees up.
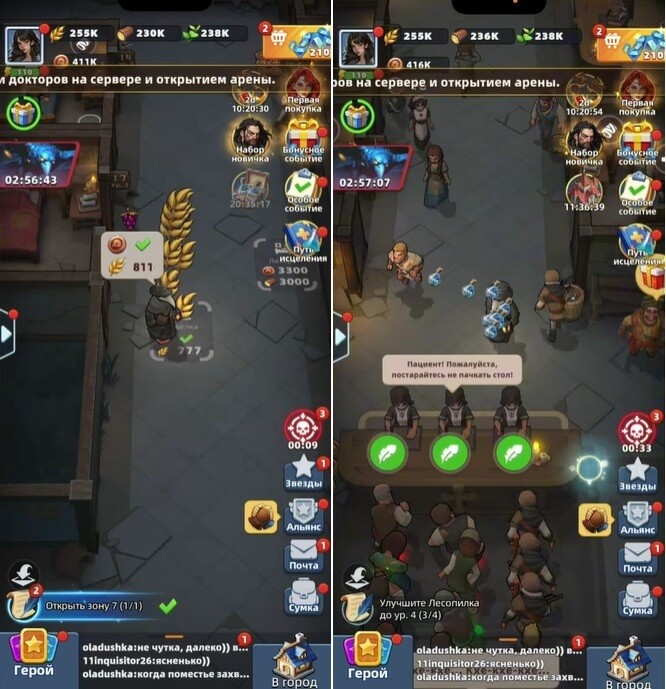
Running around as the doctor yourself works only at the very start. The moment automation (workers, auto-treatment) is available, take it: without it progress stops every time you log out; with it resources accumulate while you are away.
Stable economy before expansion
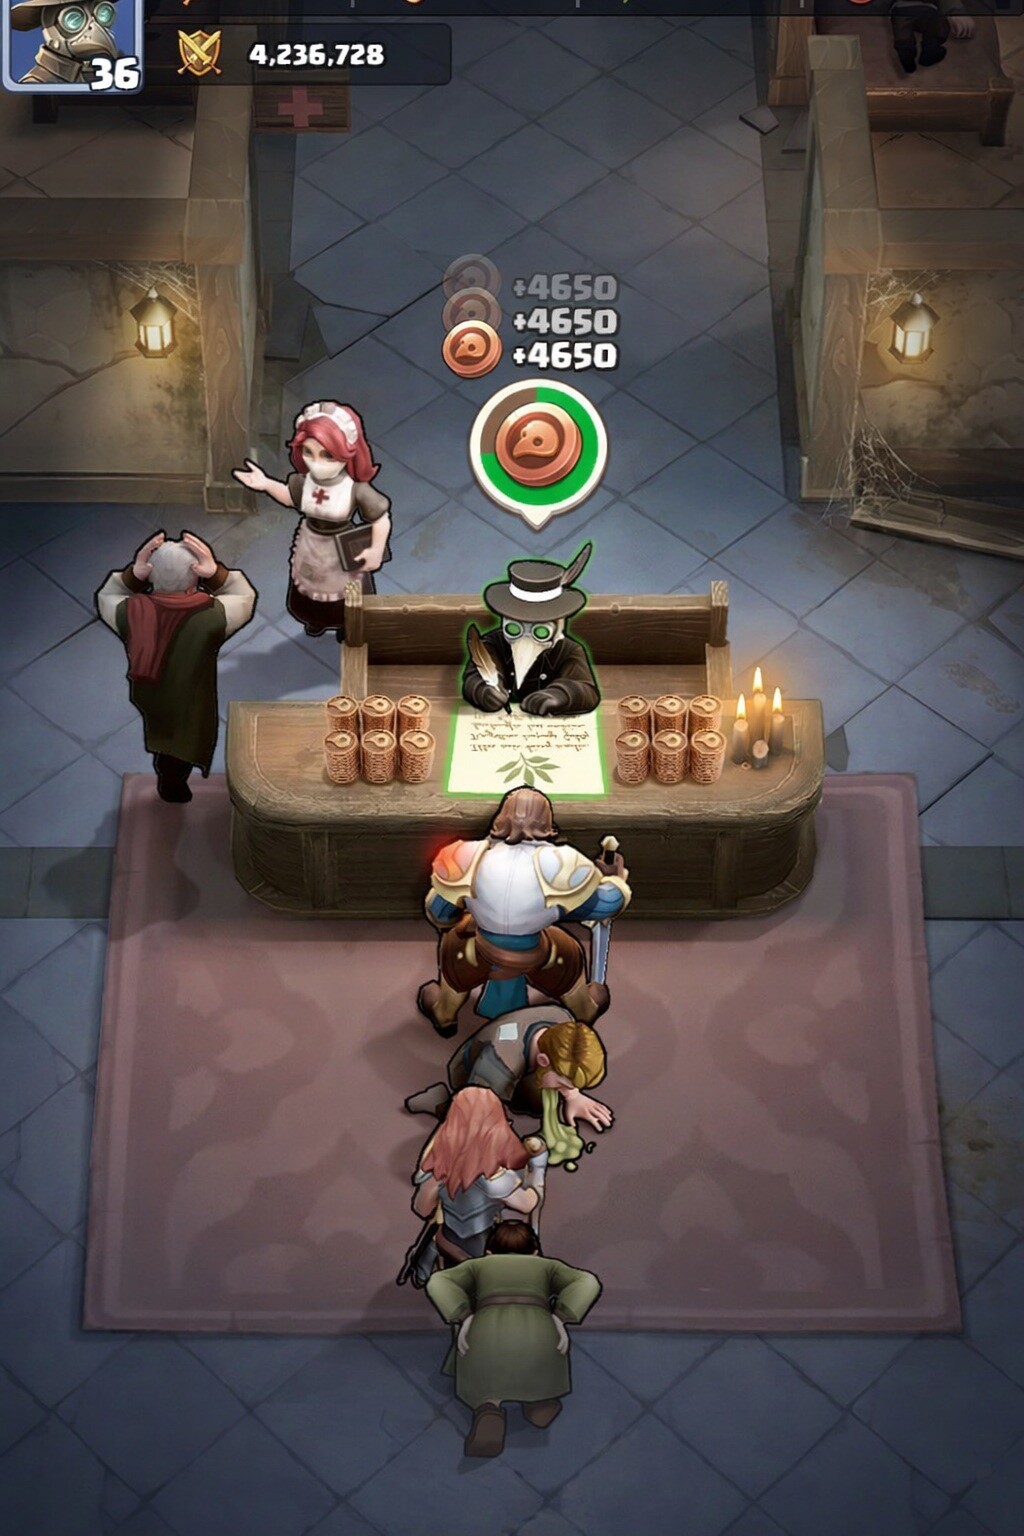
Early income feels generous, then the bill arrives: every new building raises consumption without raising output. The rule is boring but works — stable food and materials first, expansion second. And progress is not only what you gather but what you keep: warehouses raise storage caps and shield part of the stock from raids, so one lost battle does not erase an upgrade you already saved for.

Keep squads working, skip early caravans
A squad earns only while marching; an idle returned squad is invisible downtime that compounds into a real gap. Match march length to your schedule: short expeditions while online, long ones before logging out.
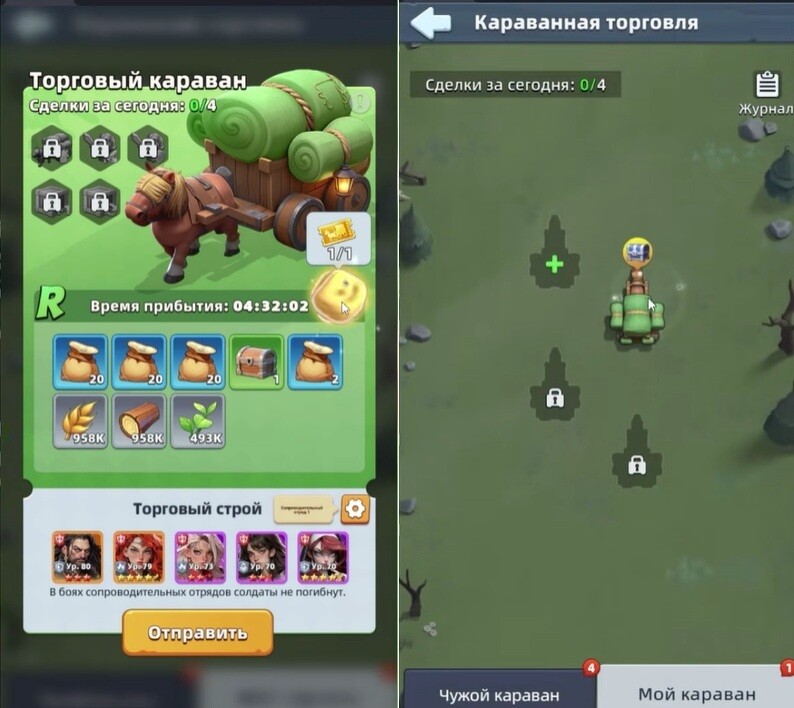
Caravans look tempting but pay unstably at the start for the attention they cost — ignore them early and farm through plain expeditions.
The base is a foundation — the map is the point
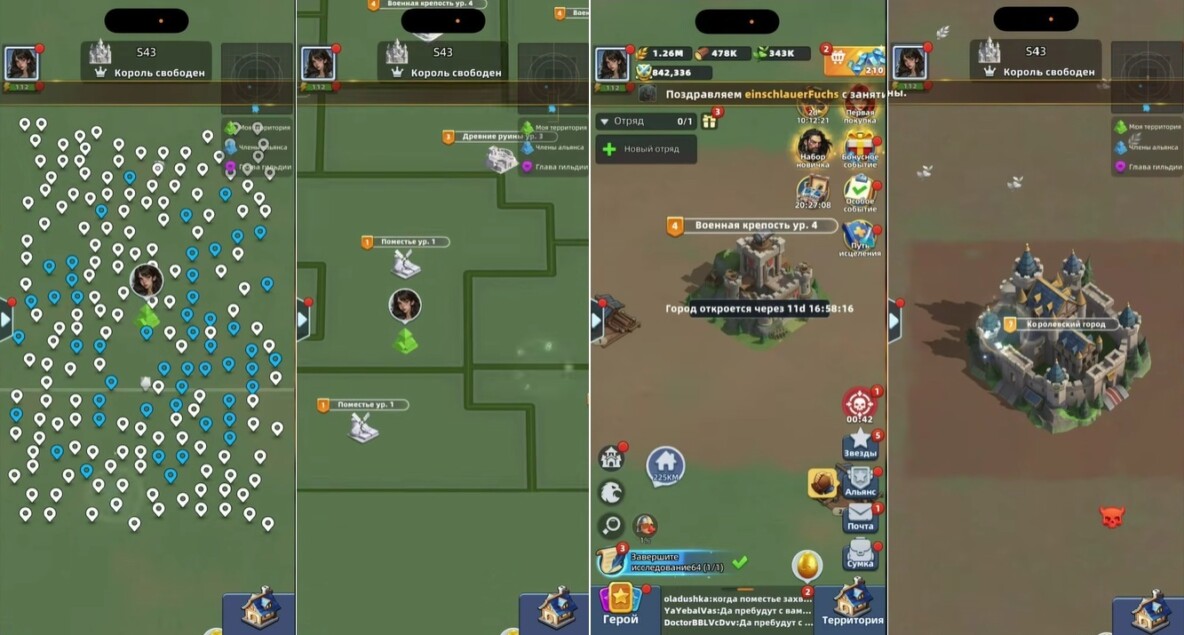
Squads are not just fetchers of food, timber and herbs: they open nodes, hold outposts, retake infected ruins and contest key cities. With server-scale formats like Kingdom Clash on the horizon, every player’s contribution feeds the shared result — a start built around a living economy, a real hero pack and working squads arrives at the map as a participant, not a spectator.
Defense is routing, not towers
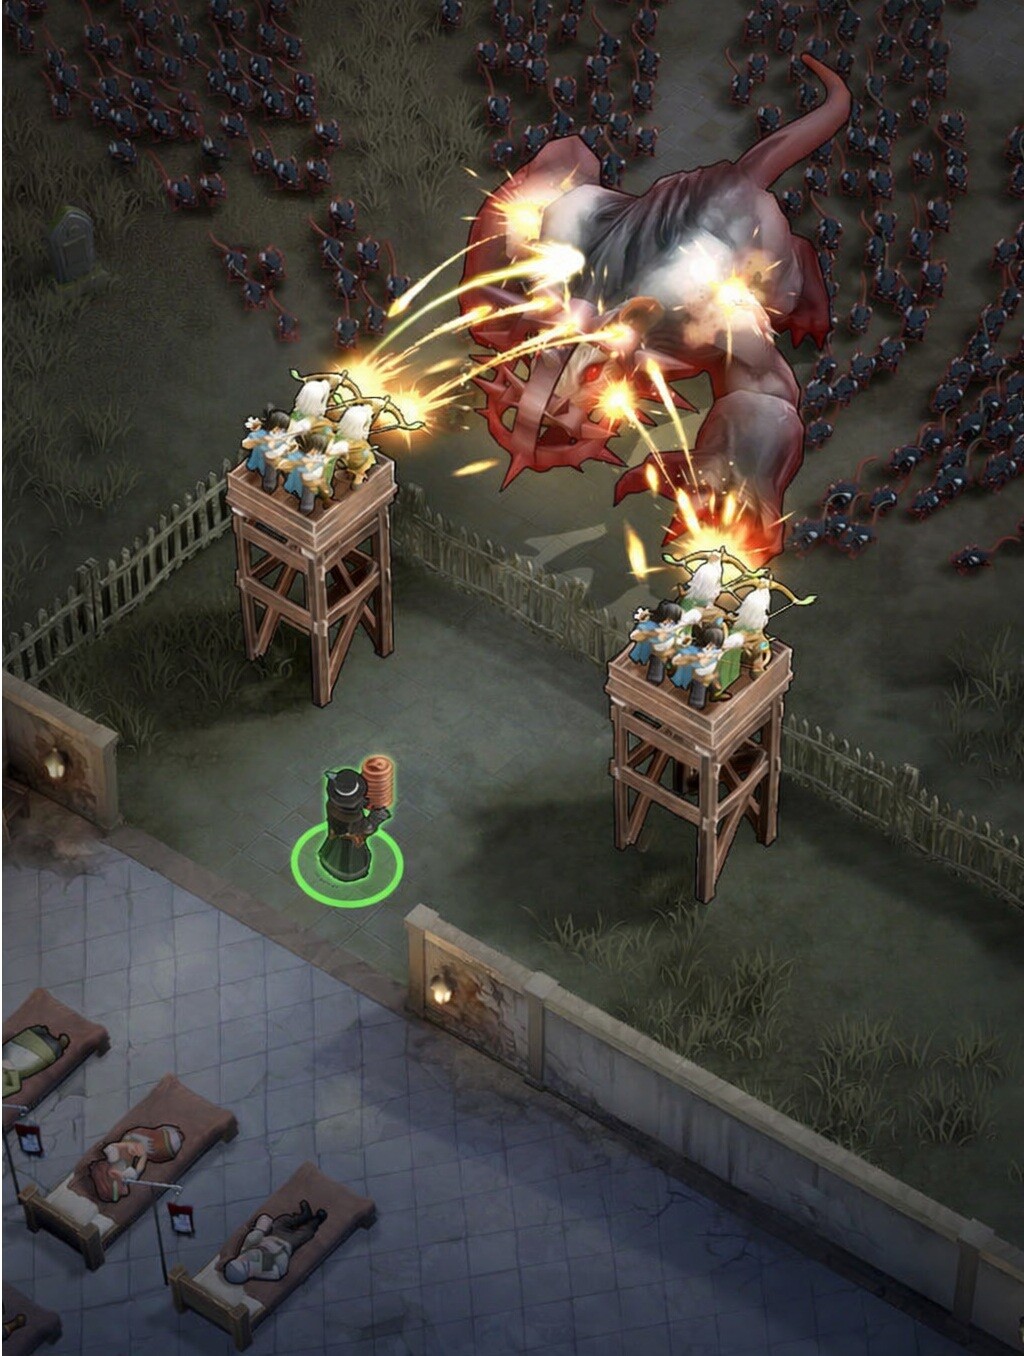
Enemies take the shortest open path, so a straight wall of towers underperforms: build long winding corridors through turns and chokepoints, concentrate towers where enemies linger longest, add slows — and the same towers deal far more damage. Good defense is a longer enemy path, not more towers.
One working five, not a roster of averages
Scattering fragments across every new pull produces a list of mediocre heroes and dragged-out fights. Pick one five and feed it everything — levels, skills, gear:
- Arthur — front-line tank, buys the team time;
- Marlena — main damage that ramps through the fight;
- Claire — buffs everyone, not just herself;
- Stellar — extra pressure, strong in mass combat;
- Celia or Bella — support that closes the remaining gaps.

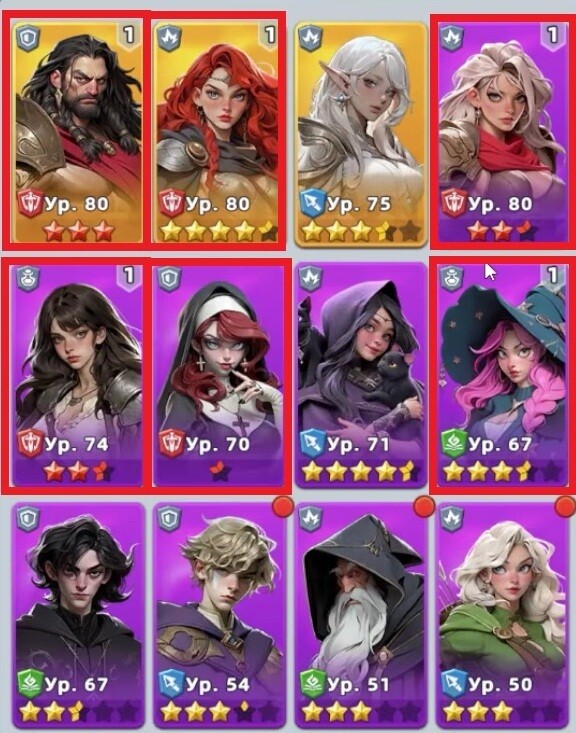
Strength comes from roles working as a unit, not from rarity counts or headcounts. New pull? Check whether it improves the current five — if not, it waits.
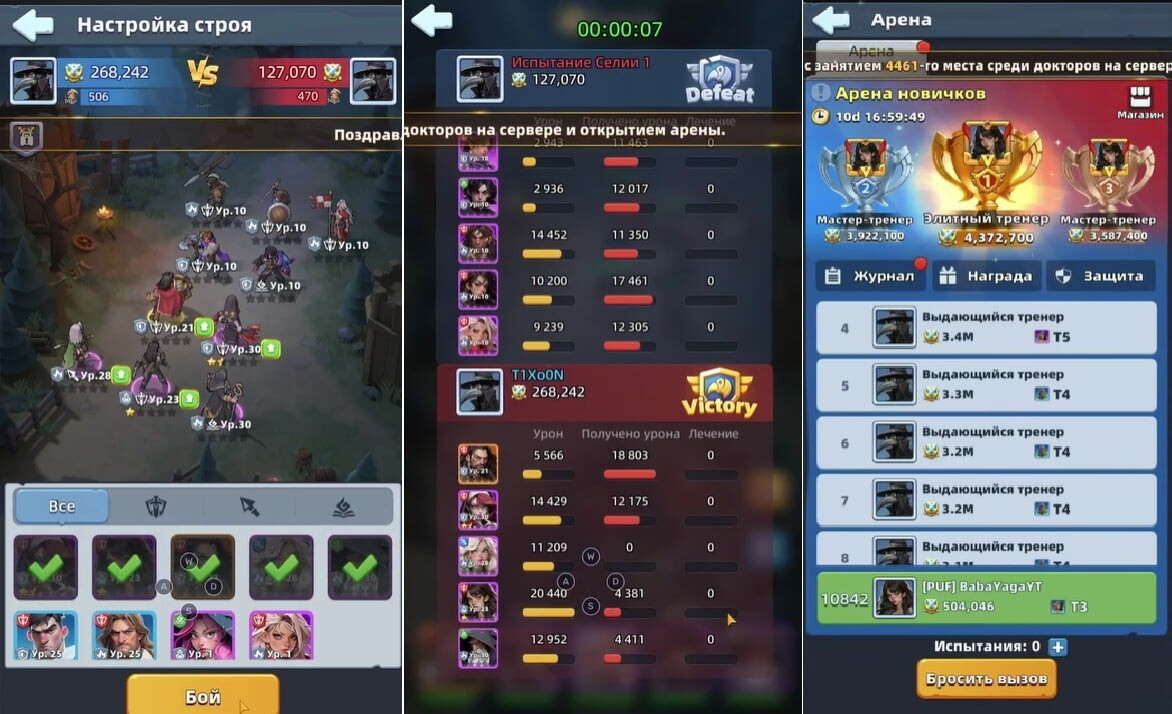
Arena currency goes to universal fragments
The arena shop is a trap of tempting one-offs. The priority that compounds: universal hero fragments — they fit any hero, push star upgrades and grow the team permanently. One strong late purchase beats ten useless early ones.
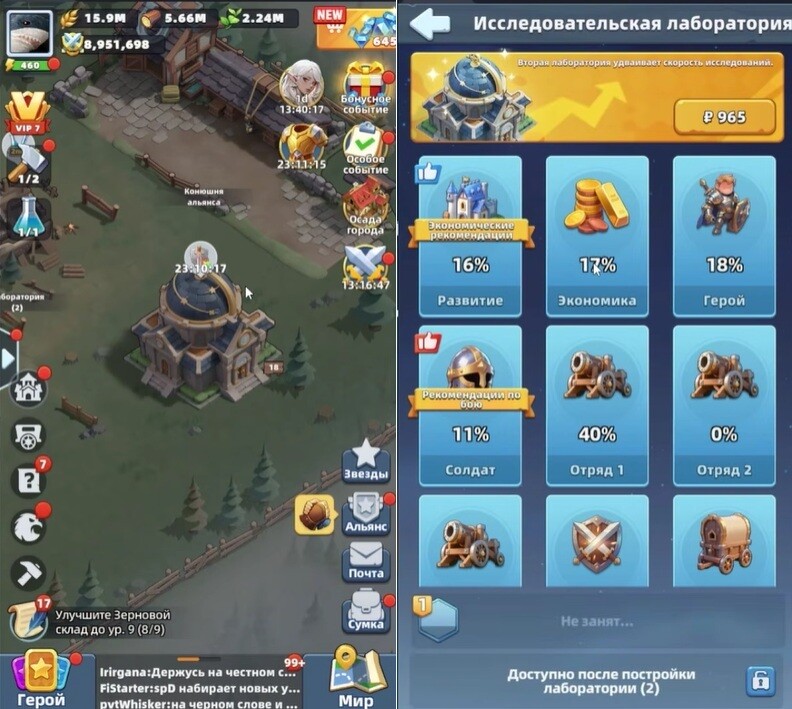
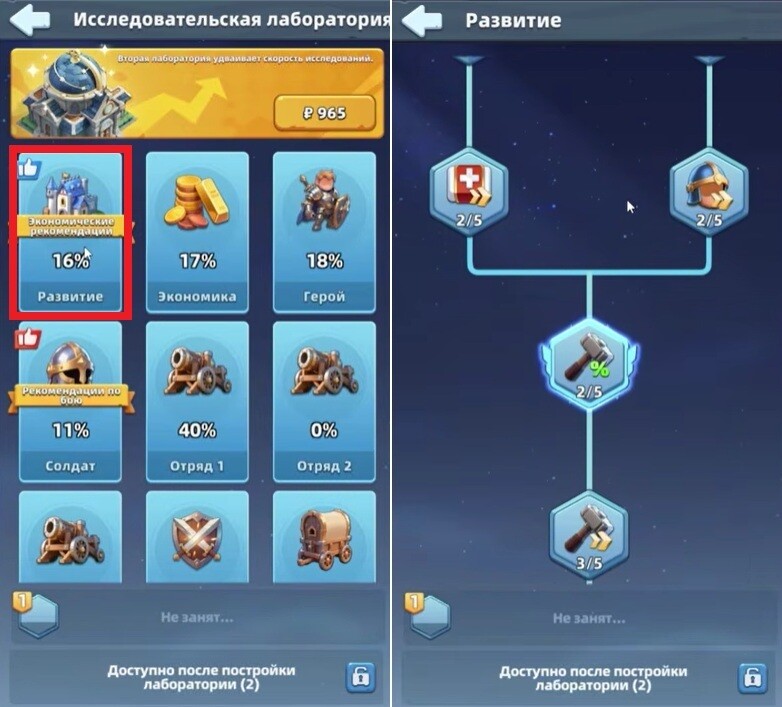
Lab: Development first, help before speedups
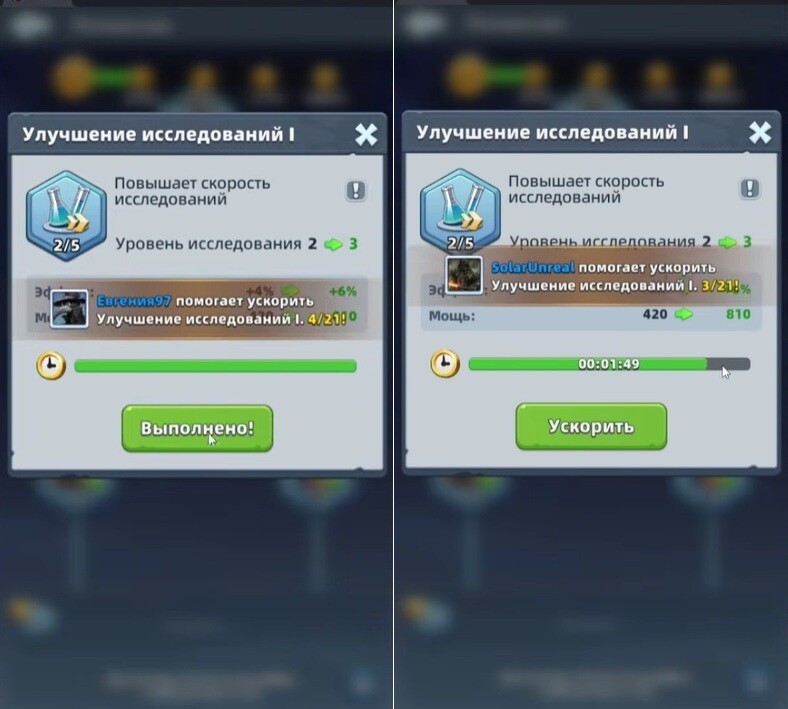
The Lab gives no instant power spike, which is why it gets postponed — and then timers balloon. Priorities: construction speed, research speed, troop training — the Development branch accelerates literally everything — plus the alliance-duel points bonus that pays extra rewards for the same actions. Lock one branch and finish it; spraying scrolls everywhere moves nothing. And always press alliance Help before spending speedups — free timer cuts first.
Gear: skip blue, dismantle, feed purple wisely
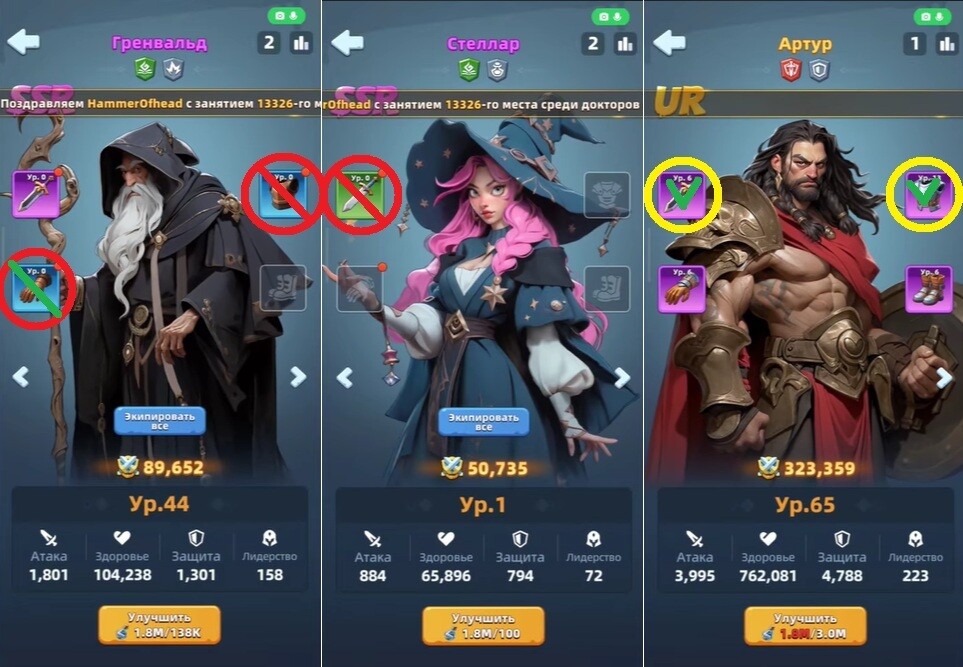
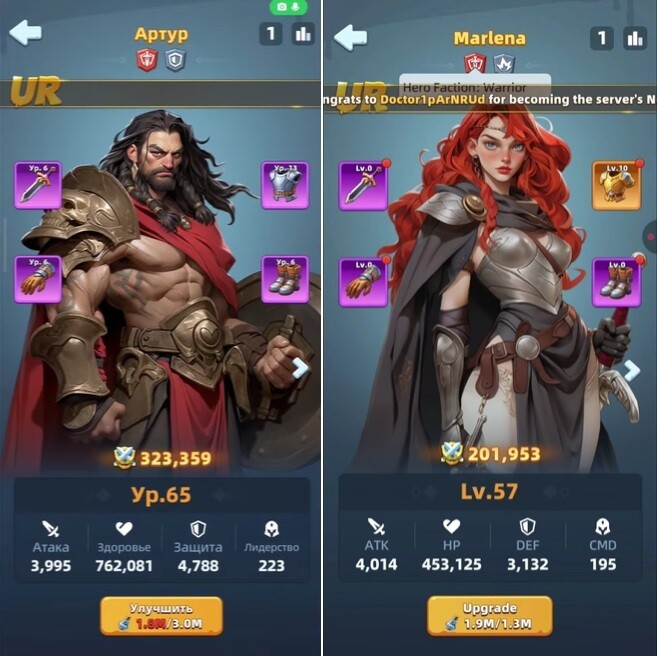
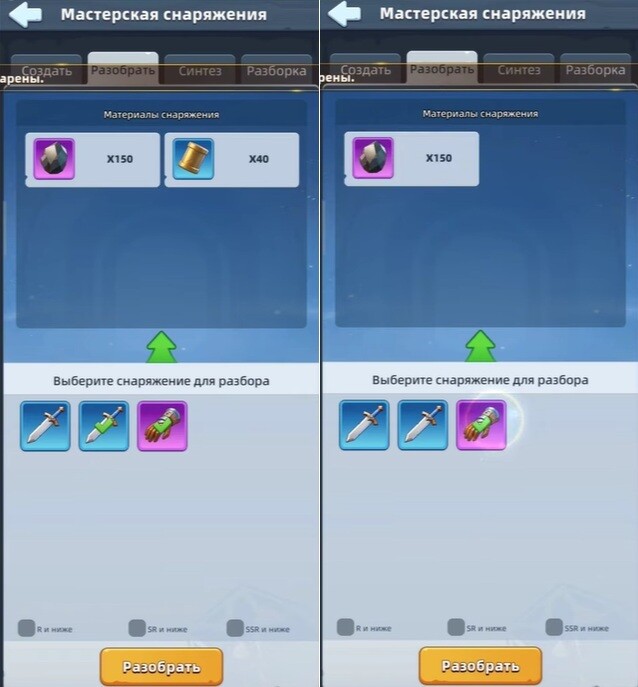
Upgrade materials are always scarcer than buttons to press. Blue gear gets replaced by purple anyway and refunds nothing — dismantle it into materials for the next stage instead of upgrading it. Purple is a fair temporary step (later dismantled without catastrophe); feed it first to the key hero — usually the tank holding the line, Arthur. Temporary item, trial hero, glowing red dot alone: almost always a bad spend.
Diamonds are a reserve, not comfort
Early diamonds burn fast on comfort — and days later the hero roulette opens, demanding a real stock, not a couple hundred. A short extra worker in the first hours is a fair boost; after that, hold. Treat diamonds as a fund for a concrete goal, and only spend to close a specific gap you already understand.
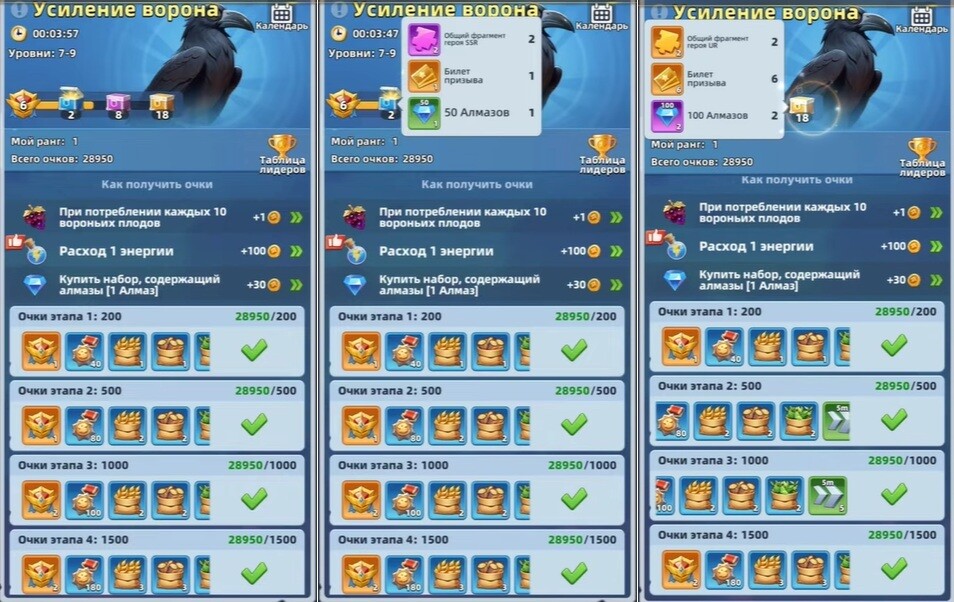
Source: Last Asylum: Plague - полный гайд для старта: как не слить ресурсы и быстро выйти в топ by Гейм-Знаток on DTF.
First Seven Days: Fresh State to Second Squad

Week one needs exactly three things: a fast-growing base, one strong main squad, and an active alliance. Everything else builds around them — the goal is to finish day seven without wanting to reroll.
Start on a fresh state
Your state is effectively your server: on a fresh one everyone starts together, while on a days-old one the active core has already pulled ahead into strong alliances with more content open. Do not chase a specific state number — that advice expires faster than a construction timer — and do not pick an old server just because the game highlights “recommended”. A state opened a few hours ago is perfectly fine.
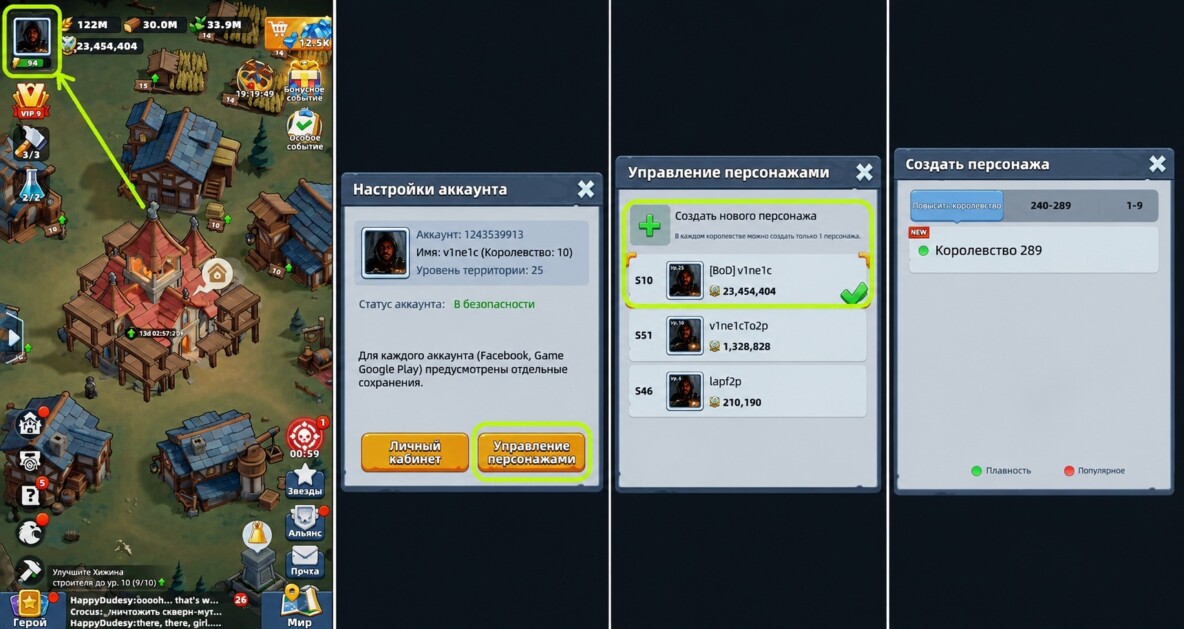
Tutorial first, then Sanctuary 8 with a living economy
Play the tutorial properly for the first half hour — it beats experimenting, especially experiments starting with “I wonder what this gold button does”. Then push the Sanctuary: it sets the development ceiling, caps hero levels and opens features. The working target is a fast run to level 8 without leaving a dead economy behind — if the next level needs Walls or the Alliance Hall, build them; if herbs run dry, fix herbs; if healing stalls, check medicine production. Note that past level 10 the Lab becomes a permanent fixture in the requirements.
Before launching each Sanctuary upgrade, check what the next level will demand and start preparing that building while the Sanctuary timer runs — this alone removes a lot of idle waiting. Spending to cross an important Sanctuary threshold and open a new system is sensible; spending to shave five idle minutes is not.
Build-queue habits
Never leave builders idle — an hour of debating heroes while timers sit empty is lost growth. While online, queue short upgrades; before sleep, launch multi-hour ones, and run production on the same rhythm. Watch the herb-to-medicine chain in particular: herbs look ordinary until a battle streak leaves you with nothing to heal with. And do not level every production building evenly “for beauty” — feed what is actually running short, because resources sunk into non-driving buildings stall the account.
Formation: tanks front, damage back
Two heroes hold the front, three work the back: the tanks absorb damage and buy time, the back line carries the main damage-dealer, a secondary attacker and a support. Never post your strongest damage-dealer up front just because it shows the biggest Might number — its job is dealing damage from the back row while the tanks hold.
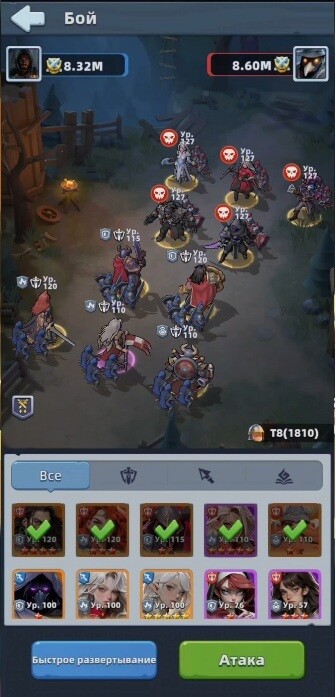
After defeat, diagnose — then keep feeding one squad
If the tanks collapse instantly, reinforce the front; if the tanks hold but enemies survive, invest in the main and secondary damage. The second squad unlocks at Sanctuary 8 and the third only at 20 — neither means splitting resources in half. The first squad still clears the hard content; the second gathers, runs errands and grows on leftovers until the main five confidently clears content.
The starter five and how to split resources
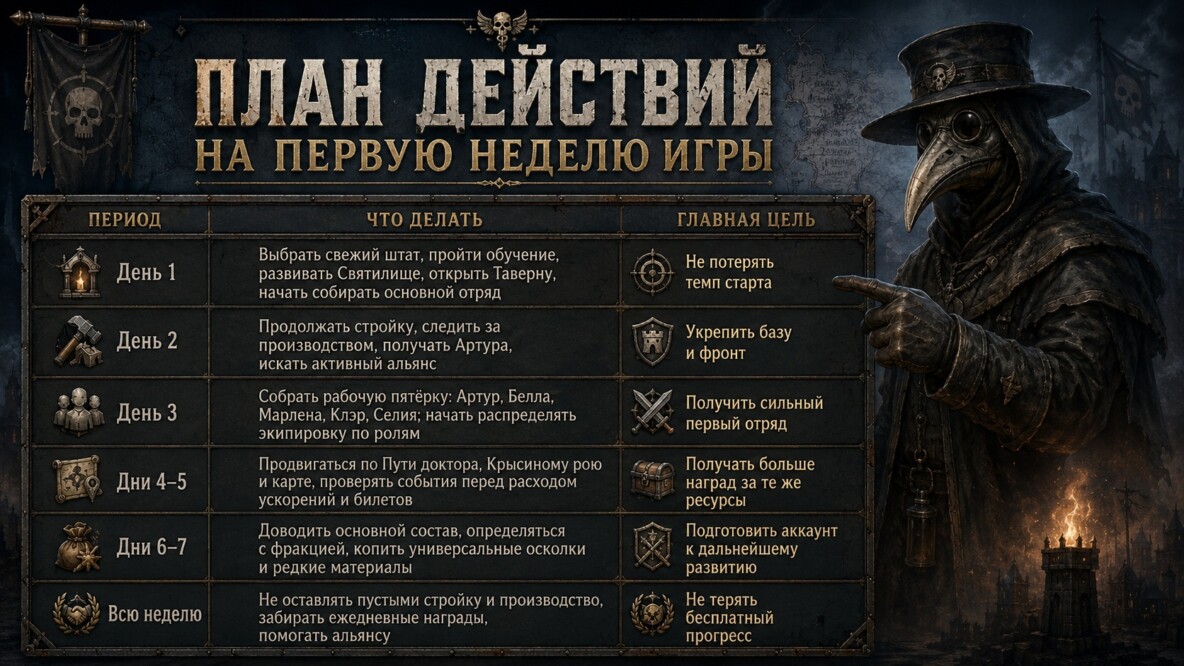
A proven early core: Arthur and Bella up front; Marlena, Claire and Celia behind — all Warriors, so the squad banks the full +20% faction bonus from day one.
- Arthur becomes the main tank. He is the first UR to appear in the Tavern on a young state, and 50 summons guarantee 10 of his fragments — claim him into the main five early, then start saving tickets for events that score summon points.
- Bella holds the second front slot so no damage-dealer has to stand there.
- Marlena is the main long-term damage carry — the prime candidate for extended investment.
- Claire shreds monsters and amplifies strong Warriors — and she is no throwaway SSR: early investment keeps paying.
- Celia shines in PvE, farming resource and elite monsters, rounding out the team until a full UR five exists.
Split unevenly: Marlena, Arthur and Claire are the long-term trio; Bella and Celia do starter jobs well but should not receive universal UR fragments, best blueprints or the rarest materials. While upgrades are cheap, keep the five roughly level; as costs climb, the trio takes priority. The same logic governs skill badges. Gear follows roles: tanks want armor and boots to hold the front longer; damage-dealers want sword and gloves to end fights faster. And never upgrade an item just because a red dot appeared next to it — the red dot does not know your plan.
Skills: PvP or monsters?
Many skills aim at PvP, others at monsters and PvE — Claire hits monsters harder and boosts Warriors against them, Celia can raise resource and elite monster loot. So the question is never “how rare is this hero” but “where am I taking them right now?” That matters doubly for the second roster: five expensive cards do not sort out tank, support and passenger roles by themselves.
Factions without fetish
The triangle runs Warriors → Warlocks → Rangers → Warriors with a 20% edge, and the same-faction build bonus scales 3 heroes +5%, 3+2 +10%, four +15%, full five +20% to attack, HP and defense.
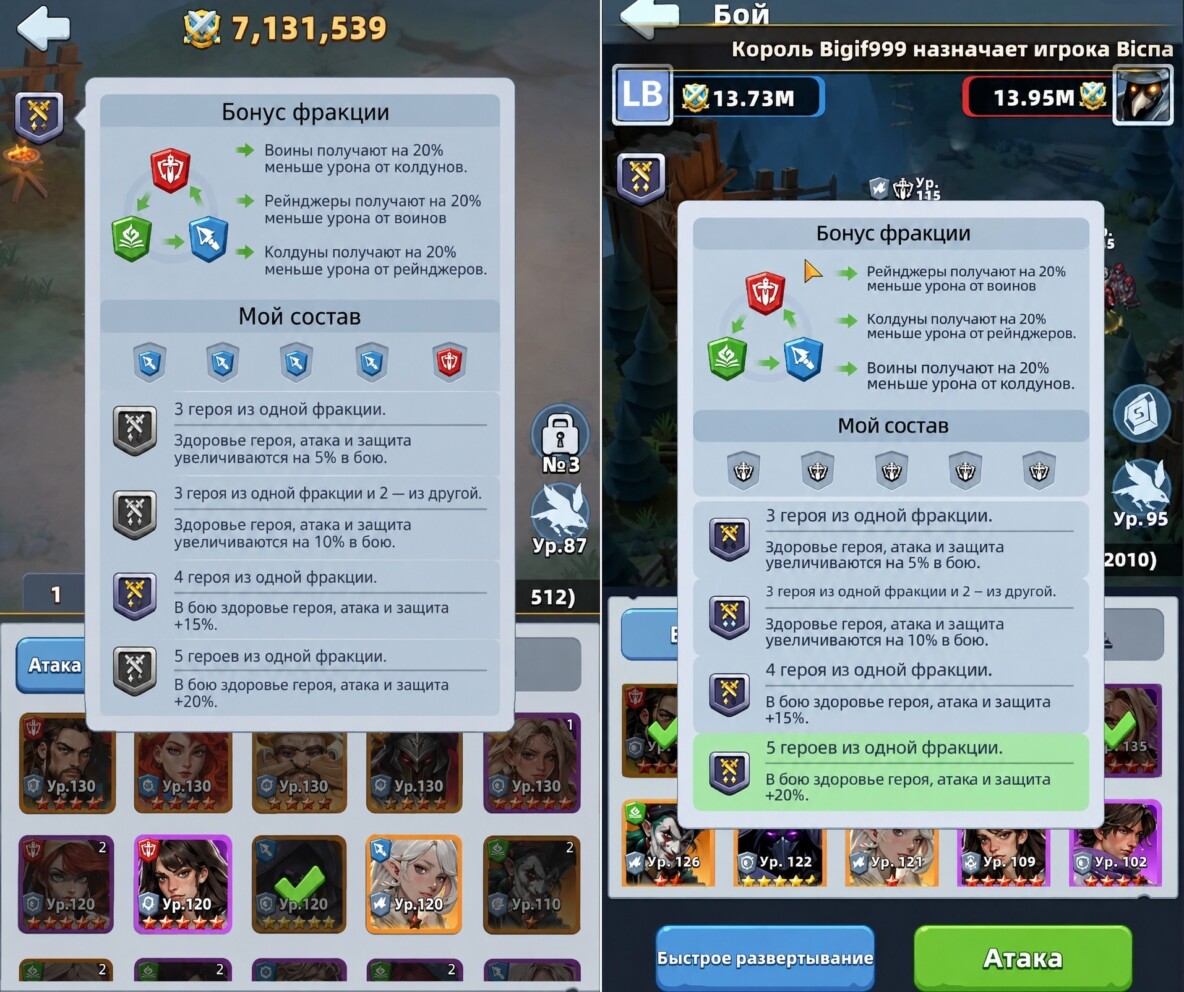
But on day one, never bench a good tank for a weak filler just to complete a 5/5 picture: the team must work first, then grow into a full mono squad. For an early Warrior core this is convenient — Arthur tanks, Marlena deals, Claire boosts PvE — and further URs slot in over time. Saving rules follow the same plan: universal UR fragments go to Marlena first (Arthur farms his own fragments through the Tavern and other sources), and among SSRs Claire is the top universal-fragment candidate.
Alliance: good beats top
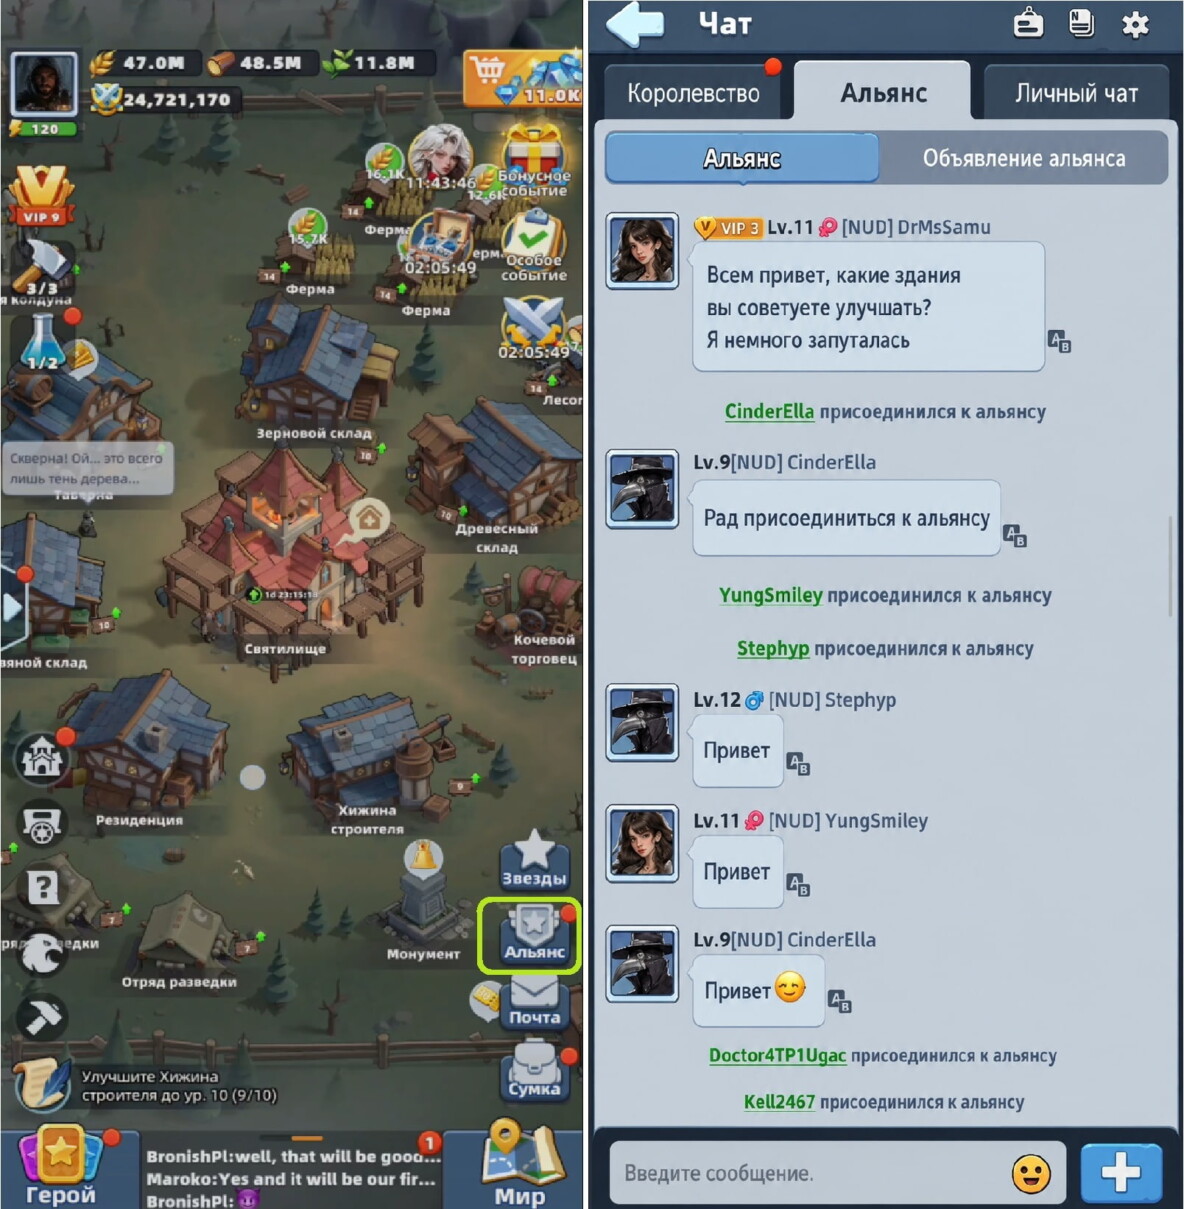
Join a good alliance as soon as the feature opens — and “good” matters more than “top”. Check whether chat answers, members press Help, events get played, leadership exists. Alliance help cuts construction and research timers every day, so an active community literally accelerates the account; twenty people helping daily compounds constantly, while a dead chat with an absent leader is a signal to move on.
Rat Swarm as a squad diagnostic
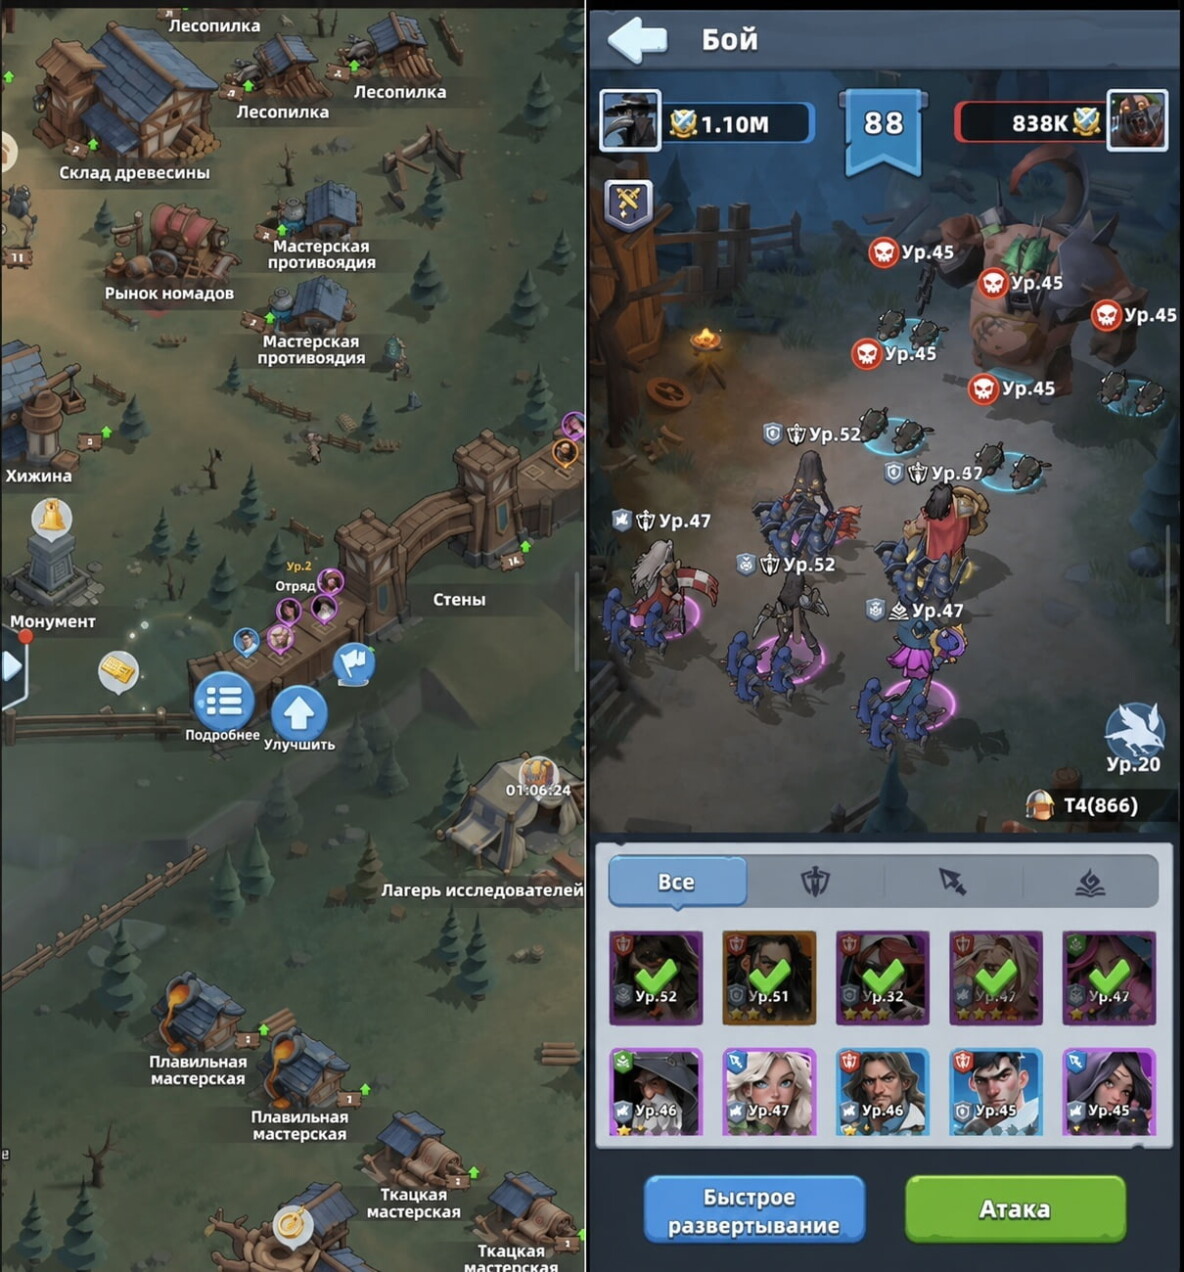
The Rat Swarm is not just an early wave-defense mode — it tells you what the main squad lacks. Tanks dying instantly means the front; calmly reaching the boss but leaving the Rat King at high HP means damage; towers standing far from the main paths means consolidating into fewer working points instead of upgrading the whole field evenly. Hold active skills manually for the boss rather than firing everything just before the Rat King spawns, and secure confident clears of normal waves before pushing the next boss.
Spend speedups and diamonds on timing
Once the mid-first-week game starts, it matters not only what you spend but when. Speedups pressed on a construction-scoring event day buy both the building level and the event rewards; the same logic spreads to research, heroes and troops — especially after the Alliance Duel opens, when hoarders of speedups out-earn impulsive spenders from the same stock. The stealthiest newbie drain is micro-speedups: three minutes here, ten there, and thousands of diamonds evaporate by evening. Hold diamonds for tangible goals — an important event, a needed threshold, a genuinely good offer. For low spenders, long-effect picks come first (a first-top-up hero, a useful pass, a pack for a hero you are actually building); speedups and plain resources come after.
The week-one rhythm
Do not try to open and upgrade everything in seven days. Raise the Sanctuary, assemble one strong main squad, join an active alliance, and keep rare materials unspent. Day one especially must never leave construction and production idle; then the Tavern, Arena, events, second squad and faction bonuses plug in gradually while the main five keeps receiving the resources. By week’s end the loop should read: collect production, launch construction, check events, spend where it scores extra, then head to the map or the Arena.
Source: Last Asylum: Plague - актуальный топовый старт: что делать в первые 7 дней. Советы, секреты, рабочая тактика игры by Гейм-Знаток on DTF.
🎥 Video guides
Curated video guides and strategic breakdowns from community creators
📝 Text Transcript 15:13 (913 сек) ▼
📝 Text Transcript 7:07 (427 сек) ▼
📝 Text Transcript 12:52 (772 сек) ▼
📝 Text Transcript 15:19 (919 сек) ▼
📝 Text Transcript 11:07 (667 сек) ▼
Search YouTube for this topic: «Beginner Guide»
Search query: Last Asylum Plague beginner guide
👑 VIP Privileges & Key Milestone Table (VIP 1–19)
Exact rewards and crucial automation thresholds extracted from the game client. Discover the optimal VIP targets for both F2P and spenders.
⚡ Essential Automation Thresholds:
| Level | Daily Free Pack | Milestone / Feature |
|---|---|---|
| 👑 VIP 1 | VIP 1 Daily Free Pack | — |
| 👑 VIP 2 | VIP 2 Daily Free Pack | — |
| 👑 VIP 3 | VIP 3 Daily Free Pack | — |
| 👑 VIP 4 | VIP 4 Daily Free Pack | ⚡ VIP Chat Tag |
| 👑 VIP 5 | VIP 5 Daily Free Pack | — |
| 👑 VIP 6 | VIP 6 Daily Free Pack | ⚡ Quick Expedition |
| 👑 VIP 7 | VIP 7 Daily Free Pack | — |
| 👑 VIP 8 | VIP 8 Daily Free Pack | ⚡ Auto Covert Ops |
| 👑 VIP 9 | VIP 9 Daily Free Pack | — |
| 👑 VIP 10 | VIP 10 Daily Free Pack | ⚡ Super Covert Ops |
| 👑 VIP 11 | VIP 11 Daily Free Pack | — |
| 👑 VIP 12 | VIP 12 Daily Free Pack | ⚡ Extra March Queue |
| 👑 VIP 13 | VIP 13 Daily Free Pack | — |
| 👑 VIP 14 | VIP 14 Daily Free Pack | — |
| 👑 VIP 15 | VIP 15 Daily Free Pack | ⚡ Max March Speed |
| 👑 VIP 16 | VIP 16 Daily Free Pack | — |
| 👑 VIP 17 | VIP 17 Daily Free Pack | — |
| 👑 VIP 18 | VIP 18 Daily Free Pack | — |
| 👑 VIP 19 | VIP 19 Daily Free Pack | — |
| 👑 VIP 20 | VIP 20 Daily Free Pack | — |
👥 Survivors & Residence: Optimization Guide
Complete database of 20 survivors from game data. Assign them in the Residence to corresponding city buildings for massive passive economy and construction buffs.
Residence Assignment Tip:
Prioritize Builders (Alice and Blanche provide up to 50 min free speedup) and Researchers (Lynn +5% science speed), followed by Lumberjacks and Farmers.
Lumberjack, Timber Output +30% A battle-hardened soldier afflicted with severe Blight, with rashes all over his body.
Farmer, Grain Output +10% A kind-hearted woman, who lost her child to the Blight.
Lumberjack, Timber Output +20% Bitten on the arm by an infected villager, amputated to avoid becoming a Blight.
Herbalist, Herb Protection +10% His family was tragically turned into Blights while resisting the Black Rats.
Builder, 30m free build speed-up time A girl who was bitten by Blights. She said that she saw a large number of Black Rats in the north of the dense forest.
Herbalist, Herb Protection +20% Patients from the neighboring town were driven here by Blights.
Officer, Soldier Training Cap +5% Once a general of the empire, he was framed by a dark sorcerer and now lives in seclusion.
Herb Keeper, Herb protection +20% Covered in black rashes from touching Black Rats, they have had a persistent high fever for a week.
Farmer, Grain Output +15% A patient from the neighboring town, who ventured into the dense forest, misled by others in search of a miracle cure.
Researcher, Tech Research Speed +5% Lost the job due to the Blight and suffers from a severe illness.
Hunter, Rescue Tent Capacity +5% A hunter living in the dense forest, who developed pneumonia from coughing due to the Blight.
Nurse, Healing speed +0.03% A nurse from the neighboring town fled into the dense forest after the infirmary was overrun by Black Rats and Blights.
Herbalist, Herb Protection +5% Frequently exhibits symptoms of bloodshot eyes, exiled from the original town to this place.
Builder, 20m Construction Speedup for free Passionate about repairs, unable to wield the sledgehammer due to the Blight.
Grain Keeper, Grain Protection+10% A little girl covered in red rashes, who was abandoned by her parents and nearly lost her life due to a high fever.
Timber Keeper, Timber Protection +10% A vagrant who catches and eats Black Rats, often experiences auditory hallucinations at night.
Nurse, Healing Speed +0.03% A beautiful woman blessed by the divine, suffering from a severe cough and low fever.
Nurse, Healing Speed +0.01% Emaciated due to chronic diarrhea symptoms.
Farmer, Grain Output +0.5% The wife of the critically ill Rowan, lost in the dense forest while searching for her husband.
Hunter, Rescue Tent Capacity +5% Ventured into the dense forest in search of grain, only to be cornered by Black Rats.
👥
No survivors found.
🧟 Monster & Rally Radar (Blight Lv. 1–30)
Complete database of 30 solo plague peasant tiers and 30 alliance Doom Elite rally bosses. Stamina costs, loot tables, and hunting tactics.
Alliance Rally Strategy:
Research "Auto-Rally" in the Alliance Tech Tree! It automatically dispatches your march into teammates' rallies while offline, yielding hundreds of reward chests daily.
📖 World Map Bestiary
Every monster and boss species found in the game client data (full SlgMonsterInfo table).
Lv.1 Elite Blight
Lv.2 Elite Blight
Lv.3 Elite Blight
Lv.4 Elite Blight
Lv.5 Elite Blight
Lv.6 Elite Blight
Lv.7 Elite Blight
Lv.8 Elite Blight
Lv.9 Elite Blight
Lv.10 Elite Blight
Lv.11 Elite Blight
Lv.12 Elite Blight
Lv.13 Elite Blight
Lv.14 Elite Blight
Lv.15 Elite Blight
Lv.16 Elite Blight
Lv.17 Elite Blight
Lv.18 Elite Blight
Lv.19 Elite Blight
Lv.20 Elite Blight
Lv.21 Elite Blight
Lv.22 Elite Blight
Lv.23 Elite Blight
Lv.24 Elite Blight
Lv.25 Elite Blight
Lv.26 Elite Blight
Lv.27 Elite Blight
Lv.28 Elite Blight
Lv.29 Elite Blight
Lv.30 Elite Blight
Grain Blight
Grain Blight
Grain Blight
Grain Blight
Grain Blight
Grain Blight
Grain Blight
Grain Blight
Grain Blight
Grain Blight
Grain Blight
Grain Blight
Grain Blight
Grain Blight
Grain Blight
Grain Blight
Grain Blight
Grain Blight
Grain Blight
Grain Blight
Grain Blight
Grain Blight
Grain Blight
Grain Blight
Grain Blight
Grain Blight
Grain Blight
Grain Blight
Grain Blight
Grain Blight
❓ FAQ — Frequently Asked Questions
What is the best F2P team in Last Asylum: Plague?
The canonical F2P squad is Arthur, Daskal, Marlena, Harper, Claire (all Warriors — mono-faction gives +20% HP/ATK/DEF). Arthur is free from day 1; the $1 Marlena top-up is considered the best value in the game. Daskal arrives in the first Era of Revival season (day 120+).
What should I upgrade first?
Sanctuary first, always — it gates every other building and your hero level cap. Then Training Grounds, Barracks, Research Lab, Infirmary, Wall. Keep the Builder’s Hut at Sanctuary level until Sanctuary 15 for free construction speedups.
When does Marlena unlock?
Day 66 for free — or immediately via the $1 starter top-up. Save UR shards so she lands at 8★ right away, then push 10★.
How do I get Cynthia as F2P?
Cynthia arrives via the Wishing Wheel on day 8. Save diamonds from day 1 (skip everything else) — ~11,500 diamonds total, and always spin ×10 (single spins waste tokens).
How do I get antitoxin?
Antitoxin Workshop + Stable production, every building upgrade completion, Falcon Quests (nearly all of them), Covert Ops and Caravan Trade (including plundering others’ ops — up to 5/day), and Blight/Elite Blight hunts (10/20 stamina). Events pay large amounts.
Why did my plunder income drop to almost nothing?
You hit the daily plunder limit: below the limit 100%, from 1× the limit you keep only 15%, from 1.3× only 5%. It resets at 02:00 UTC. The limit scales with Sanctuary level (2.5M at Lv.10–12 up to 30M at Lv.30) and rises immediately when you upgrade Sanctuary. A yellow triangle under your Might shows the status.
What should I buy in the shops?
Sanctuary/Expedition/Alliance shops: Crow Essence and UR Hero Omnifragments first. Honor shop is for gear blueprints only (never epigraph chests there). All shops restock Monday.
Are diamonds worth spending on speedups?
Only the VIP-shop 8h speedups are considered acceptable purchases — and only after hero resources. Community rule: never dump diamonds into speedups over hero wheel events (Cynthia day 8, Joker after day 15).
What faction should I build?
Warriors are the best early game (free Arthur/Harper shards, $1 Marlena). Rangers peak mid game (counter Warriors). Warlocks are the best late game but need heavy long-term investment. Mono-faction (5 heroes of one type) is the current meta because UR epigraphs buff a single faction.
How does Claire SSR→UR conversion work?
Opens on Era Day 8. She lands at 6★ and the run to 10★ costs 1,600 SSR shards (each substage costs 2× the SSR price). There’s a team-buff dip between 6★–9★ — skip it by banking Hall of Honor levels before converting (Lv.60→8★, Lv.100→9★, Lv.160→instant 10★).
How do I redeem gift codes?
In-game: Avatar (top-left) → Settings → Gift Code. iOS or web: log in at the official redemption page with your linked Facebook/Google account, pick server and character, enter the code.
What are the biggest beginner mistakes?
Upgrading everything equally instead of one main squad; judging heroes before high stars (Marlena is the classic late bloomer); splitting Awakening materials across heroes; wasting gems on VIP levels over hero wheels; skipping daily plunder (~27M resources/day); letting stamina cap.
Discounted Currency Store — LDShop
Diamonds, battle passes, and starter packs delivered instantly via UID with discounts up to 20%. Support the fan hub at zero extra cost!
📖 Read next
Did this guide help?