Valle dei Cluster di Cristallo: Percorso F2P per il Farming di Punti
Guida all'evento Valle dei Cluster di Cristallo: farming di mob rossi (1.500 punti l'uno), attacchi alle miniere a 5.000 punti/min, disciplina nella tempistica delle abilità e il trucco del cronometro per massimizzare i punti.
☰ In questa pagina 15 ▾
🗓 Aggiornato: 2026-10-12
La Valle dei Cluster di Cristallo (Valle dei Grappoli di Cristalli) è un evento a tempo in stile battle royale: trascorri una sessione fissa su una mappa condivisa uccidendo mob neutrali rossi e minando cristalli, e il tuo punteggio — non le kill sugli altri giocatori — decide la fascia di ricompensa. Giocatori F2P e balene iniziano la mappa sullo stesso piano; la disciplina batte il portafoglio.
La matematica del punteggio
Tre fonti di punti contano:
| Fonte | Punti | Perché è importante |
|---|---|---|
| Mob neutrali rossi (“rossi”) | ~1.500 ciascuno | Istantanei, ripetibili e con un respawn denso. La spina dorsale di ogni run F2P. |
| Miniere di cristalli (attaccando i nodi di cristallo controllati dai giocatori) | ~5.000 per minuto di possesso | Esplosive se riesci a sostenere l’occupazione; rischiose se ti spingi troppo oltre. |
| Sblocco abilità personali / bonus equipaggiamento | moltiplicativi | Amplificatori passivi su tutto ciò che precede. |
Accumula rossi all’inizio, passa alle miniere non appena le tue abilità sono alte e supererai la maggior parte delle balene casual.
Il percorso F2P
- Perlustra prima la mappa. Prima di attaccare qualsiasi cosa, rimpicciolisci la visuale e individua il cluster più denso di mob rossi vicino al tuo punto di rigenerazione. Il giusto punto di partenza fa risparmiare 5 minuti di marcia a ogni ciclo.
- Farma i rossi incessantemente a circa 1.500 pt per kill. Raggruppali: posiziona la tua marcia in modo che ogni kill si concateni alla successiva con un tempo di viaggio quasi nullo. La regola di Korpez: se la barra della marcia rimane inattiva, hai scelto il posto sbagliato.
- Sblocca immediatamente il tuo albero delle abilità. Il pannello delle abilità dell’evento Cristalli si apre a lato dello schermo: investi punti nei bonus alle uccisioni dei rossi, poi nella velocità di movimento e infine nei bonus per le miniere. Non aspettare; ogni minuto di ritardo è tempo perso per i moltiplicatori.
- Usa un cronometro / un’app timer per le finestre delle miniere. Colpire una miniera occupata rende circa 5.000 punti per ogni minuto in cui la mantieni; preimposta un timer per i momenti di pagamento in modo da poter prendere le miniere nel momento in cui i tuoi avversari si allontanano.
- Solo allora competi per le miniere. Una volta ripuliti i tuoi rossi o massimizzate le tue abilità, lanciati su una miniera contesa a metà ciclo — idealmente una il cui proprietario è appena partito per un altro gruppo di rossi.
Regole di disciplina
- Mai rimanere inattivi. Venticinque minuti di rossi continui > 35 minuti di girovagare.
- Non combattere i giocatori all’inizio. I duelli PvP danno punti al tuo avversario e bloccano le tue corse per i punteggi. Allontanati; torna più tardi.
- Non inseguire una miniera contesa da solo. Investirai 60 secondi e otterrai 5.000 punti — nel frattempo tre kill di rossi avrebbero fruttato 4.500 punti ogni 90 secondi senza alcun rischio. Mantieni le miniere solo quando non sono contese o se hai una forte superiorità.
- Le abilità non sono facoltative. I punti abilità non si farmano da soli: apri quel pannello nel secondo in cui lo vedi.
Il contropiede alle balene
I giocatori paganti acquistano principalmente pacchetti di velocità di marcia e abilità più forti più rapidamente. La risposta non è gareggiare sulla loro velocità, bensì superarli in disciplina: colpire più rossi al minuto, non sprecare mai un secondo a combatterli e rubare la miniera che hanno appena ripulito nel momento in cui se ne vanno. La maggior parte delle balene si stabilizza a 5.000 miniere; una pulita run F2P da 30 rossi al minuto raggiunge la stessa fascia.
📊 Tabelle di Punteggi e Ricompense
Valori verificati dai dati del client di gioco (v1.0.87), fonte: wiki-last-asylum.com. Valori base mostrati senza Accademia o bonus di ricerca dell’evento.
Fonte: wiki — black-mine
Vene
| Vena | Scorta | Velocità |
|---|---|---|
| Cluster di Cristallo 1 | 8.640 | 12 |
| Cluster di Cristallo 2 | 17.280 | 24 |
| Cluster di Cristallo 3 | 34.560 | 48 |
| Cluster Istantaneo 4 | 4.000 | 200 |
Abilità della miniera
| Abilità | Effetto | Costo |
|---|---|---|
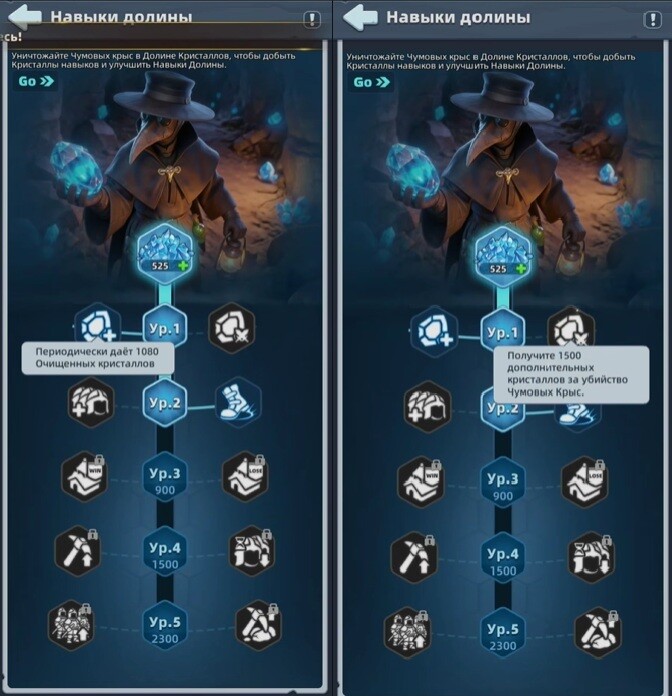
| Ondata di Cristallo | Ottieni periodicamente 1.080 Cristalli Purificati | 200 |
| Cacciatore di Ratti della Peste | Ottieni 1.500 Cristalli extra quando sconfiggi un Ratto della Peste | 200 |
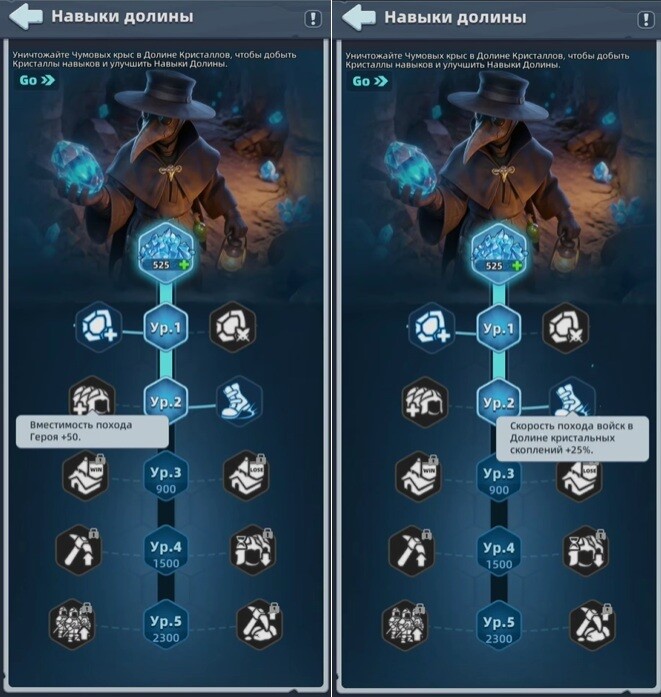
| Espansione della Forza | Capacità di Marcia Eroe Singolo +50 | 500 |
| Marcia Rapida | Velocità di Marcia delle Truppe nella Valle dei Cluster di Cristallo +25% | 500 |
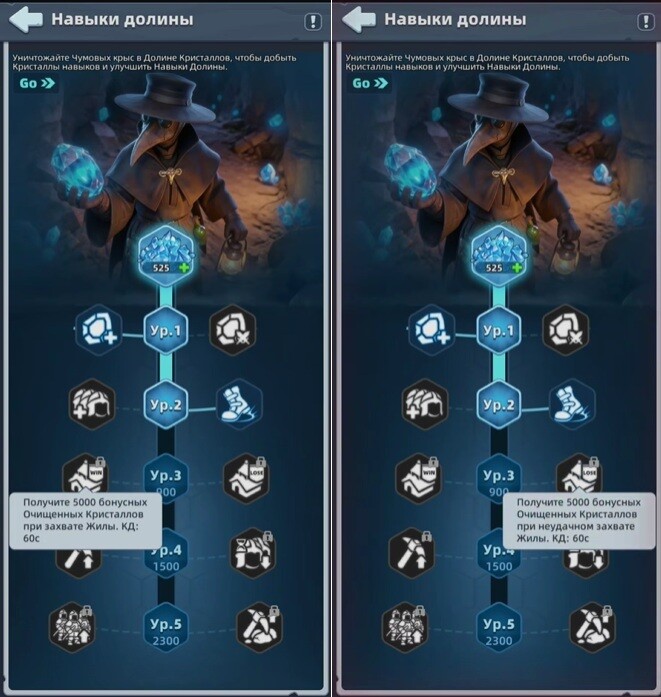
| Sacco della Valle | Ottieni 5.000 Cristalli Purificati extra quando conquisti un Filone. CD: 60s | 900 |
| Vigilanza della Valle | Ottieni 5.000 Cristalli Purificati extra quando non riesci a conquistare un Filone. CD: 60s | 900 |
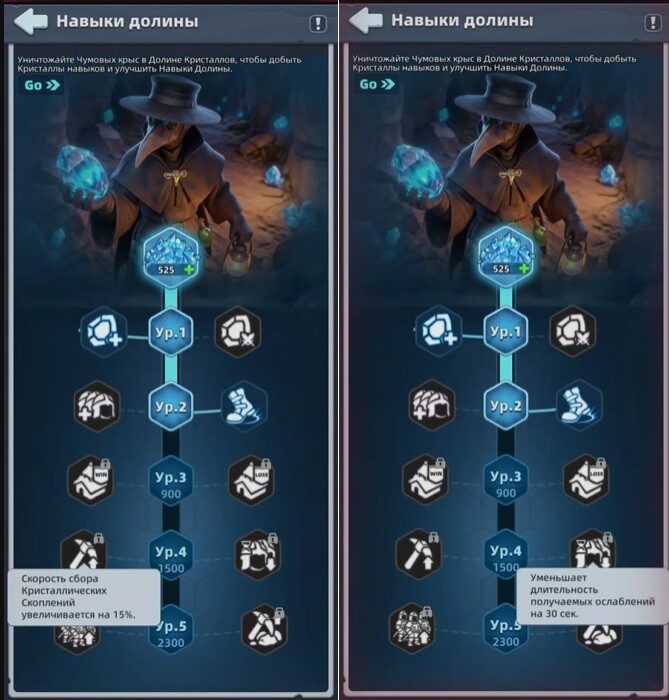
| Estrazione di Cristallo | La velocità di raccolta dei Cluster di Cristallo aumenta del 15% | 1.500 |
| Volontà di Ferro | Riduce la durata dei debuff ricevuti di 30s | 1.500 |
| Risveglio della Valle | Aumenta i DAN dell’Eroe del 15% per 60s. CD: 300s | 2.300 |
| Risonanza di Cristallo | Aumenta temporaneamente la velocità di raccolta dei Cluster di Cristallo del 50% per 60s. CD: 300s | 2.300 |
Approfondimento sulla Valle dei Cristalli: tempistiche, teletrasporti e scelte delle abilità
Gara a punti in solitaria di 30 minuti su una mappa separata: raccogli cristalli, mantieni caselle, uccidi ratti, fai salire di livello le abilità temporanee. La disattenzione si paga cara: una brutta posizione di partenza, una marcia troppo lunga o una finestra di cristalli istantanei mancata regalano punti a chiunque altro. La forza aiuta vicino al trono e alle caselle di livello 3, ma un giocatore regolare con un farm stabile supera regolarmente un balena distratto.
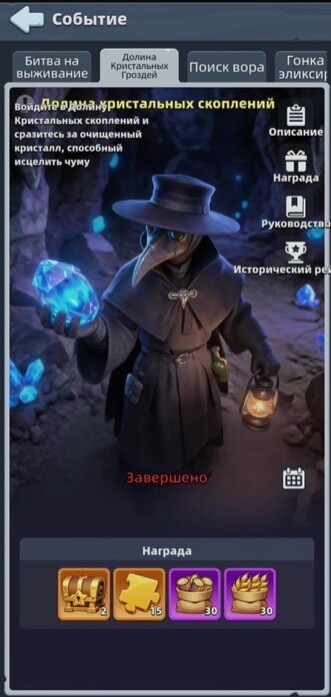
Formato e regole dell’esercito
- Evento in solitaria, non di alleanza. Competi anche contro i membri del tuo stesso clan all’interno della valle. Non sabotare gli alleati, ma non aspettarti che nessuno ti ceda le caselle.
- 30 minuti, tre fasce orarie, un solo tentativo. Puoi giocare in una sola delle fasce orarie: controlla il calendario per non perderla. Solo per i server più vecchi; se il tuo server non ha ancora la valle, non ha raggiunto quella fase.
- Le truppe seguono le regole dell’evento. Il numero di teste scala con la capacità delle caserme, il livello è il più alto sbloccato. Le perdite rimangono all’interno dell’evento e non toccano il tuo esercito permanente.
- La cura costa solo acceleratori (di cura o universali). I combattimenti costanti prosciugano gli stessi acceleratori di cui la tua base e la ricerca hanno bisogno: i giocatori F2P dovrebbero evitare scontri inutili.
- Nessun attacco alle città. Si combatte solo per le caselle di risorse: caccia chi le detiene, prendi il posto, raccogli.
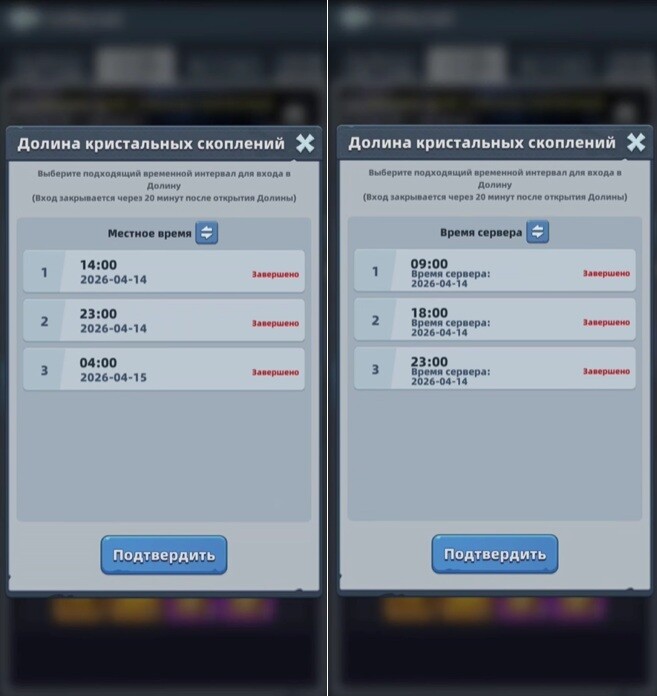
Primi 2 minuti e teletrasporti
Dopo l’ingresso ottieni 2 minuti di preparazione su un punto di generazione casuale. Controlla prima di muoverti: caselle di livello 2 vicine, ratti che compaiono nelle vicinanze, nessun gruppo di giocatori forti, distanze di marcia brevi, spazio di manovra. L’errore classico è buttarsi dritto al centro: i giocatori fuori meta vengono scacciati e passano la sessione a marciare invece di raccogliere risorse.

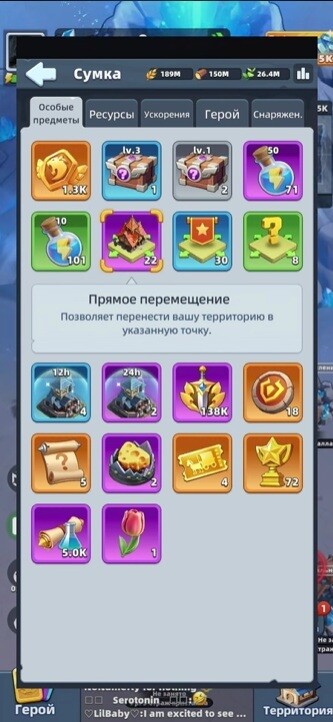
- Il teletrasporto gratuito si aggiorna ogni 6 minuti. Usalo quando il punto muore (vicini forti, caselle contese, niente ratti, cacciate continue).
- I teletrasporti a pagamento aumentano: 1, 2, 3, 4 e poi 5 per salto. Salta solo verso un obiettivo concreto (zona libera con buone caselle e ratti), mai su un “sembra meglio laggiù”: tutti gli altri raccolgono risorse mentre tu voli.
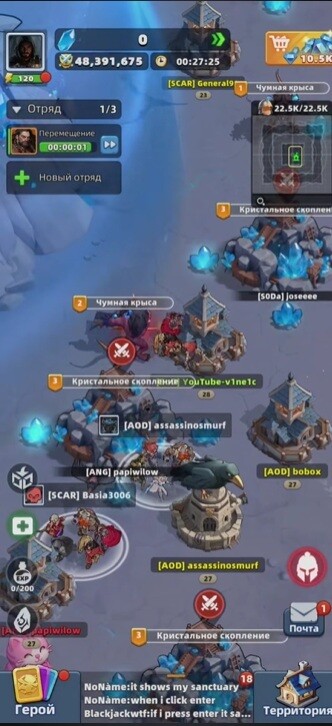
Caselle e trono
| Casella | Rendimento | Per chi è |
|---|---|---|
| Livello 1 | minimo, tranquillo | imparare l’evento, run senza combattimenti |
| Livello 2 | solido, contesa moderata | impostazione predefinita per la maggior parte dei giocatori non-balena |
| Livello 3 (vicino al trono) | tasso migliore, forte contesa | account forti che possono mantenerla |
Se non riesci a mantenere il livello 3, rende meno di una tranquilla casella di livello 2: occupala, fatti cacciare, marcia indietro, ripeti. Trenta minuti di farm stabile a livello 2 battono trenta minuti passati a dimostrare qualcosa ai primi in classifica.

- La battaglia per il trono si apre 23 minuti dopo l’inizio e dura 7 minuti. Per gli account forti con esercito, eroi e sete di guerra è l’obiettivo logico. Per i giocatori F2P o con basse spese, non renderlo il piano principale: mentre i migliori combattono al centro, le caselle normali spesso si svuotano e diventano coltivabili. Comunque la maggior parte dei punti arriva prima del trono: caselle, raccolta, ratti, cristalli sparsi.

Ratti e la divisione iniziale
Uccidere i ratti assegna XP per le abilità dell’evento: più alto è il livello del ratto, maggiori sono gli XP. Prima si sbloccano le abilità, più a lungo producono effetti. Non assegnare ogni marcia alla raccolta all’inizio: con 3 marce esegui 1 raccolta + 2 ratti; con 4 marce, 1 raccolta + 2-3 ratti e reazioni. Una quarta marcia rappresenta un vero vantaggio qui. I ratti vengono presi di mira rapidamente, ma ignorarli significa rinunciare a gran parte del potenziale dell’evento.
Scelte dell’albero delle abilità
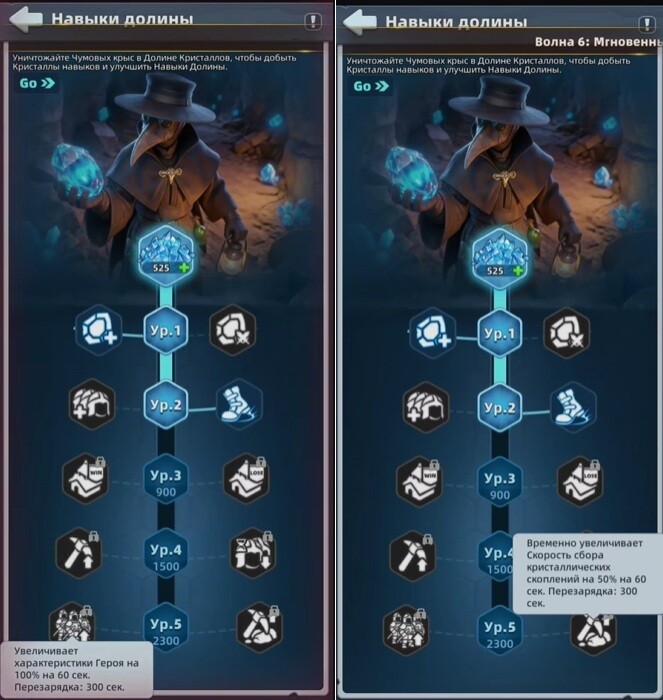
Temporanee per una run, poi azzerate. Due rami, cinque livelli, una scelta per livello. I primi quattro sono passivi; il quinto è attivo con un tempo di ricarica di 5 minuti. Scegli in base al tuo stile di gioco, non al numero più alto.
- Livello 1: sinistro — reddito gratuito periodico di 1.080 cristalli; destro — 1.500 per ogni ratto ucciso. Il destro ripaga solo con una densità alta di ratti e pulizie rapide; il sinistro è il reddito sicuro quando i ratti sono scarsi o contesi.
- Livello 2: sinistro — marcia +50 guerrieri; destro — +25% velocità di marcia. Di solito la velocità vince: si raggiungono più velocemente ratti, caselle e cristalli liberi. La capacità non risolve mai il vero problema della valle: il timer di 30 minuti.
- Livello 3: sinistro — 5.000 cristalli per ogni cattura di casella riuscita (massimo una volta al minuto); destro — 5.000 quando la tua squadra viene spazzata via su una casella. Per il gioco normale prendi il bonus di cattura; non basare la tua strategia sulle sconfitte, specialmente quando la cura costa acceleratori.
- Livello 4: sinistro — +15% velocità di raccolta nelle caselle; destro — rimozione più rapida dei debuff sugli eroi sconfitti. I raccoglitori prendono il sinistro; i combattenti del trono prendono il destro.
- Livello 5 (attivo): sinistro — +100% statistiche degli eroi per 60s; destro — +50% raccolta nelle caselle per 60s. I combattenti prendono il sinistro, i contadini il destro — e attivalo nel momento giusto (prima di un combattimento, di una difesa chiave, di una raccolta ricca), non appena si ricarica.
PvP e cristalli istantanei
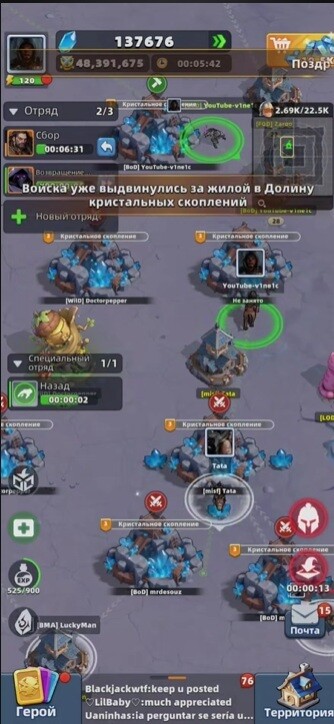
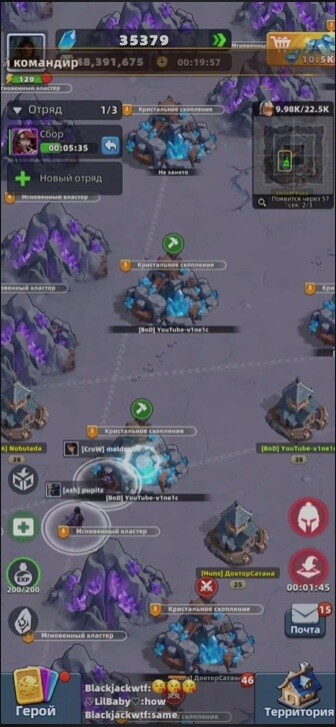
- Nessun punto per l’uccisione del detentore della casella in sé. Un buon attacco è quello che fa guadagnare posizione e cristalli: la vittima lascia cadere i cristalli raccolti sparsi intorno alla casella, che tu raccogli, e in più prendi il posto. Attacca solo se c’è un vantaggio (possessore più debole, raccoglitore fermo da molto tempo, recupero rapido nelle vicinanze). Prendi anche i cristalli sciolti visibili vicino alle caselle degli altri: punti veloci e quasi privi di rischi.
- I cristalli istantanei compaiono intorno ai minuti 10, 11, 12, 20, 21 e 22. Si raccolgono rapidamente e pagano bene. Tieni parte delle tue marce pronte vicino a quei momenti: a volte allontana una squadra da una casella normale per contenderli. La migliore meccanica di recupero F2P: non serve alcuna lotta per il trono.
Piano di gioco semplice e dove si perdono i punti
Inizio: ricognizione durante la preparazione, evita il centro, ancorati vicino a caselle di livello 2 con ratti. Dopo l’inizio: 1 marcia raccoglie, il resto dà la caccia ai ratti per sbloccare rapidamente le abilità. Metà partita: mantieni una buona posizione, tieni occupata ogni marcia, preparati per il 10/11/12, poi 20/21/22; dopo il minuto 23, i giocatori che non puntano al trono continuano semplicemente a coltivare risorse. Regole F2P: caselle di livello 2, ratti per le abilità, finestre istantanee, niente teletrasporti a pagamento casuali, niente risse che bruciano acceleratori. Gli account forti aggiungono caselle di livello 3 e il trono, ma continuano a fare farm, potenziare abilità e colpire le finestre istantanee prima del minuto 23.
I punti si perdono a causa di: scelte di partenza lente, lunghe marce verso ratti distanti, finestre istantanee mancate, combattimenti senza vantaggi, teletrasporti a pagamento casuali e attaccarsi a una casella impossibile da mantenere. Ogni azione dovrebbe fare punti o migliorare la posizione, altrimenti saltala.
Fonte: Last Asylum: Plague - гайд по Долине кристальных скоплений. Секреты, советы и тактика от новичка до топа. di Гейм-Знаток su DTF.
🎥 Video guide
Video guide selezionate e analisi strategiche dai creatori della community
📝 Trascrizione del testo 15:28 (928 сек) ▼
Cerca questo argomento su YouTube: «Crystal Cluster Valley»
Termine di ricerca: Last Asylum Plague Crystal Cluster Valley guide
❓ FAQ — Domande frequenti
Qual è la migliore squadra F2P in Last Asylum: Plague?
La squadra F2P canonica è composta da Arthur, Daskal, Marlena, Harper, Claire (tutti Guerrieri — la mono-fazione conferisce +20% HP/ATK/DEF). Arthur è gratuito dal giorno 1; la ricarica da 1$ per Marlena è considerata il miglior rapporto qualità-prezzo del gioco. Daskal arriva nella prima stagione dell'Era della Rinascita (giorno 120+).
Cosa dovrei potenziare per primo?
Il Santuario per primo, sempre — sblocca ogni altro edificio e il limite di livello dei tuoi eroi. Poi Campi di Addestramento, Caserma, Laboratorio di Ricerca, Infermeria, Mura. Mantieni la Capanna del Costruttore al livello del Santuario fino al livello 15 per accelerazioni di costruzione gratuite.
Quando si sblocca Marlena?
Il giorno 66 gratuitamente — o immediatamente tramite la ricarica iniziale da 1$. Risparmia i frammenti UR in modo che arrivi subito a 8★, poi punta alle 10★.
Come ottengo Cynthia come F2P?
Cynthia arriva tramite la Ruota dei Desideri il giorno 8. Risparmia i diamanti dal giorno 1 (salta tutto il resto) — circa 11.500 diamanti in totale, e gira sempre ×10 (i giri singoli sprecano gettoni).
Come ottengo l'antitossina?
Officina Antitossina + produzione della Stalla, completamento di ogni potenziamento edificio, Missioni Falcon (quasi tutte), Operazioni Segrete e Commercio Carovane (incluso il saccheggio delle operazioni altrui — fino a 5/giorno), e cacce al Flagello/Flagello d'élite (10/20 energia). Gli eventi pagano grandi quantità.
Perché il mio reddito da saccheggio è sceso quasi a zero?
Hai raggiunto il limite giornaliero di saccheggio: sotto il limite 100%, da 1× il limite mantieni solo il 15%, da 1,3× solo il 5%. Si resetta alle 02:00 UTC. Il limite scala con il livello del Santuario (2,5M al Lv.10–12 fino a 30M al Lv.30) e aumenta immediatamente quando potenzi il Santuario. Un triangolo giallo sotto la tua Potenza mostra lo stato.
Cosa dovrei comprare nei negozi?
Negozi Santuario/Spedizione/Alleanza: prima Essenza di Corvo e Omniframmenti Eroe UR. Il negozio d'onore è solo per i progetti dell'equipaggiamento (mai comprare forzieri epigrafici lì). Tutti i negozi si riforniscono il lunedì.
Vale la pena spendere diamanti per le accelerazioni?
Solo le accelerazioni da 8 ore del negozio VIP sono considerate acquisti accettabili — e solo dopo le risorse per gli eroi. Regola della community: non spendere mai diamanti in accelerazioni invece che negli eventi della ruota degli eroi (Cynthia giorno 8, Joker dopo il giorno 15).
Quale fazione dovrei costruire?
I Guerrieri sono i migliori a inizio gioco (frammenti gratuiti di Arthur/Harper, Marlena a 1$). I Ranger raggiungono il picco a metà gioco (contrastano i Guerrieri). Gli Stregoni sono i migliori a fine gioco ma richiedono un pesante investimento a lungo termine. La mono-fazione (5 eroi dello stesso tipo) è il meta attuale perché gli epigrafici UR potenziano una singola fazione.
Come funziona la conversione Claire SSR→UR?
Si apre il giorno 8 dell'Era. Arriva a 6★ e il percorso verso le 10★ costa 1.600 frammenti SSR (ogni sottolivello costa 2× il prezzo SSR). C'è un calo nel potenziamento di squadra tra 6★–9★ — saltalo accumulando livelli della Sala d'Onore prima di convertire (Lv.60→8★, Lv.100→9★, Lv.160→10★ istantaneo).
Come riscatto i codici regalo?
Nel gioco: Avatar (in alto a sinistra) → Impostazioni → Codice Regalo. iOS o web: accedi alla pagina di riscatto ufficiale con il tuo account Facebook/Google collegato, scegli server e personaggio, inserisci il codice.
Quali sono i più grandi errori dei principianti?
Potenziare tutto equamente invece di una squadra principale; giudicare gli eroi prima di aver raggiunto stelle alte (Marlena è la classica che sboccia tardi); dividere i materiali del Risveglio tra troppi eroi; sprecare gemme in livelli VIP invece che nelle ruote degli eroi; saltare il saccheggio giornaliero (~27M di risorse/giorno); lasciare che l'energia raggiunga il limite.
📖 Leggi il prossimo
Questa guida ti è stata utile?