وادي عناقيد الكريستال: مسار جمع النقاط للاعبين المجانيين (F2P)
دليل إعفية وادي عناقيد الكريستال: زراعة الوحوش الحمراء (1.5 ألف نقطة لكل منها)، غارات المناجم بمعدل 5 آلاف نقطة/دقيقة، انضباط توقيت المهارات وحيلة ساعة الإيقاف لتحقيق أقصى عدد من النقاط.
☰ في هذه الصفحة 15 ▾
🗓 محدّث: 2026-10-12
وادي عناقيد الكريستال (Crystal Cluster Valley) هو حدث مؤقت بأسلوب الباتل رويال: حيث تقضي جلسة محددة المدة على خريطة مشتركة لقتل الوحوش المحايدة الحمراء وتعدين البلورات، ونتيجة نقاطك — وليست عمليات القتل ضد اللاعبين الآخرين — هي ما يحدد فئة مكافأتهم. يبدأ اللاعبون المجانيون (F2P) واللاعبون المنفقون (الحيتان) الخريطة على قدم المساواة؛ الانضباط يتفوق على المحفظة.
رياضيات لوحة النتائج
ثلاثة مصادر للنقاط هي ما يهم:
| المصدر | النقاط | لماذا هي مهمة |
|---|---|---|
| الوحوش المحايدة الحمراء (“الحمراء”) | ~1,500 لكل منها | فورية، متكررة، وتظهر بكثافة. العمود الفقري لكل جولة مجانية (F2P). |
| مناجم الكريستال (مهاجمة عقد الكريستال التي يسيطر عليها اللاعبون) | ~5,000 لكل دقيقة سيطرة | متفجرة إذا تمكنت من الحفاظ على الاحتلال؛ محفوفة بالمخاطر إذا بالغت في التوغل. |
| فتح المهارات الشخصية / تعزيزات العتاد | مضاعفة | مكبرات سلبية على كل ما سبق. |
اجمع النقاط من الوحوش الحمراء مبكراً، وانتقل إلى المناجم بمجرد أن تصبح مهاراتك عالية، وستتفوق في النقاط على معظم الحيتان العاديين.
مسار اللاعبين المجانيين (F2P)
- استكشف الخريطة أولاً. قبل مهاجمة أي شيء، قم بالتصغير وحدد أقرب تكتل كثيف من الوحوش الحمراء بالقرب من نقطة ظهورك. موقع البداية الصحيح يوفر 5 دقائق من المسير في كل دورة.
- ازرع الوحوش الحمراء بلا هوادة بحوالي 1,500 نقطة لكل قتلة. تجميلها: أوقف مسيرك بحيث تتسلسل كل قتلة إلى التالية بوقت انتقال شبه معدوم. قاعدة كوربيز (Korpez): إذا ظل شريط المسير خاملًا في أي وقت، فقد اخترت الموقع الخطأ.
- افتح شجرة مهاراتك فوراً. تفتح لوحة مهارات حدث الكريستال على جانب الشاشة - ضع النقاط في مكافآت قتل الوحوش الحمراء، ثم سرعة الحركة، ثم مكافآت المناجم. لا تنتظر؛ فكل دقيقة تأخير هي وقت مضاعف ضائع.
- استخدم تطبيق ساعة إيقاف / مؤقت لفترات المناجم. إن ضرب منجم مشغُول يمنح ~5 آلاف نقطة مقابل كل دقيقة تحتفظ به؛ قم بضبط مؤقت مسبقًا لفترات الدفع حتى تتمكن من الاستولى على المناجم في اللحظة التي ينتقل فيها خصومك عنها.
- قم بمنافسة المناجم بعد ذلك فقط. بمجرد مسح الوحوش الحمراء أو الحد الأقصى لمهاراتك، قفز إلى منجم تنافسي في منتصف الدورة - ويفضل أن يكون منجماً غادر مالكه للتو إلى حزمة حمراء أخرى.
قواعد الانضباط
- لا تكن خاملاً أبداً. خمس وعشرون دقيقة من الوحوش الحمراء المستمرة > 35 دقيقة من التجوال.
- لا تحارب اللاعبين مبكراً. مبارزات اللاعبين ضد اللاعبين تغذي خصمك بالنقاط وتؤخر جولات جمع النقاط الخضراء. تحول بعيداً؛ وعد لاحقاً.
- لا تطارد منجماً تنافسياً بمفردك. ستستثمر 60 ثانية وتحصل على 5 آلاف - وفي نفس الوقت كانت ثلاث عمليات قتل حمراء ستدفع 4.5 ألف لكل 90 ثانية بدون أي مخاطرة. احتفظ بالمناجم فقط عندما تكون غير متنازع عليها أو محملة بكثافة.
- المهارات ليست اختيارية. لن تقوم نقاط المهارة بالزراعة وحدها - افتح تلك اللوحة في اللحظة التي تراها فيها.
مواجهة الحيتان (Whales)
يشتري اللاعبون المنفقون غالباً حزم سرعة المسير ومهارات أقوى بشكل أسرع. الحل ليس سباق سرعتهم - بل تفوقهم انضباطاً: اضرب المزيد من الوحوش الحمراء في الدقيقة، ولا تهدر ثانية واحدة في قتالهم، واسرع لسرقة المنجم الذي قاموا بتطهيره للتو في اللحظة التي يغادرون فيها. يستقر معظم الحيتان عند 5 آلاف منجم؛ جولة نظيفة للاعب مجاني بمعدل 30 قتلة حمراء في الدقيقة تحط في نفس الفئة.
📊 جدول النتائج والمكافآت
قيم تم التحقق منها من بيانات عميل اللعبة (v1.0.87)، المصدر: wiki-last-asylum.com. القيم الأساسية معروضة بدون مكافآت الأكاديمية أو أبحاث الحدث.
المصدر: wiki — black-mine
العروق (Veins)
| العرق | المخزون | المعدل |
|---|---|---|
| عنقود الكريستال 1 | 8,640 | 12 |
| عنقود الكريستال 2 | 17,280 | 24 |
| عنقود الكريستال 3 | 34,560 | 48 |
| العنقود الفوري 4 | 4,000 | 200 |
مهارات المناجم
| المهارة | التأثير | التكلفة |
|---|---|---|
| طفرة الكريستال (Crystal Surge) | احصل بشكل دوري على 1080 كريستالة نقية | 200 |
| صائد جرذان الطاعون (Plague Rat Hunter) | احصل على 1500 كريستالة إضافية عندما تقضي على جرذ طاعون | 200 |
| توسيع القوة (Force Expansion) | سعة مسير البطل الفردي +50 | 500 |
| المسير السريع (Swift March) | سرعة مسير القوات في وادي عناقيد الكريستال +25% | 500 |
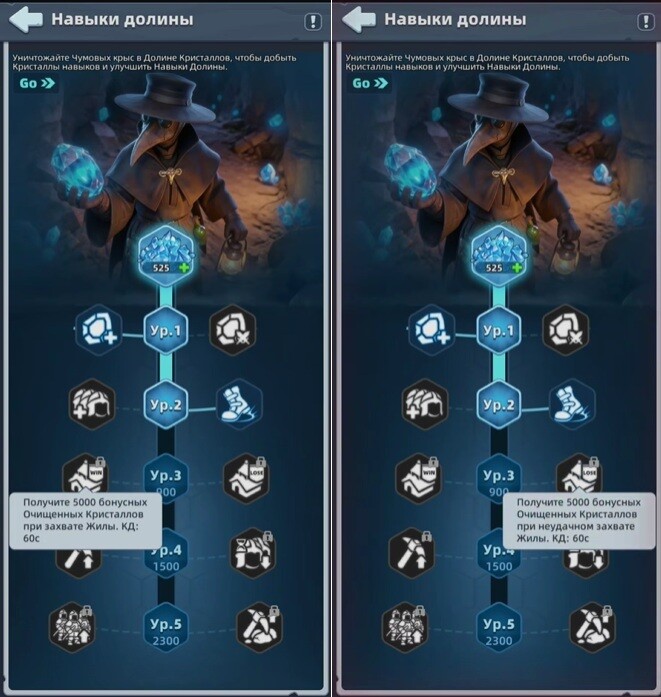
| غنائم الوادي (Valley Plunder) | احصل على 5000 كريستالة نقية إضافية عند الاستيلاء على عرق (Lode). فترةهدوء: 60 ثانية | 900 |
| يقظة الوادي (Valley Vigil) | احصل على 5000 كريستالة نقية إضافية عند الفشل في الاستيلاء على عرق (Lode). فترة هدوء: 60 ثانية | 900 |
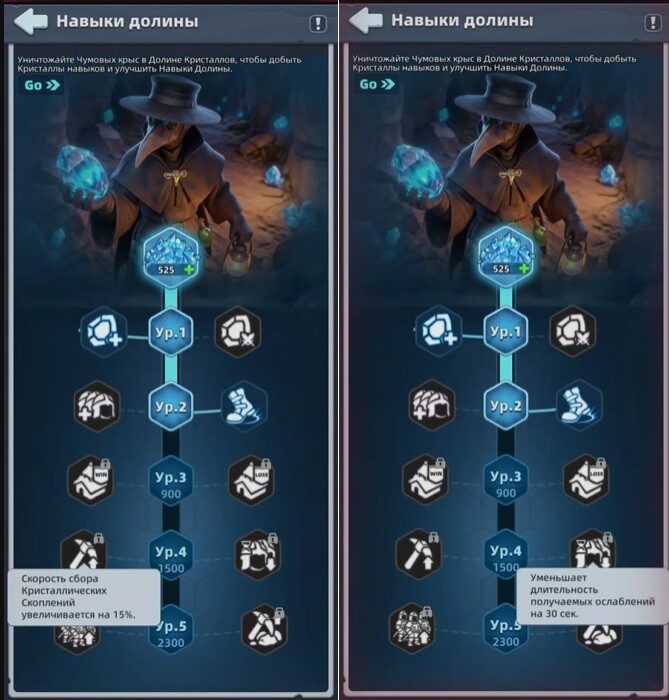
| تعدين الكريستال (Crystal Mining) | تزداد سرعة جمع عناقيد الكريستال بنسبة 15% | 1,500 |
| إرادة حديدية (Iron Will) | تقلل مدة التأثيرات السلبية المستلمة بمقدار 30 ثانية | 1,500 |
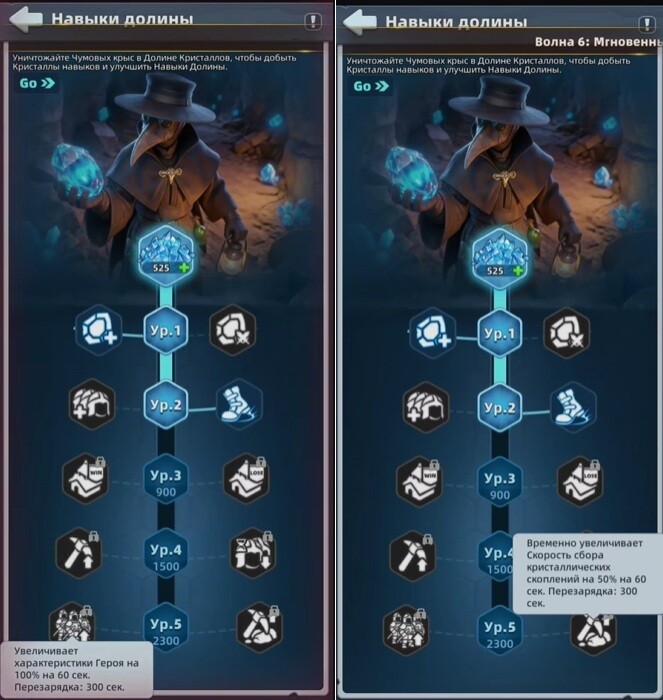
| صحوة الوادي (Valley Awakening) | تزيد ضرر البطل بنسبة 15% لمدة 60 ثانية. فترة هدوء: 300 ثانية | 2,300 |
| رنين الكريستال (Crystal Resonance) | تزيد مؤقتاً سرعة جمع عناقيد الكريستال بنسبة 50% لمدة 60 ثانية. فترة هدوء: 300 ثانية | 2,300 |
نظرة متعمقة على وادي البلورات: التوقيت، الانتقالات، واختيار المهارات
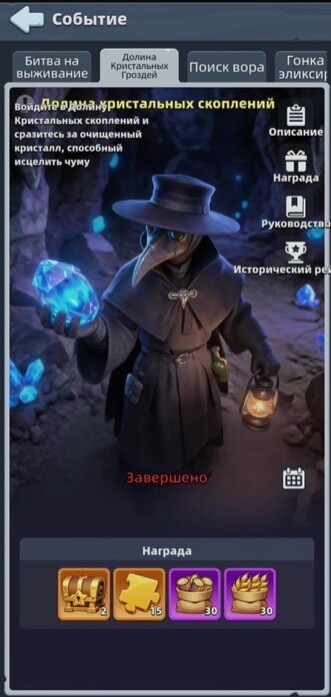
سباق نقاط فردي لمدة 30 دقيقة على خريطة منفصلة: اجمع البلورات، وامتلك المربعات، واقتل الفئران، وقم بترقية المهارات المؤقتة. يُعاقب على قلة التركيز بسرعة — فموقع البداية السيئ، أو المسيرة الطويلة جداً، أو تفويت نافذة البلورات الفورية يمنح النقاط للجميع. تساعد القوة قرب العرش ومربعات المستوى 3، لكن اللاعب العادي الذي يمتلك مزرعة مستقرة يتفوق بانتظام على اللاعب المُنفِق المشتت.
نظام الحدث والقواعد العسكرية
- حدث فردي وليس تحالفياً. أنت تتنافس حتى ضد أعضاء عشيرتك داخل الوادي. لا تخرب الحلفاء، ولكن لا تتوقع أن يتنازل لك أحد عن المربعات.
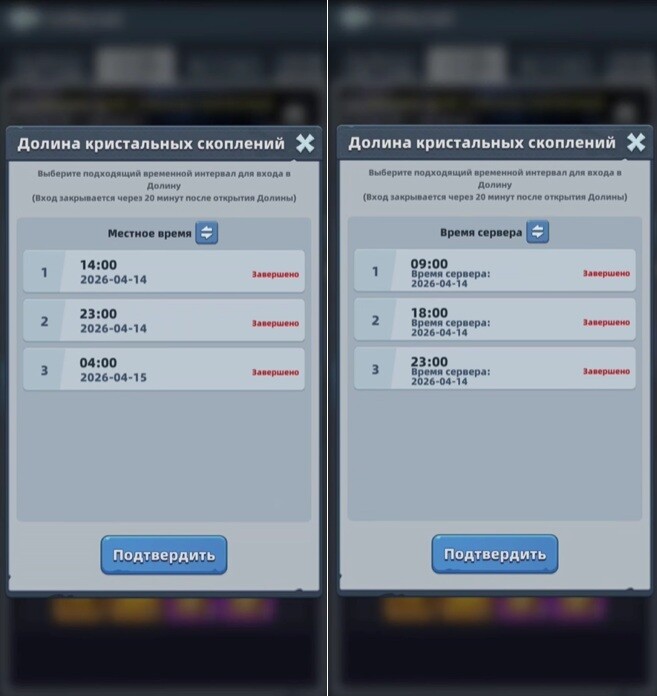
- 30 دقيقة، ثلاث فترات زمنية، محاولة واحدة. يمكنك اللعب في فترة واحدة فقط — راقب التقويم حتى لا تفوته. الخوادم القديمة فقط؛ إذا لم يكن خادمك يحتوي على وادي حتى الآن، فهو لم يصل إلى تلك المرحلة.
- تتبع القوات قواعد الحدث. يتناسب عدد القوات مع سعة الثكنات، والمستوى هو أعلى مستوى تم فتحه لديك. تبقى الخسائر داخل الحدث ولا تلمس جيشك الدائم.
- تكلفة العلاج تسريعات فقط (علاج أو عالمية). القتال المستمر يستنزف نفس التسريعات التي تحتاجها قاعدتك وأبحاثك — يجب على اللاعبين المجانيين (F2P) تجنب المعارك عديمة الجدوى.
- لا توجد هجمات على المدن. المعارك مخصصة فقط لمربعات الموارد: أطح بمن يحتلها، استولِ على الموقع، واجمع.
أول دقيقتين والانتقالات
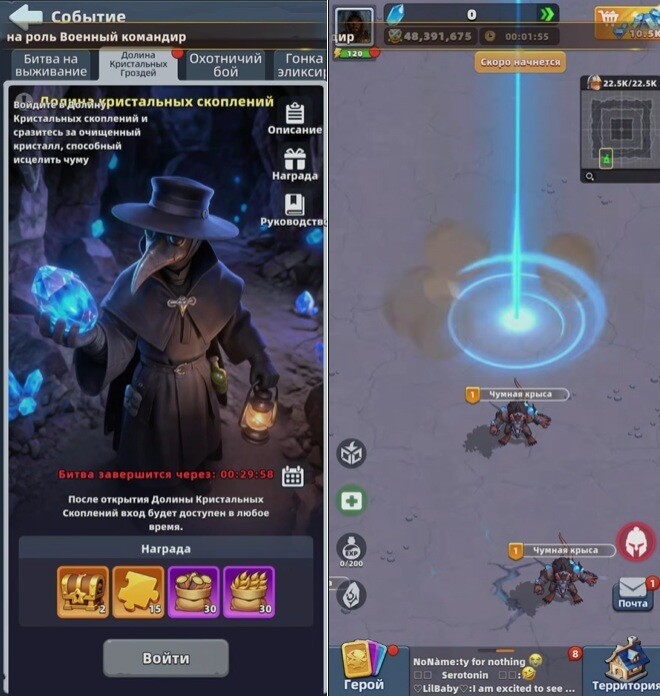
بعد الدخول، تحصل على دقيقتين للإعداد في نقطة ظهور عشوائية. تحقق قبل التحرك: مربعات المستوى 2 قريبة، الفئران تظهر بقوة، لا توجد تجمعات للاعبين الأقوياء، مسافات مسير قصيرة، ومساحة للمناورة. الخطأ الكلاسيكي هو القفز مباشرة نحو المركز — حيث يتم طرد اللاعبين خارج القالب المعتاد ويقضون الجولة في المسير بدلاً من الزراعة.
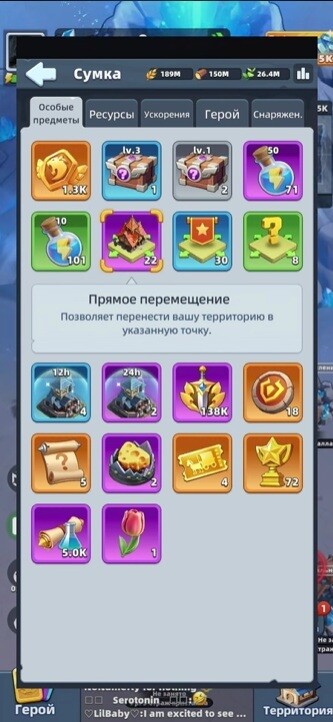
- يتجدد الانتقال المجاني كل 6 دقائق. استخدمه عندما يموت الموقع (جيران أقوياء، مربعات متنازع عليها، لا توجد فئران، عمليات طرد مستمرة).
- تتصاعد تكلفة الانتقالات المدفوعة: 1، 2، 3، 4، ثم 5 لكل قفزة. قفز فقط إلى هدف محدد (منطقة حرة بها مربعات جيدة وفئران)، ولا تقفز أبداً بناءً على شعور “أن الأمور أفضل هناك” — فالجميع يزرعون بينما تطير أنت.
المربعات والعرش
| المربع | العائد | لمن مخصص |
|---|---|---|
| المستوى 1 | الأدنى، هادئ | تعلم الحدث، جولات بلا قتال |
| المستوى 2 | قوي، تنافس معتدل | افتراضي لمعظم اللاعبين غير المُنفِقين |
| المستوى 3 (قرب العرش) | أفضل معدل، تنافس شديد | الحسابات القوية التي يمكنها الحفاظ عليه |
إذا لم تتمكن من الاحتفاظ بالمستوى 3، فإنه يمنح عائداً أقل من مربع هادئ من المستوى 2: احتل، تَمَّ طردك، امسح في طريق العودة، وكرر. ثلاثون دقيقة من الزراعة المستقرة في المستوى 2 تتفوق على ثلاثون دقيقة من إثبات الذات أمام القمة.
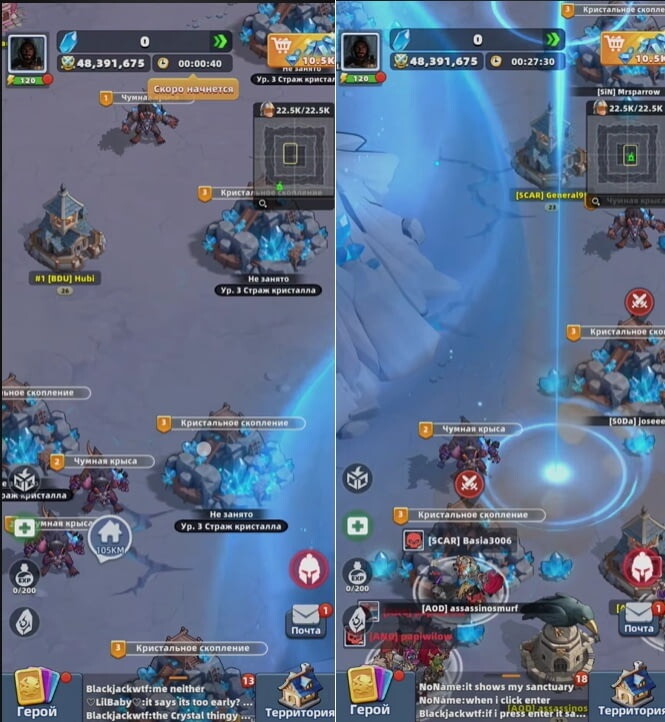
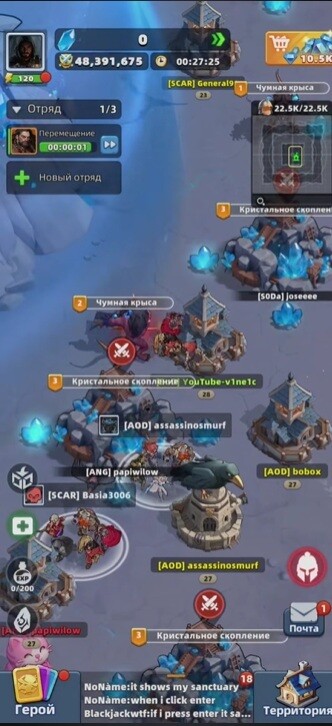
- تفتح معركة العرش بعد 23 دقيقة من البداية وتستمر لمدة 7 دقائق. بالنسبة للحسابات القوية التي تمتلك جيشاً وأبطالاً ورغبة في الحرب، فهي الهدف المنطقي. أما بالنسبة للاعبين المجانيين/قليلي الإنفاق، فلا تجعلها الخطة الأساسية: بينما يتصارع الكبار في المركز، غالباً تصبح المربعات العادية هادئة وقابلة للزراعة. يأتي معظم النقاط قبل العرش على أي حال — المربعات، الجمع، الفئران، والبلورات المتناثرة.

الفئران والانقسام المبكر
تمنح عمليات قتل الفئران نقاط خبرة لمهارات الحدث — كلما زاد مستوى الفأر، زادت النقاط. وكلما تم فتح المهارات مبكراً، كلما استمرت في جلب العوائد لفترة أطول. لا تضع كل المسيرات على الجمع في البداية: مع 3 مسيرات نفذ 1 جمع + 2 فئران؛ ومع 4 مسيرات، 1 جمع + 2-3 فئران وتفاعلات. المسيرة الرابعة تمثل ميزة حقيقية هنا. يتم اصطياد الفئران بسرعة، لكن تجاهلها يحرمك من معظم إمكانيات الحدث.
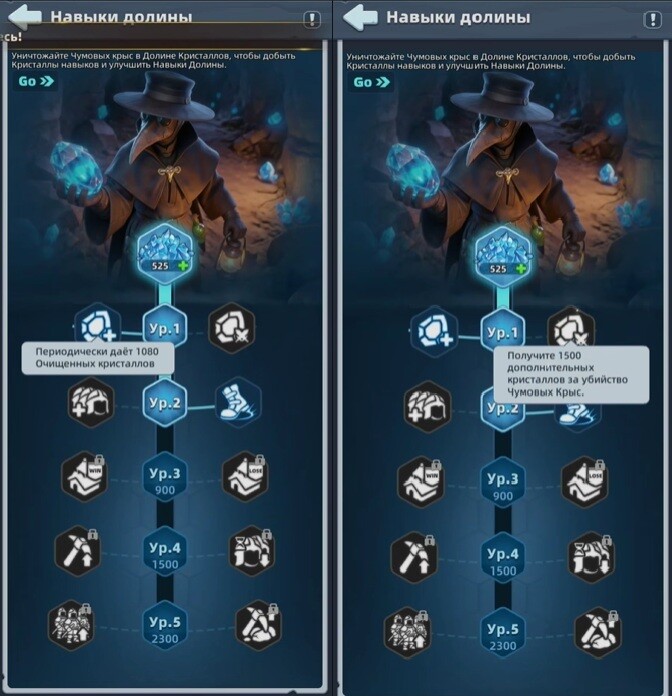
خيارات شجرة المهارات
مؤقتة لجولة واحدة، ثم يتم إعادة تعيينها. فرعان، خمسة مستويات، خيار واحد لكل مستوى. الأربعة الأولى سامّة (تلقائية/كامنة)؛ والخامسة نشطة مع فترة تبريد مدتها 5 دقائق. اختر بما يتناسب مع أسلوب لعبك وليس بناءً على الرقم الأكبر.
- المستوى 1: اليسار — دخل مجاني دوري بقيمة 1,080 بلورة؛ اليمين — 1,500 لكل فأر يتم القضاء عليه. اليمين يمنح عائداً فقط مع وجود فئران كثيفة ومسح سريع؛ اليسار هو الدخل الآمن عندما تكون الفئران نادرة أو متنازعاً عليها.
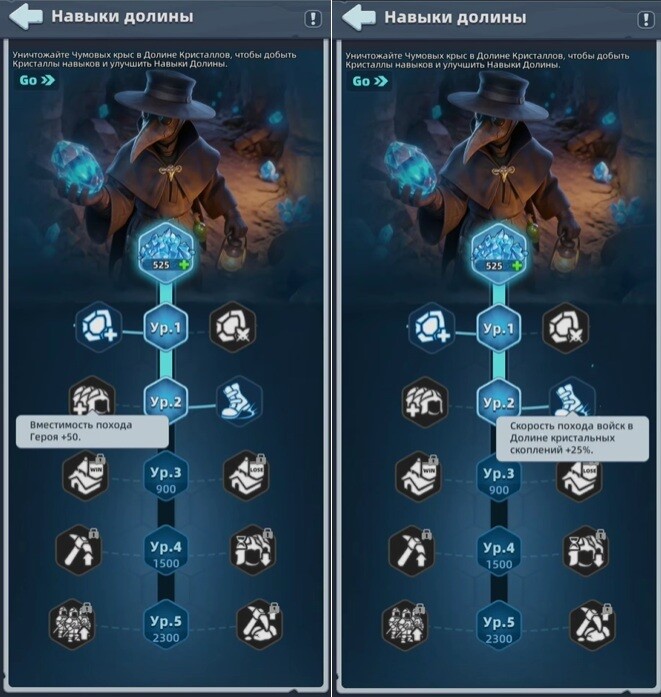
- المستوى 2: اليسار — مسير +50 محارباً؛ اليمين — +25% سرعة المسير. السرعة تفوز عادةً: فهي أسرع للوصول إلى الفئران والمربعات والبلورات المتناثرة. السعة لا تعالج أبداً المورد الحقيقي للوادي — وهو عداد الـ 30 دقيقة.
- المستوى 3: اليسار — 5,000 بلورة لكل عملية الاستيلاء ناجحة على مربع (بحد أقصى مرة واحدة في الدقيقة)؛ اليمين — 5,000 عندما تتم الإطاحة بفرقتك على مربع. للعب العادي، خذ مكافأة الاستيلاء؛ لا تبنِ استراتيجيتك حول الخسارة، خاصة عندما تكلف عملية العلاج تسريعات.
- المستوى 4: اليسار — +15% سرعة جمع المربعات; اليمين — تطهير أسرع للشوائب/الخصائص السلبية على الأبطال المهزومين. جامعو الموارد يأخذون اليسار؛ مقاتلو العرش يأخذون اليمين.
- المستوى 5 (نشط): اليسار — +100% إحصائيات البطل لمدة 60 ثانية؛ اليمين — +50% جمع المربعات لمدة 60 ثانية. المقاتلون يأخذون اليسار، والمزارعون اليمين — ويتم تفعيلها في لحظة حقيقية (قبل القتال، أو لحظة إمساك أساسية، أو عملية جمع غنية)، وليس فور انتهاء فترة التبريد.
حلف الألفا (PvP) والبلورات الفورية
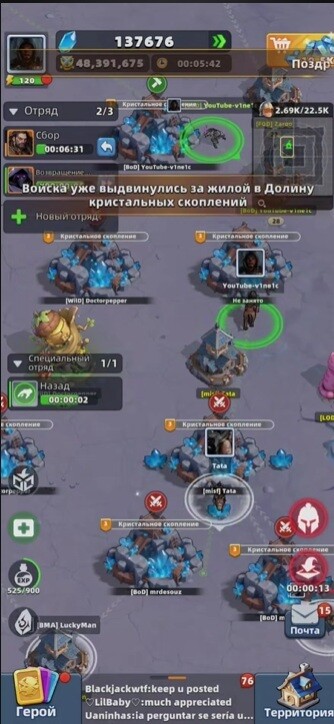
- لا توجد نقاط لقتل صاحب المربع نفسه. الهجوم الجيد هو الذي يكتسب موقعاً + بلورات: حيث يُسقط الضحية البلورات التي جمعها متناثرة حول المربع، والتي تقوم أنت بالتقاطها، بالإضافة إلى استيلاءك على الموقع. هاجم فقط عندما تكون هناك مكاسب (حامل أضعف، جامع جالس لفترة طويلة، التقاط سريع قريب). التقط أيضاً البلورات المتناثرة المرئية بالقرب من مربعات الآخرين — نقاط سريعة وشبه خالية من المخاطر.
- تظهر البلورات الفورية حول الدقائق 10، 11، 12، 20، 21، و22. يتم جمعها بسرعة وتمنح عائداً جيداً. اجعل جزءاً من مسيراتك جاهزاً بالقرب من تلك العلامات — اسحب أحياناً فرقة من مربع عادي للتنافس عليها. أفضل ميكانيكية تعويض للاعبين المجانيين (F2P): لا حاجة لمعركة العرش.
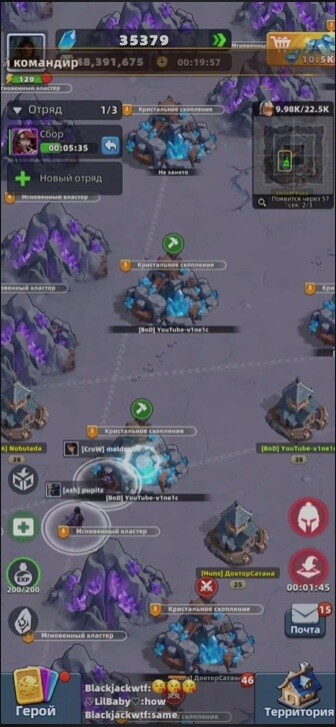
خططة الجولة البسيطة وأماكن تسرب النقاط
البداية: استطلع في مرحلة الإعداد، تجنب المركز، ثبت نفسك بالقرب من مربعات المستوى 2 التي تحتوي على فئران. بعد البداية: مسير واحد يجمع، والباقي يصطاد الفئران لفتح المهارات بسرعة. المنتصف: احفظ موقعاً جيداً، واجعل كل مسير مشغولاً، واستعد للدقائق 10/11/12، ثم 20/21/22؛ بعد الدقيقة 23، يواصل لاعبو غير العرش الزراعة فحسب. قواعد اللاعبين المجانيين (F2P): مربعات المستوى 2، فئران للمهارات، نوافذ فورية، لا توجد انتقالات مدفوعة عشوائية، ولا توجد معارك تحرق التسريعات. الحسابات القوية تضيف مربعات المستوى 3 والعرش — لكنها تظل تزرع، وترفع مهاراتها، وتضرب النوافذ الفورية قبل الدقيقة 23.
تتسرّب النقاط من: خيارات البداية البطيئة، المسيرات الطويلة للفئران البعيدة، النوافذ الفورية المُفوتة، المعارك بلا مكاسب، الانتقالات المدفوعة العشوائية، والتشبث بمربع غير قابل للاحتفاظ به. يجب أن يحرز كل إجراء نقاطاً أو يحسن الموقع — وإلا فتخطَّه.
Source: Last Asylum: Plague - гайд по Долине кристальных скоплений. Секреты, советы и тактика от новичка до топа. by Гейм-Знаток on DTF.
🎥 أدلة الفيديو
أدلة فيديو مختارة وتحليلات استراتيجية من صناع المحتوى في المجتمع
📝 نص الحوار 15:28 (928 сек) ▼
ابحث في YouTube عن هذا الموضوع: «Crystal Cluster Valley»
استعلام البحث: Last Asylum Plague Crystal Cluster Valley guide
❓ الأسئلة الشائعة
ما هو أفضل فريق F2P في Last Asylum: Plague؟
الفريق القياسي لـ F2P هو Arthur و Daskal و Marlena و Harper و Claire (جميعهم من فئة Warriors — التشكيلة أحادية الفصيل تمنح +20% HP/ATK/DEF). Arthur متاح مجاناً من اليوم الأول؛ وتعتبر حزمة Marlena بقيمة 1 دولار أفضل قيمة في اللعبة. يصل Daskal في أول موسم من Era of Revival (بعد اليوم 120).
ما الذي يجب علي ترقيته أولاً؟
الملاذ (Sanctuary) أولاً دائماً — فهو يحدد مستوى جميع المباني الأخرى والحد الأقصى لمستوى أبطالك. ثم ساحات التدريب (Training Grounds)، والثكنات (Barracks)، ومختبر الأبحاث (Research Lab)، والمستشفى (Infirmary)، والجدار (Wall). حافظ على كوخ البناء (Builder’s Hut) عند مستوى الملاذ حتى يصل الملاذ إلى المستوى 15 للحصول على تسريع بناء مجاني.
متى يتم فتح Marlena؟
في اليوم 66 مجاناً — أو فوراً عبر حزمة المبتدئين بقيمة 1 دولار. وفر شظايا UR لتصل بها إلى 8★ فوراً، ثم ادفع بها إلى 10★.
كيف أحصل على Cynthia كلاعب F2P؟
تصل Cynthia عبر عجلة الحظ (Wishing Wheel) في اليوم 8. وفر الماس من اليوم الأول (تجاهل أي شيء آخر) — تحتاج حوالي 11,500 ماسة إجمالاً، وقم دائماً بالتدوير ×10 (التدوير الفردي يهدر الرموز).
كيف أحصل على مضاد السموم (Antitoxin)؟
عبر ورشة مضاد السموم (Antitoxin Workshop) + إنتاج الإسطبل، وإكمال ترقية كل مبنى، ومهام الصقر (Falcon Quests) (تقريباً كلها)، والعمليات السرية (Covert Ops) وتجارة القوافل (Caravan Trade) (بما في ذلك نهب عمليات الآخرين — حتى 5 مرات يومياً)، وصيد Blight/Elite Blight (10/20 طاقة). الفعاليات تمنح كميات كبيرة.
لماذا انخفض دخل النهب الخاص بي إلى لا شيء تقريباً؟
لقد وصلت إلى حد النهب اليومي: تحت الحد 100%، من 1× الحد تحتفظ بـ 15% فقط، ومن 1.3× تحتفظ بـ 5% فقط. يتم إعادة التعيين في الساعة 02:00 بالتوقيت العالمي (UTC). يتناسب الحد مع مستوى الملاذ (2.5 مليون في المستوى 10-12 وصولاً إلى 30 مليون في المستوى 30) ويرتفع فوراً عند ترقية الملاذ. يظهر مثلث أصفر تحت قوتك (Might) يوضح الحالة.
ما الذي يجب أن أشتريه من المتاجر؟
متاجر الملاذ/الاستكشاف/التحالف: جوهر الغراب (Crow Essence) وشظايا بطل UR الشاملة (UR Hero Omnifragments) أولاً. متجر الشرف (Honor shop) مخصص لمخططات المعدات فقط (لا تشترِ صناديق النقوش أبداً من هناك). يتم تحديث جميع المتاجر يوم الاثنين.
هل يستحق الماس الإنفاق على التسريعات؟
فقط تسريعات 8 ساعات من متجر VIP تعتبر مشتريات مقبولة — وفقط بعد موارد الأبطال. قاعدة المجتمع: لا تنفق الماس أبداً على التسريعات بدلاً من فعاليات عجلة الأبطال (Cynthia في اليوم 8، Joker بعد اليوم 15).
أي فصيل يجب أن أبني؟
المحاربون (Warriors) هم الأفضل في بداية اللعبة (شظايا Arthur/Harper المجانية، Marlena بـ 1 دولار). الرماة (Rangers) يصلون لذروتهم في منتصف اللعبة (لمواجهة المحاربين). السحرة (Warlocks) هم الأفضل في نهاية اللعبة لكنهم يحتاجون لاستثمار طويل الأمد. التشكيلة أحادية الفصيل (5 أبطال من نفس النوع) هي الميتا الحالية لأن نقوش UR تعزز فصيلاً واحداً.
كيف يعمل تحويل Claire من SSR إلى UR؟
يفتح في اليوم 8 من الحقبة. تبدأ عند 6★ وتكلفة الوصول إلى 10★ هي 1,600 شظية SSR (كل مرحلة فرعية تكلف ضعف سعر SSR). هناك انخفاض في تعزيز الفريق بين 6★-9★ — تجنبه عن طريق تخزين مستويات قاعة الشرف (Hall of Honor) قبل التحويل (المستوى 60←8★، المستوى 100←9★، المستوى 160←10★ فوراً).
كيف أقوم باسترداد رموز الهدايا؟
داخل اللعبة: الصورة الرمزية (أعلى اليسار) ← الإعدادات ← رمز الهدية (Gift Code). iOS أو الويب: سجل الدخول في صفحة الاسترداد الرسمية باستخدام حساب Facebook/Google المرتبط، اختر الخادم والشخصية، وأدخل الرمز.
ما هي أكبر أخطاء المبتدئين؟
ترقية كل شيء بالتساوي بدلاً من التركيز على فريق رئيسي واحد؛ الحكم على الأبطال قبل الوصول لنجوم عالية (Marlena هي البطلة الكلاسيكية التي تتألق متأخراً)؛ تقسيم مواد الصحوة (Awakening) على عدة أبطال؛ إهدار الجواهر على مستويات VIP بدلاً من عجلات الأبطال؛ تخطي النهب اليومي (~27 مليون مورد/يوم)؛ السماح للطاقة بالوصول للحد الأقصى.
📖 اقرأ التالي
هل ساعدك هذا الدليل؟