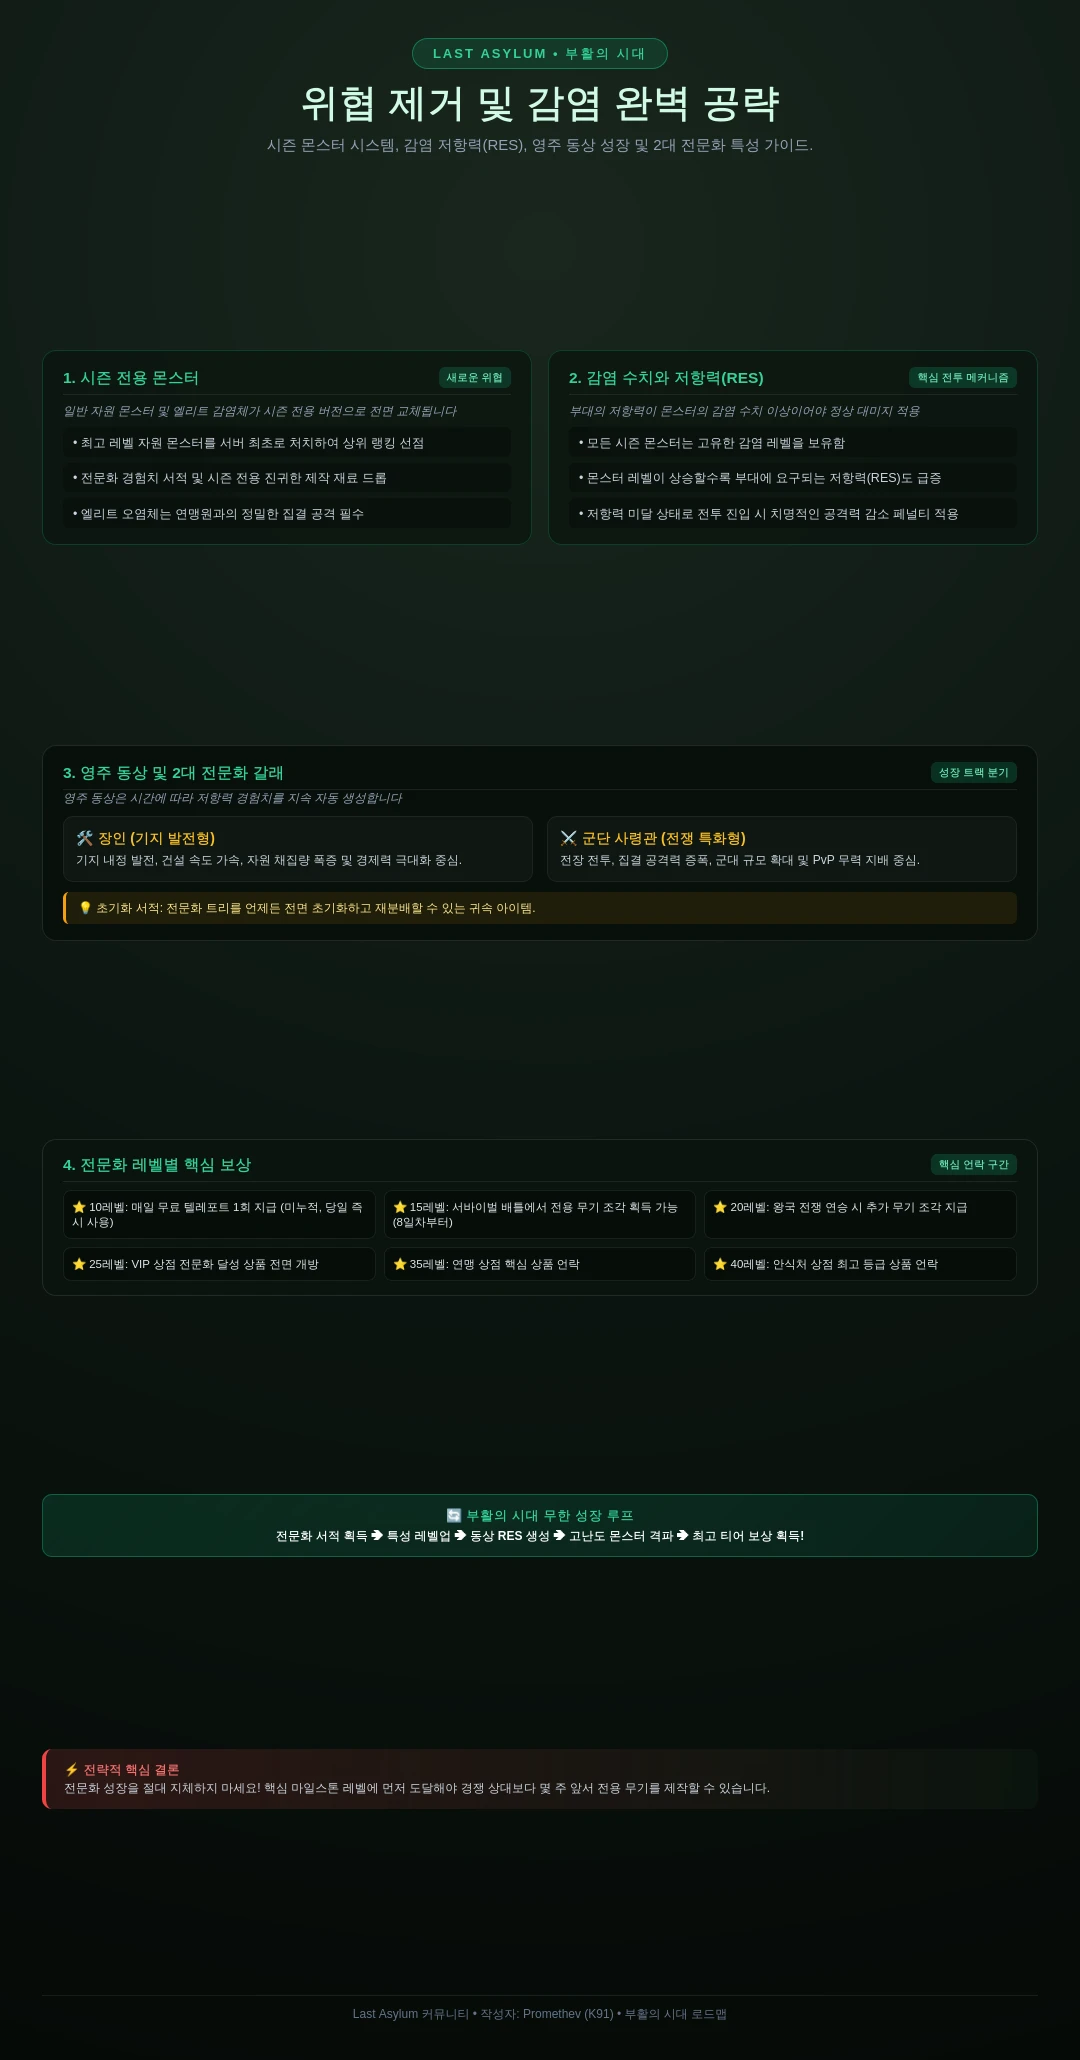
시즌 1일차부터 저항이 목록의 최상위 일일 우선과제입니다. 이유는 간단합니다: 첫 번째 성장 벽이고, 모든 시즌 성장이 저항 XP에 의존합니다. 다른 모든 시즌 시스템이 그 뒤에서 해금되거나 스케일됩니다.
저항을 미는 두 가지 실용 규칙:
30% 피해 페널티가 있어도 몬스터를 공격하세요. 전투는 여전히 클리어 가능한 경우가 많고 — 저항 XP는 어느 쪽이든 흐릅니다.
저항이 높은 동맹원과 함께 정예 역병을 집결하세요. 그룹 난이도는 참가자에 따라 스케일됩니다; 더 강한 동맹원이 당신의 클리어를 끌고 갑니다.
즉시 잡을 가치가 있는 무료 아이템 하나: 초록빛 은신처 스킨이 +100 저항 XP를 줍니다. 획득하고 적용하고 시즌 내내 매일 지급받으세요 — 싸우지 않아도 되는 하루 100 XP입니다.
특성 트리: 성장 vs 전쟁
특성 트리는 과금 프로필로 나뉘고, 커뮤니티의 선택은 명확합니다:
프로필
트리
효과
F2P와 중과금자
잡역부 / 숙련 장인
연구 및 건설 시간 단축 — 생츄어리를 돌파하고 10티어 부대에 더 빨리 도달하세요.
고과금 / PvP 지향
군단장 / 군사 사령관
전투 버프, 치유, 집결 전력 — 전쟁 경로.
논리: 이웃보다 더 쓰지 않는다면 성장 트리가 그들을 역으로 이겨 시즌을 이기게 합니다. 이미 더 쓰고 있다면 전쟁 트리가 그것을 전장 결과로 바꿉니다.
전쟁 보급: 약탈 상한 스킬
군단장 트리는 전쟁 보급을 지니며, 스킬 레벨 1부터 5까지 일일 약탈 한도를 +6 / +14 / +24 / +36 / +50% 올립니다. 하루 가치의 맥락은 경제 가이드의 약탈 한도 표를 참고하세요 — 후반 상한에서 매일 수백만의 추가 자원입니다.
영주상과 부흥 아카데미
영주상은 부흥 아카데미에 있으며, 내부의 두 시스템은 다른 일을 합니다:
저항 — 시즌의 벽. XP로 게이트되고 일일 플레이로 먹이며, 그 뒤에 시즌 콘텐츠와 보상이 있습니다.
영주 진화 — 시즌 재료로 먹이는 행군의 영구 스탯 성장.
시즌 종료에 리셋되는 것: 시즌 성장 시스템은 부흥시대와 함께 리셋됩니다 — 저항 진행과 시즌 트리 등반은 0으로 돌아가고, 영구 투자 (영주 진화 스탯, 영웅, 장비)는 유지됩니다. 그에 맞게 지출을 계획하세요: 영구 전력에는 자유롭게, 시즌 재화는 발행된 시즌 너머로 모아두지 마세요.
영주 진화: 어떤 스탯을 가져갈까
프로필
스탯
F2P / 성장
연구 속도, 건설 속도, 자원 생산, 치유
PvP
공격, 행군 규모, 영웅 피해
특성 트리와 같은 논리를 한 단계 아래에서: 성장 계정은 속도 스탯으로 모든 것을 복리로 쌓고, PvP 계정은 접촉으로 전투를 이기는 스탯을 삽니다.
시즌 속 영웅 성장
시즌 내부의 각성 영웅 사다리, 메인 영웅에 대해 순서대로:
메인 영웅을 10성으로.
각성.
전용 무기.
영주 진화.
영주 저항.
부흥시대 강화 — 메인 스킨 하나만.
그다음 두 번째 영웅을 같은 사다리로.
두 가지 구속 규칙: 각성 재료를 절대 분할하지 마세요, 그리고 하나의 강한 행군이 반쯤 완성된 여러 행군보다 낫다는 것 — 사다리는 정확히 두 영웅을 병렬로 키우는 것을 막기 위해 존재합니다.
시즌 전에 비축할 것
계정이 120일차에 가까이 있다면, 이것이 비축 목록입니다. 여기 모든 항목은 시즌 전보다 시즌 안에서 쓸 때 더 가치가 있습니다:
다이아몬드.
모집 티켓.
영웅 조각과 훈장.
연구 가속을 포함한 모든 가속.
항독소.
Raven 열매.
자원.
무기 재료.
패턴: 시즌은 이 모든 것을 쓸 새로운 방법을 추가하고, 몇몇 시즌 이벤트는 소비에 보상을 줍니다 — 비축은 부흥시대가 시작되면 이벤트 점수와 성장으로 직접 전환됩니다.
1주차 구매 (과금자)
배틀 패스 + 주간 부흥 패스 — +250 저항 및 특성 XP. 시즌 최고 타이밍: 1주차에 사서 패스가 두 달 전체에 걸쳐 지급되게 하세요.
전용 무기와 각성 샤드 패키지는 전용 패스 이벤트가 활성화될 때까지 보류하세요. 같은 패키지, 이벤트가 구매에 보상을 줄 때 더 가치가 있습니다.
Claire SSR→UR 전환 (부흥시대 8일차)
Claire 전환은 부흥시대 8일차에 열립니다 — 하지만 이것을 먼저 읽지 않고 8일차에 손대지 마세요. 전환은 Claire을 6성 UR에 착지시키고, 거기서 10까지 가는 길에 문제가 있습니다.
비용
Claire은 UR 샤드가 아니라 SSR 샤드를 먹습니다 — 초반에 아낀 샤드가 정확히 이 전환이 설계된 중심입니다.
모든 하위 단계가 2배: 6성에서 10성까지 총 1,600 샤드가 듭니다.
이득
별 레벨
최대 성장 SSR 대비 피해
9성
~1.70배
10성
~2.20배
패시브 하락
함정: 전환하면 그녀의 패시브 부대 버프가 떨어집니다. SSR의 최대 패시브는 16% 부대 버프입니다; 6성 UR에서는 10%에 불과합니다 — 다시 오르는 동안 실제 몇 퍼센트의 부대 손실입니다. 9성 (14%)에서 회복되고 10성 (22%)에서 넘어섭니다.
하락 건너뛰기: 명예의 전당 전략
전환 전에 명예의 전당 레벨을 준비하면 하락을 완전히 건너뛸 수 있습니다:
명예의 전당 레벨
전환 결과
60레벨
Claire이 8성에 착지 — 고급 강인함 (+20% ATK / HP / DEF, +10% 쿨다운 속도)
100레벨
Claire이 9성에 착지
160레벨
1,600 샤드 전부 저축 — 즉시 10성, 하락 없음
타이밍의 결론: 완전한 UR 라인업이 없는 계정에 이 전환은 거대한 PvP 업그레이드입니다 — 무료로 아낀 샤드로 지은 2.20배 피해 캐리. 단지 명예의 전당 레벨과 샤드 저축에 맞춰 6이 아니라 8성 이상에 착지하도록 타이밍을 잡으세요.
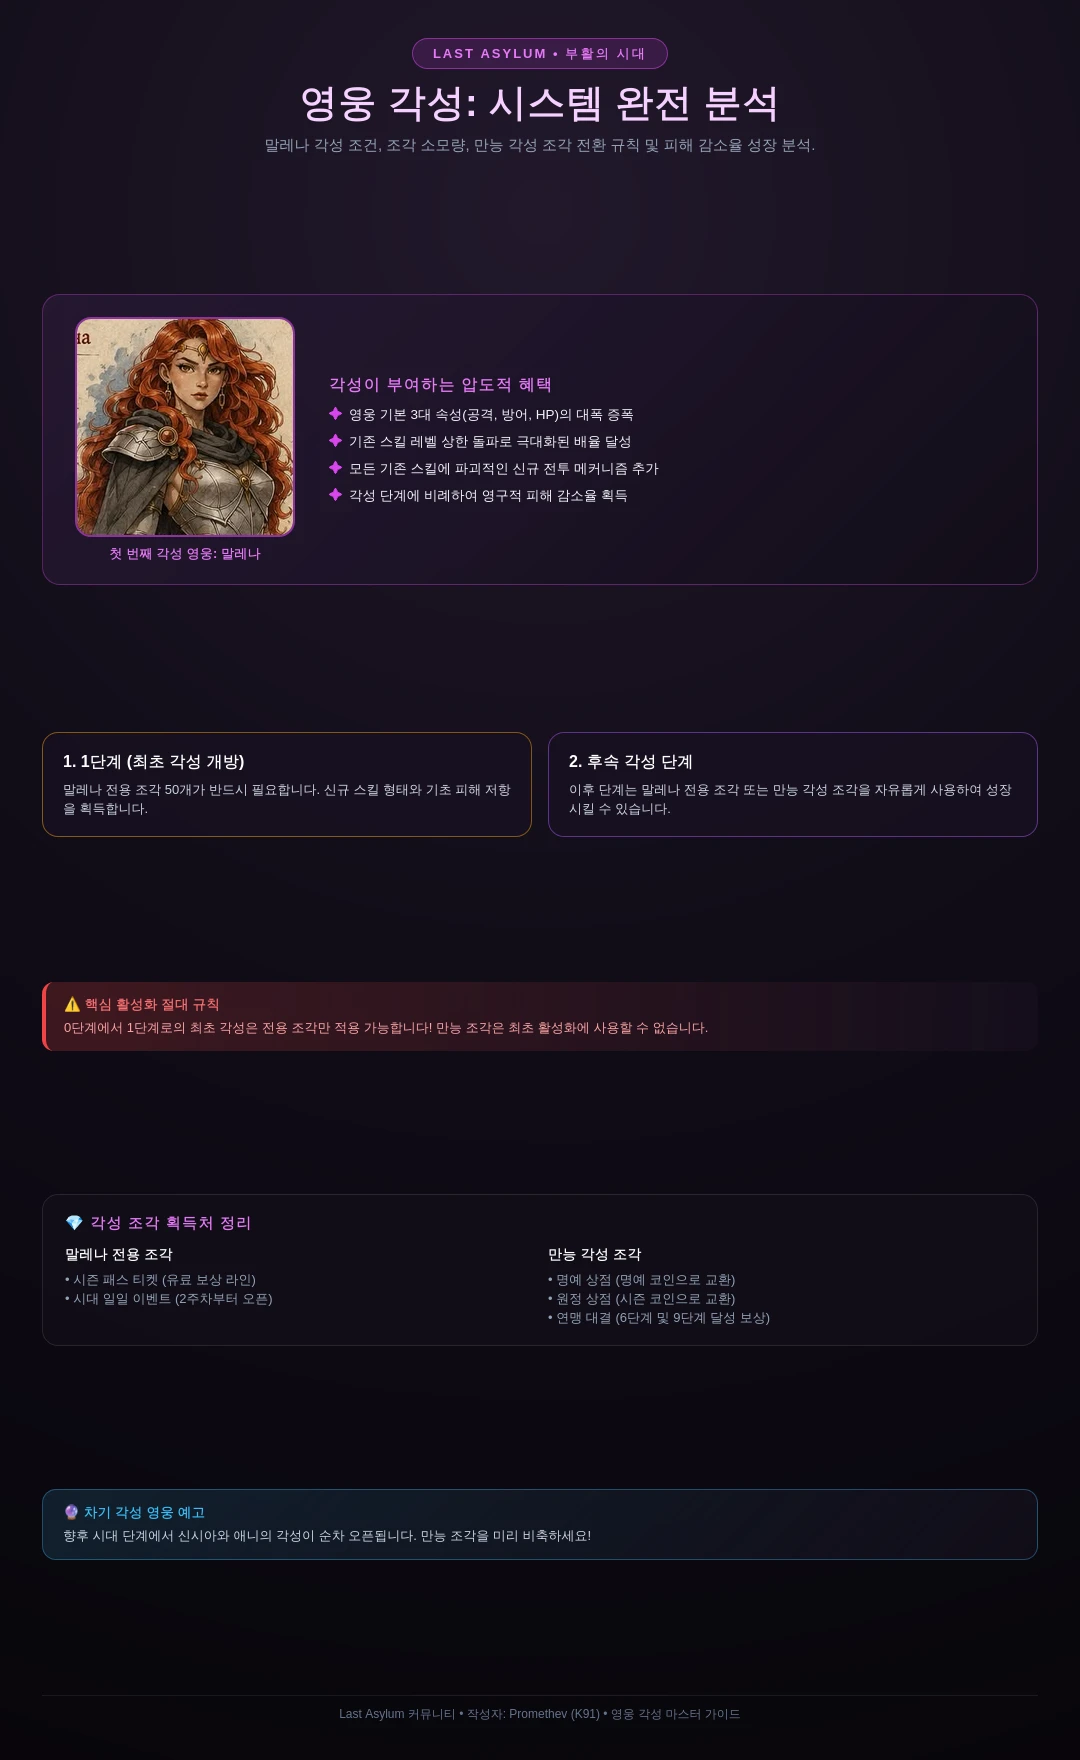
원정 리그: 총 55일간 진행되며 영구 성역 외형인 «부흥의 성» 스킨을 획득할 수 있습니다.
What's up, guys? Corpus Gaming here, and today Era of Revival has started, and we are going to discuss the tech tree. In future days, we will discuss more things
about the Era of Revival, but now it's the tech tree's turn. You know what to do. If you like these guides, hit that subscribe, smash that like, and let's
get into it.
So, guys, we are going to start with our video about the tech. And as you can see, we have the Lord statue here, and we have the specialty button and the
active skill button. We are going to the specialty button. And we have two options here. We have Handyman and Legion Commander. And I'm going to show
you guys who to pick and the reasons why right now. Let's get to that. So, why to pick Handyman? If you're still not level
30 and you really want to push to level 30, it has some really good building buffs that you want to catch. Uh if you still don't have tier 10 troops and you
want to rush to tier 10 troops, you want to get those research buffs as well. So, you would should pick Handyman.
If you don't like PvP and are more of a passive player and you're not really you don't really have the time to join in on
those events on the Saturday, then you should also pick Handyman to really progress your account to the next level.
And why to pick Legion Commander? And this is really a PvP tech tree. And if you're a whale player, you already maxed out everything in
Handyman, so you don't need to go there.
You really want to go into Legion Commander, get those attack buffs to really deal some damage. If you love PvP and want to support your alliance in the
PvP events, you also really want to pick out Legion Commander so you can grab those wins as well. And of course, this is also for Kingdom versus Kingdom
really handy.
If you are level 30 sanctuary and have tier 10 troops, or if you don't have tier 10 troops, but you don't care, you really want to get into this tech tree
to get those extra attack stats.
And then we have as well And then we have as well uh alliance tactic. You really want to get your R5 and R4 to discuss who's going to
pick the handyman and who's going to pick legion commander cuz there are some buffs that really help out your alliance as well. You have uh some stuff that you
really need to unlock on both sides. So, this is something your R4 and R5 have to discuss together. And we are going to go
straight to the next part of this video, the handyman skill tree.
To the handyman, and here we are. This is the handyman, and this is mostly for is the handyman, and this is mostly for PVE
uh content, and the commander is more for PVP content. And what we have here is as follows. We have outstanding contribution, and this basically
increases your to known donation tech for your alliance, and uh this is a good one to have as well to also get some extra income to buy from the alliance
shop. So, get this one. Then we have instant produce, and you gain extra resources, and it has a 1-day cool down.
Um I don't know if you should buy this.
I I didn't pick it for my um uh template cuz I don't think resources is really the biggest issue in the game.
Then we have siege frenzy, and this is going to give your soldiers more destruction. It's basically going to destroy cities faster, and this is more
of a PVP skill, so you don't really want to get that in your PVE build that you're building right here. Then we have fidelity and figure, and this is going
to give you free stamina. Free stamina is always good. You should get this one.
And uh just put some points into that.
Then we have free research or we have free build. And this is also or we have free build. And this is also basically pick your poison.
What do you want to have? If you are What do you want to have? If you are already level 30, you want to ignore free build
and go for free research. And then maybe do get the instant produce to get that the extra herbs that you need so much for your research to get the higher tier
for your research to get the higher tier troops.
Then we go to the next one. And this is a speed up for your research and it instantly reduces all research queues times by 180 minutes
and it has a cool down of almost It has a cool down of two days.
So, yeah, whatever you want. And you can also get instant build and it is the same but only for buildings and it reduces the cool down time
the building time as well 490 minutes and the higher you build it, the more minutes you eat off your building time.
I if you're going to buy it, I recommend buying the instant research cuz research is more important than building. It also
depends a bit on where your sanctuary level are, but if you're above 27, I would always focus on research and ignore the building ones.
Then we have swift stride and it is for rally participation and the returning speed once you did your rally. Not really that interesting and not really
worth putting your points in. Then we got the siege flag and it deploy a war flag on an anti-terrain ally's tent in the ally's tent territory within its
range gain 100 destruction boost for 30 minutes. It's a good one to have and it only costs one point, so you might as well get it.
Then we have the alliance aid when Then we have the alliance aid when reinforce reinforcing an alliance member's territory, the casualty rate of their
troops is reduced by 3%. This is a great way to help out your alliance, so you should get this. It's nice. And then we have the trap. It's called combat XP and
error monster skills grant 10% specialty EXP, but the monsters don't really give a lot, so the 10% or if it is maxed, you
get 30%. It doesn't really matter that much in the great schemes of all. You really want to get your points in alliance duel and kingdom versus
kingdom, but we'll talk about it in the later date of this video.
And then we have help research, and this is a really good one to get. Use on an alliance member increases yours and the alliance members' research speed by 10%.
It has a one-day cool down, and it is for 1 hour, and uh you can get this as well. It is uh only two points, so why not? And here
you have one as well, and this is help building. Uh use on an alliance member to increase yours and the alliance members' building speed by 2 10%, and it
goes to 20% as well, I think. Um you can get it as well, but uh again, it all depends on where you are in the game. Uh below uh above 27, you just
focus on the research is the best.
Then we have material recycle, and it reduces the cost. This one is for research, and this one's is for buildings. So, yeah, whatever you want.
I think you can buy both cuz you have 40 points to use in these skill trees, so you want to use all of them. Then we have the healing force.
And this is basically going to increase your healing speed uh for your infirmary, and you don't really want to get that cuz the
infirmary doesn't really need that much much attention. if you do the batch healing that I teach you guys. What you would do want to get is the bound shield
and it gives you a 1-hour uh shield to your uh alliance member and that's going to really going to help in the PvP events and if your alliance
member forgot to shield up. So, you definitely want to get a few people that have this and it goes three times, so I guess it's a 3-hour shield that your
alliance members can get and uh it says a cool down of almost 3 days, so you really want to use this on the Saturday as well. This is it for the handyman.
I've made a layout to really sh- show you guys what I picked for the handyman, so let's get into that.
So, here we have the road map, a short uh recap of what we just discussed. The first point, you want to do an outstanding contribution, after that
vitality figure, free build five points, free research five points, instant build five points or instant research five points. I recommend doing instant
research. You want to get the siege war flag, you want to get the alliance aid, you want to get the help research, you want to get the help building, you want
to get material recycle, art of architecture and the bound shield and this gives you precisely 40 points that you have and this is it for the
handyman. We are going to go into the legion commander right now.
So, we finished off handyman and now we're going straight into legion commander, the PvP tech tree and let's get into that. And what we have here is
as follows. We have return now and this is basically going to return your troops immediately. You can do it one time daily and
uh I think once you pushed out more levels into it, you can get more returns daily, but it's not really interesting.
What you do want to get is train now.
It's going to give you free troops, 250, and that's quite nice to have as an extra backup. And we're going to get barracks expansion as well, and you can
push this to five and get those 10 extra barracks expansions. We have infirmity infirmary expansion.
Uh the capacity goes up the higher the level. I think it is also 10% but we don't really want to get that cuz the infirmary is never going to be that
full if you're doing the best healing that I've taught you already in my other videos. Then we have frenzy, and this is going to increase
your damage in the frenzy state. So, that's a must-have to get really more attack buffs. Then we have intense intensifies training, and this is going
to increase your training speed. A must-have as well. You want to get five points into that.
Then we have concentrated fire. Enemy castries rate 1% when attacking a burning target. This is really if you want to hurt other people.
want to hurt other people. Um I think they're better buffs to write in the future.
Uh then we go up.
And then we have the wasteland marsh, and this is the one you really want to get. It's going to go 20% one if you put one point in it, and I think 40% if you
put two points in it, and it's during the Royal City Scramble only. And that is still pretty nice to have in the Kingdom versus Kingdom event when you're
hitting the big one. So, then we go to the war supplies, and this is going to increase your plunder rate uh by 6%, and of course when you put
more in it, it's going to get higher.
Then you have a really good one to have.
It's the boost morale, and it's going to increase your morale state uh by 1% for the one point you put in, and it's going
to get 5% once you max that out.
Then we have reinforcements speed up and this is basically going to get your troops faster into your allies to help them out defending them. It's a good one
to have as well.
Then we have concealed identity. I don't think it's really worth to put a point in it. I think there are better options laying around, so we can ignore this.
It's basically going to hide your information to the enemy if they scout you or an attack battle reports.
Then we have the team rate and it's going to increase the damage when participating or instigating a rally, which is pretty good to have.
Uh so this one you really want to get as Uh so this one you really want to get as well.
Then we have reinforced enhancement and it's giving you 1% attack, defense, and HP increase by 1% and you can put five points in it,
so I guess it's going to be 5% and it's not stackable. So it can only be one guy with this buff inside the city. Uh so that's it.
Then we have the full power buff and when reinforcing an alliance member's territory, attacking soldiers casualty rate increases by 1% and I think this is
stackable, so that's also pretty nice to stackable, so that's also pretty nice to have.
Then we have the weakened state. When displacing an enemy territory, a certain proportion of the soldiers become weakened. Soldier level reduces by one.
Up 2,000 soldiers can be weakened per day. I don't think this is really an interesting one to have, but the charging war flag is.
Place a war flag on a vacant terrain.
Friendly territories within the range gain two plus attack stats for lasting for 30 minutes and it stacks up to five times, so it can get 10% extra attack if
five members have this as well and it's going to be great for Kingdom versus Kingdom. A must have for your alliance and this is what I mean with those extra
and this is what I mean with those extra alliance uh tech. Now, I'm going to show you guys what I've picked for the commander in my
layout, and that's it.
So, this is my setup for Legion Commander, the 40 skill points. The first five points go into train now.
Then, we have five points into barrack expansion, five points into frenzy, five points into intensive training, two points into wasteland march, five points
into boost morale, five points into team rate, five points into reinforced enhancement, two points into full power buff, and one
point into change charging war flag. And this is it for the Legion Commander. And we are now going to discuss how to get the points to actually level up your
tech tree and get these great buffs for your accounts. Let's get into that.
So, here we are, and excuse me, I'm going to get that pirate ship first cuz that's the most important thing we have to do in this game. Let's go right to
the pirate ship.
And after that, we are going to And after that, we are going to continue.
Okay, here we go. We are going to discuss how to get those skill EXP points for your tech tree, and it is as follows. We are going here, and we want
to hit those blights.
And these give a first time rewards 1K, and then after that it gets quite low. I think it's around 200. It's not that interesting. And then, we have these
elite blights that also really give a good first time reward for your rest EXP, more about that in a later video, and a little bit of lord specialty EXP.
But the most points you will get from kingdom wars. And what we have here is the royal city scramble, and here is where you get those points and look at
that there's a lot of uh Lord Specialty XP so you really want to make sure that you are online on the Saturday to help your alliance out and your kingdom of
your alliance out and your kingdom of course.
And then we have the alliance tool as well giving you daily a lot of well giving you daily a lot of uh EXP points as well and those are the
biggest two options to really farm those levels up. And what we have as well are the packs that we can buy and we have them here in the Era of Conquest and
they are basically €30 to get both of they are basically €30 to get both of them uh free to play. You can also get a few of these points here but it's nothing
compared to the packs that we have going on here with some UR shards as well into it so that's pretty nice.
And this uh milestone is for 55 days so that's okay. And I I [ __ ] I I got too late.
It's okay. All for the sake of you guys enjoying this video.
enjoying this video. Um so that's it for basically getting those EXP points and um what else you can do as well is we have this shop here and you can
really get uh also some uh reset uh buttons. Here it is and you can get specialty skill uh reset books and this is basically you
can switch around between uh Handyman and the Commander if you buy these books and then you have these skill reset uh books where you can
really reset your skills uh inside your specialty that you have chosen. And here we have some extra skill points that you can buy as well.
Pretty expensive and I don't know if they add to the 40 or if you can go above 244. Uh maybe you guys know and you can tell me in the comments about
you can tell me in the comments about this and that's it for this video. I hope it has been a good one for you guys and I
hope you have learned a lot about it and you know what to do. If you like this guide, hit that subscribe, smash that like and I'll see you guys in the next