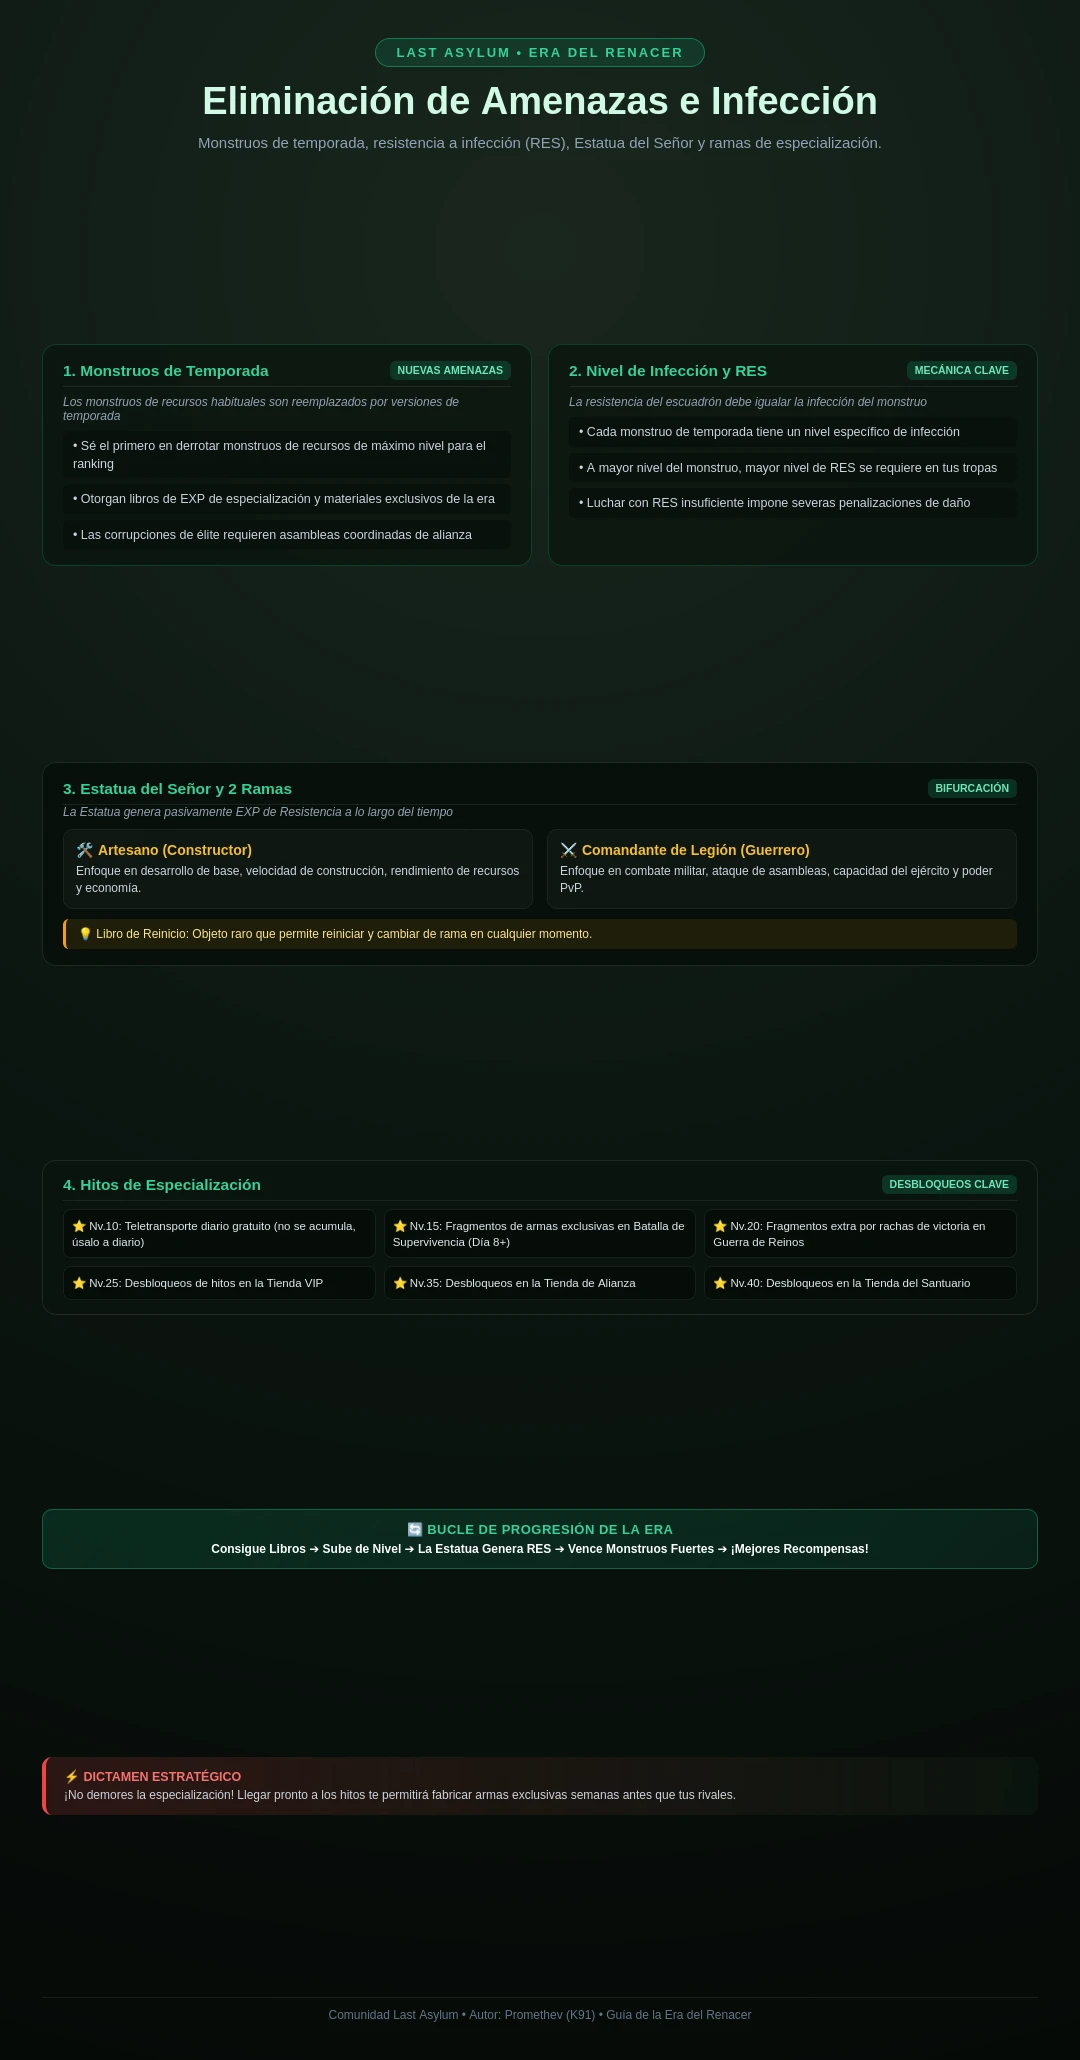
El sistema de temporada: la Resistencia como prioridad diaria, árboles de especialidad para F2P y whales, estadísticas de Evolución del Señor, la lista de acopio y la matemática completa de la conversión de Claire SSR a UR con la estrategia de saltar el bache del Salón del Honor.
Guide
Updated • Community verified
☰ En esta página 14▾
La Era del Renacimiento es la capa estacional que llega alrededor del día 120 — un ciclo de unos dos meses que añade sus propios sistemas de progresión sobre el juego base: la Estatua del Señor (Resistencia y Evolución del Señor), los árboles de Especialidad y la Plaga de Élite.
La temporada recompensa el enfoque, y castiga la distracción más duro que el juego base. Esta página cubre qué priorizar a diario, qué árbol de especialidad encaja con tu nivel de gasto, qué acopiar antes de que empiece la temporada, y la matemática completa de la conversión de Claire SSR a UR.
Resumen de la temporada
Una temporada dura unos dos meses. Dentro de ella, tres sistemas llevan la progresión:
Estatua del Señor — Resistencia y Evolución del Señor. La columna vertebral de la temporada; consulta la sección de Estatuas del Señor.
Árboles de Especialidad — bonos que definen el rol, divididos entre rutas de crecimiento y guerra.
Plaga de Élite — contenido grupal con dificultad limitada por Resistencia.
Resistencia: la prioridad diaria #1
Desde el día 1 de la temporada, la Resistencia es la prioridad diaria máxima — por delante de cualquier otra cosa en tu lista. La razón es simple: es el primer muro de progresión, y toda la progresión de temporada depende del XP de Resistencia. Cada otro sistema estacional se desbloquea o escala detrás de él.
Dos reglas prácticas para empujar la Resistencia:
Ataca monstruos incluso con 30% de penalización al daño. La pelea suele seguir siendo ganable — y el XP de Resistencia fluye de todos modos.
Concéntrate en la Plaga de Élite con un aliado de Resistencia superior. La dificultad grupal escala con los participantes; un aliado más fuerte arrastra tu limpieza con él.
Un regalo que conviene reclamar de inmediato: la skin del Refugio Vegetal otorga +100 XP de Resistencia. Reclámala, aplícala, y deja que pague cada día de la temporada — son 100 XP diarios que no tienes que pelear.
Árboles de especialidad: Crecimiento vs Guerra
Los árboles de especialidad se dividen por perfil de gasto, y las elecciones de la comunidad son inequívocas:
Perfil
Árboles
Qué dan
F2P y gasto medio
Manitas / Artesano Hábil
Recortes de tiempo de investigación y construcción — acelera tu Santuario y llega antes a tropas Nivel 10.
Whales / enfoque PvP
Comandante de Legión / Comandante Militar
Bonos de batalla, curación y poder de concentración — la ruta de guerra.
La lógica: si no superas en gasto a tus vecinos, los árboles de crecimiento te ganan la temporada dejándote construir más que ellos. Si ya gastas más, los árboles de guerra lo convierten en resultados en el campo de batalla.
Aprovisionamiento de Guerra: la habilidad del tope de saqueo
El árbol del Comandante de Legión lleva el Aprovisionamiento de Guerra, que sube tu límite diario de saqueo en +6 / +14 / +24 / +36 / +50% en los niveles de habilidad 1 a 5. Para contexto de lo que eso vale al día, consulta la tabla de límites de saqueo en la guía de Economía — con los topes del final del juego son millones de recursos extra diarios.
Estatuas del Señor y la Academia de la Era
Las Estatuas del Señor viven en la Academia de la Era, y los dos sistemas dentro hacen trabajos distintos:
Resistencia — el muro estacional. Limitada por XP, alimentada por el juego diario, y la puerta tras la que están el contenido y las recompensas de la temporada.
Evolución del Señor — crecimiento permanente de estadísticas para tu marcha, alimentado por materiales de temporada.
Qué se reinicia al final de la temporada: los sistemas de progresión estacional se reinician con la Era — el progreso de Resistencia y la escalada estacional vuelven a cero, mientras tus inversiones permanentes (estadísticas de Evolución del Señor, héroes, equipo) continúan. Planifica el gasto en consecuencia: gasta con libertad en poder permanente, pero no atesores monedas de temporada más allá de la temporada que las emitió.
Evolución del Señor: qué estadísticas tomar
Perfil
Estadísticas
F2P / progresión
Velocidad de Investigación, Velocidad de Construcción, Producción de Recursos, Curación
PvP
Ataque, Tamaño de Marcha, Daño de Héroe
La misma lógica que los árboles de especialidad, un nivel más abajo: las cuentas de progresión lo acumulan todo con estadísticas de velocidad; las cuentas PvP compran las estadísticas que ganan peleas al contacto.
Progresión de héroes en la temporada
La escalera de héroes Despiertos dentro de la temporada, para tu héroe principal, en orden:
Héroe principal a 10 estrellas.
Despertar.
Arma Exclusiva.
Evolución del Señor.
Resistencia del Señor.
Mejora de Era — solo una skin principal.
Luego el segundo héroe, por la misma escalera.
Dos reglas vinculantes: nunca repartas los materiales de Despertar, y recuerda que una marcha fuerte vence a varias a medias — la escalera existe precisamente para impedir que subas dos héroes en paralelo.
Qué acopiar antes de la temporada
Si tu cuenta se acerca al día 120, esta es la lista de acopio. Cada artículo aquí vale más gastado dentro de la temporada que antes:
Diamantes.
Tickets de Reclutamiento.
Fragmentos de Héroes y Medallas.
Todas las Aceleraciones, incluidas las de Investigación.
Antitoxina.
Fruta del Cuervo.
Recursos.
Materiales de Armas.
El patrón: la temporada añade nuevas formas de gastarlos todos, y varios eventos estacionales premian el consumo — acopiar se convierte directamente en puntos de evento y progresión en cuanto empieza la Era.
Compras de la semana 1 (los que gastan)
Battle Pass + Pase Semanal de Era — +250 Resistencia y XP de Especialidad. El mejor momento de la temporada: cómpralos la semana 1 para que paguen durante los dos meses completos.
Retén los paquetes de Arma Exclusiva y Fragmentos de Despertar hasta que el Evento de Pase Exclusivo esté activo. Mismos paquetes, más valor cuando el evento te paga por comprarlos.
Conversión de Claire SSR a UR (día 8 de la Era)
La conversión de Claire se abre el día 8 de la Era — pero no la toques ese día sin leer esto primero. La conversión deja a Claire en 6 estrellas UR, y el camino de ahí a 10 es donde viven los problemas.
Los costes
Claire consume fragmentos SSR, no UR — los fragmentos atesorados del juego temprano son exactamente para lo que se diseñó esta conversión.
Cada subnivel cuesta x2: ir de 6 estrellas a 10 lleva 1,600 fragmentos en total.
Las ganancias
Nivel de estrellas
Daño vs SSR maximizado
9 estrellas
~1.70x
10 estrellas
~2.20x
El bache de la pasiva
La trampa: su bono pasivo de equipo baja al convertir. La pasiva maximizada del SSR es un bono de equipo del 16%; con 6 estrellas UR es solo del 10% — un par de puntos porcentuales reales de pérdida mientras escalas de vuelta. Se recupera a las 9 estrellas (14%) y supera a las 10 (22%).
Saltar el bache: la estrategia del Salón del Honor
Puedes saltar el bache por completo preparando niveles del Salón del Honor antes de convertir:
Nivel del Salón del Honor
Resultado de la conversión
Niv. 60
Claire queda en 8 estrellas — Tenacidad Avanzada (+20% ATK / HP / DEF, +10% velocidad de recuperación)
Niv. 100
Claire queda en 9 estrellas
Niv. 160
Los 1,600 fragmentos bancados — 10 estrellas instantáneas, sin bache
La conclusión sobre el timing: para una cuenta sin una alineación UR completa, esta conversión es una mejora PvP enorme — una portadora de 2.20x de daño construida con fragmentos que atesoraste gratis. Solo calcúlalo contra tu nivel del Salón del Honor y tu banco de fragmentos para quedar en 8 estrellas o mejor, no en 6.
Liga de Expedición: Se extiende durante 55 días y permite desbloquear el aspecto permanente de Santuario Castillo del Renacimiento.
🎥Guías en vídeo
Guías en vídeo seleccionadas y análisis tácticos de la comunidad
What's up, guys? Corpus Gaming here, and today Era of Revival has started, and we are going to discuss the tech tree. In future days, we will discuss more things
about the Era of Revival, but now it's the tech tree's turn. You know what to do. If you like these guides, hit that subscribe, smash that like, and let's
get into it.
So, guys, we are going to start with our video about the tech. And as you can see, we have the Lord statue here, and we have the specialty button and the
active skill button. We are going to the specialty button. And we have two options here. We have Handyman and Legion Commander. And I'm going to show
you guys who to pick and the reasons why right now. Let's get to that. So, why to pick Handyman? If you're still not level
30 and you really want to push to level 30, it has some really good building buffs that you want to catch. Uh if you still don't have tier 10 troops and you
want to rush to tier 10 troops, you want to get those research buffs as well. So, you would should pick Handyman.
If you don't like PvP and are more of a passive player and you're not really you don't really have the time to join in on
those events on the Saturday, then you should also pick Handyman to really progress your account to the next level.
And why to pick Legion Commander? And this is really a PvP tech tree. And if you're a whale player, you already maxed out everything in
Handyman, so you don't need to go there.
You really want to go into Legion Commander, get those attack buffs to really deal some damage. If you love PvP and want to support your alliance in the
PvP events, you also really want to pick out Legion Commander so you can grab those wins as well. And of course, this is also for Kingdom versus Kingdom
really handy.
If you are level 30 sanctuary and have tier 10 troops, or if you don't have tier 10 troops, but you don't care, you really want to get into this tech tree
to get those extra attack stats.
And then we have as well And then we have as well uh alliance tactic. You really want to get your R5 and R4 to discuss who's going to
pick the handyman and who's going to pick legion commander cuz there are some buffs that really help out your alliance as well. You have uh some stuff that you
really need to unlock on both sides. So, this is something your R4 and R5 have to discuss together. And we are going to go
straight to the next part of this video, the handyman skill tree.
To the handyman, and here we are. This is the handyman, and this is mostly for is the handyman, and this is mostly for PVE
uh content, and the commander is more for PVP content. And what we have here is as follows. We have outstanding contribution, and this basically
increases your to known donation tech for your alliance, and uh this is a good one to have as well to also get some extra income to buy from the alliance
shop. So, get this one. Then we have instant produce, and you gain extra resources, and it has a 1-day cool down.
Um I don't know if you should buy this.
I I didn't pick it for my um uh template cuz I don't think resources is really the biggest issue in the game.
Then we have siege frenzy, and this is going to give your soldiers more destruction. It's basically going to destroy cities faster, and this is more
of a PVP skill, so you don't really want to get that in your PVE build that you're building right here. Then we have fidelity and figure, and this is going
to give you free stamina. Free stamina is always good. You should get this one.
And uh just put some points into that.
Then we have free research or we have free build. And this is also or we have free build. And this is also basically pick your poison.
What do you want to have? If you are What do you want to have? If you are already level 30, you want to ignore free build
and go for free research. And then maybe do get the instant produce to get that the extra herbs that you need so much for your research to get the higher tier
for your research to get the higher tier troops.
Then we go to the next one. And this is a speed up for your research and it instantly reduces all research queues times by 180 minutes
and it has a cool down of almost It has a cool down of two days.
So, yeah, whatever you want. And you can also get instant build and it is the same but only for buildings and it reduces the cool down time
the building time as well 490 minutes and the higher you build it, the more minutes you eat off your building time.
I if you're going to buy it, I recommend buying the instant research cuz research is more important than building. It also
depends a bit on where your sanctuary level are, but if you're above 27, I would always focus on research and ignore the building ones.
Then we have swift stride and it is for rally participation and the returning speed once you did your rally. Not really that interesting and not really
worth putting your points in. Then we got the siege flag and it deploy a war flag on an anti-terrain ally's tent in the ally's tent territory within its
range gain 100 destruction boost for 30 minutes. It's a good one to have and it only costs one point, so you might as well get it.
Then we have the alliance aid when Then we have the alliance aid when reinforce reinforcing an alliance member's territory, the casualty rate of their
troops is reduced by 3%. This is a great way to help out your alliance, so you should get this. It's nice. And then we have the trap. It's called combat XP and
error monster skills grant 10% specialty EXP, but the monsters don't really give a lot, so the 10% or if it is maxed, you
get 30%. It doesn't really matter that much in the great schemes of all. You really want to get your points in alliance duel and kingdom versus
kingdom, but we'll talk about it in the later date of this video.
And then we have help research, and this is a really good one to get. Use on an alliance member increases yours and the alliance members' research speed by 10%.
It has a one-day cool down, and it is for 1 hour, and uh you can get this as well. It is uh only two points, so why not? And here
you have one as well, and this is help building. Uh use on an alliance member to increase yours and the alliance members' building speed by 2 10%, and it
goes to 20% as well, I think. Um you can get it as well, but uh again, it all depends on where you are in the game. Uh below uh above 27, you just
focus on the research is the best.
Then we have material recycle, and it reduces the cost. This one is for research, and this one's is for buildings. So, yeah, whatever you want.
I think you can buy both cuz you have 40 points to use in these skill trees, so you want to use all of them. Then we have the healing force.
And this is basically going to increase your healing speed uh for your infirmary, and you don't really want to get that cuz the
infirmary doesn't really need that much much attention. if you do the batch healing that I teach you guys. What you would do want to get is the bound shield
and it gives you a 1-hour uh shield to your uh alliance member and that's going to really going to help in the PvP events and if your alliance
member forgot to shield up. So, you definitely want to get a few people that have this and it goes three times, so I guess it's a 3-hour shield that your
alliance members can get and uh it says a cool down of almost 3 days, so you really want to use this on the Saturday as well. This is it for the handyman.
I've made a layout to really sh- show you guys what I picked for the handyman, so let's get into that.
So, here we have the road map, a short uh recap of what we just discussed. The first point, you want to do an outstanding contribution, after that
vitality figure, free build five points, free research five points, instant build five points or instant research five points. I recommend doing instant
research. You want to get the siege war flag, you want to get the alliance aid, you want to get the help research, you want to get the help building, you want
to get material recycle, art of architecture and the bound shield and this gives you precisely 40 points that you have and this is it for the
handyman. We are going to go into the legion commander right now.
So, we finished off handyman and now we're going straight into legion commander, the PvP tech tree and let's get into that. And what we have here is
as follows. We have return now and this is basically going to return your troops immediately. You can do it one time daily and
uh I think once you pushed out more levels into it, you can get more returns daily, but it's not really interesting.
What you do want to get is train now.
It's going to give you free troops, 250, and that's quite nice to have as an extra backup. And we're going to get barracks expansion as well, and you can
push this to five and get those 10 extra barracks expansions. We have infirmity infirmary expansion.
Uh the capacity goes up the higher the level. I think it is also 10% but we don't really want to get that cuz the infirmary is never going to be that
full if you're doing the best healing that I've taught you already in my other videos. Then we have frenzy, and this is going to increase
your damage in the frenzy state. So, that's a must-have to get really more attack buffs. Then we have intense intensifies training, and this is going
to increase your training speed. A must-have as well. You want to get five points into that.
Then we have concentrated fire. Enemy castries rate 1% when attacking a burning target. This is really if you want to hurt other people.
want to hurt other people. Um I think they're better buffs to write in the future.
Uh then we go up.
And then we have the wasteland marsh, and this is the one you really want to get. It's going to go 20% one if you put one point in it, and I think 40% if you
put two points in it, and it's during the Royal City Scramble only. And that is still pretty nice to have in the Kingdom versus Kingdom event when you're
hitting the big one. So, then we go to the war supplies, and this is going to increase your plunder rate uh by 6%, and of course when you put
more in it, it's going to get higher.
Then you have a really good one to have.
It's the boost morale, and it's going to increase your morale state uh by 1% for the one point you put in, and it's going
to get 5% once you max that out.
Then we have reinforcements speed up and this is basically going to get your troops faster into your allies to help them out defending them. It's a good one
to have as well.
Then we have concealed identity. I don't think it's really worth to put a point in it. I think there are better options laying around, so we can ignore this.
It's basically going to hide your information to the enemy if they scout you or an attack battle reports.
Then we have the team rate and it's going to increase the damage when participating or instigating a rally, which is pretty good to have.
Uh so this one you really want to get as Uh so this one you really want to get as well.
Then we have reinforced enhancement and it's giving you 1% attack, defense, and HP increase by 1% and you can put five points in it,
so I guess it's going to be 5% and it's not stackable. So it can only be one guy with this buff inside the city. Uh so that's it.
Then we have the full power buff and when reinforcing an alliance member's territory, attacking soldiers casualty rate increases by 1% and I think this is
stackable, so that's also pretty nice to stackable, so that's also pretty nice to have.
Then we have the weakened state. When displacing an enemy territory, a certain proportion of the soldiers become weakened. Soldier level reduces by one.
Up 2,000 soldiers can be weakened per day. I don't think this is really an interesting one to have, but the charging war flag is.
Place a war flag on a vacant terrain.
Friendly territories within the range gain two plus attack stats for lasting for 30 minutes and it stacks up to five times, so it can get 10% extra attack if
five members have this as well and it's going to be great for Kingdom versus Kingdom. A must have for your alliance and this is what I mean with those extra
and this is what I mean with those extra alliance uh tech. Now, I'm going to show you guys what I've picked for the commander in my
layout, and that's it.
So, this is my setup for Legion Commander, the 40 skill points. The first five points go into train now.
Then, we have five points into barrack expansion, five points into frenzy, five points into intensive training, two points into wasteland march, five points
into boost morale, five points into team rate, five points into reinforced enhancement, two points into full power buff, and one
point into change charging war flag. And this is it for the Legion Commander. And we are now going to discuss how to get the points to actually level up your
tech tree and get these great buffs for your accounts. Let's get into that.
So, here we are, and excuse me, I'm going to get that pirate ship first cuz that's the most important thing we have to do in this game. Let's go right to
the pirate ship.
And after that, we are going to And after that, we are going to continue.
Okay, here we go. We are going to discuss how to get those skill EXP points for your tech tree, and it is as follows. We are going here, and we want
to hit those blights.
And these give a first time rewards 1K, and then after that it gets quite low. I think it's around 200. It's not that interesting. And then, we have these
elite blights that also really give a good first time reward for your rest EXP, more about that in a later video, and a little bit of lord specialty EXP.
But the most points you will get from kingdom wars. And what we have here is the royal city scramble, and here is where you get those points and look at
that there's a lot of uh Lord Specialty XP so you really want to make sure that you are online on the Saturday to help your alliance out and your kingdom of
your alliance out and your kingdom of course.
And then we have the alliance tool as well giving you daily a lot of well giving you daily a lot of uh EXP points as well and those are the
biggest two options to really farm those levels up. And what we have as well are the packs that we can buy and we have them here in the Era of Conquest and
they are basically €30 to get both of they are basically €30 to get both of them uh free to play. You can also get a few of these points here but it's nothing
compared to the packs that we have going on here with some UR shards as well into it so that's pretty nice.
And this uh milestone is for 55 days so that's okay. And I I [ __ ] I I got too late.
It's okay. All for the sake of you guys enjoying this video.
enjoying this video. Um so that's it for basically getting those EXP points and um what else you can do as well is we have this shop here and you can
really get uh also some uh reset uh buttons. Here it is and you can get specialty skill uh reset books and this is basically you
can switch around between uh Handyman and the Commander if you buy these books and then you have these skill reset uh books where you can
really reset your skills uh inside your specialty that you have chosen. And here we have some extra skill points that you can buy as well.
Pretty expensive and I don't know if they add to the 40 or if you can go above 244. Uh maybe you guys know and you can tell me in the comments about
you can tell me in the comments about this and that's it for this video. I hope it has been a good one for you guys and I
hope you have learned a lot about it and you know what to do. If you like this guide, hit that subscribe, smash that like and I'll see you guys in the next